
Flatter Files is designed to distribute your content digitally in a controlled and secure manner. Ideally your content will be made accessible digitally all the way to the shop floor and even into the field. Digital access on the shop floor has many advantages and Flatter Files makes this extremely easy via super fast search, immediate preview images, and quick access to the drawing and supporting files. To make digital access even better, we are happy to announce that Flatter Files now supports barcode scanning as an input method for quickly finding the correct item. This makes finding and viewing content digitally so much easier. Simply scan a barcode and you end up with digital access of the correct item. No need to search for a part number or scroll through multiple search results. Barcode scanning is supported directly within the mobile applications for iPhone, iPad, and Android. In addition, a USB barcode scanner attached to a computer can easily be used with the Flatter Files web application.
Mobile Barcode Scanning
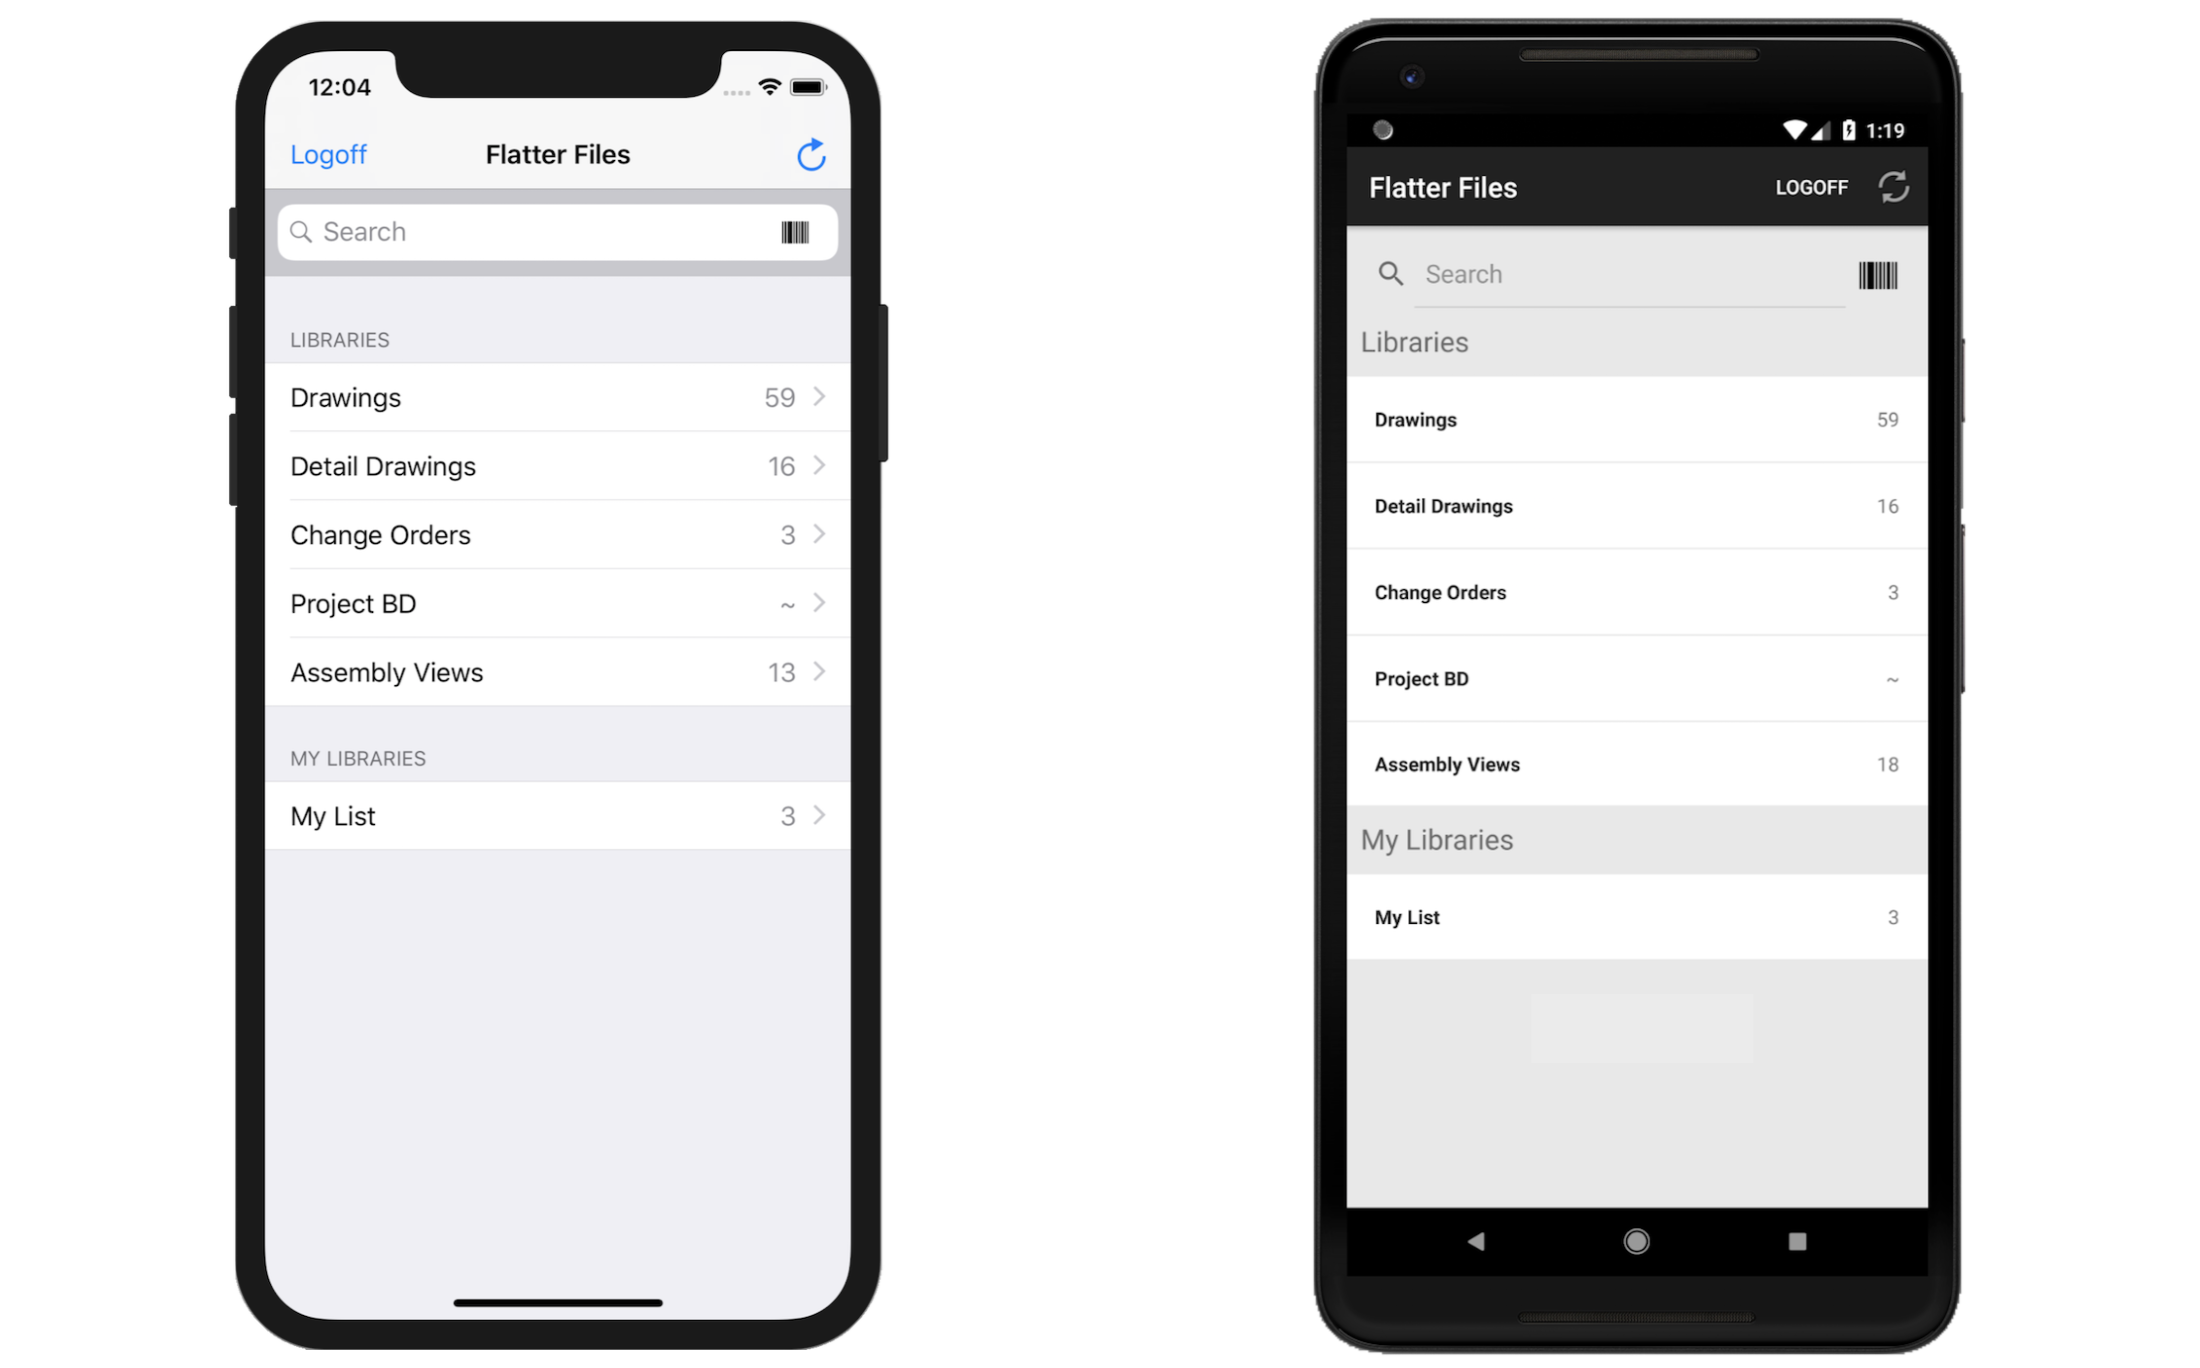
The Flatter Files iPhone, iPad and Android applications now include a simple barcode icon on the main page of the application as shown in the image below. Users of the application can simply tap this icon at which point your camera will be turned on and can be pointed at a barcode. Once a barcode is found, a quick search on Flatter Files automatically occurs and if a matching item is found then that item is immediately displayed.
USB Barcode Scanning
Using a USB barcode scanner is simple to setup. Once you have a USB barcode scanner it can be used to scan barcodes and enter text into any normal input. For Flatter Files, we have created a dedicated input page that users can use. The page only displays an option to enter an input value or scan a barcode making the process slightly simpler for the user. This dedicated input page can be accessed by simply going to the URL shown below:
https://www.flatterfiles.com/input
Once this page has loaded, the text input is already selected such that you can simply scan the barcode with the USB barcode scanner. This will result in an immediate search for the item. If a matching item is found then that item is immediately displayed.

You will notice that the input page shown above includes a property selection option. The default value is set to the PDM ID meaning that the barcode scanned should point to the corresponding PDM ID for the item. This can easily be switched to Part Number or another custom property. To change the default input property go to Dashboard > Settings > Company Settings > Misc Settings as shown in the image below.
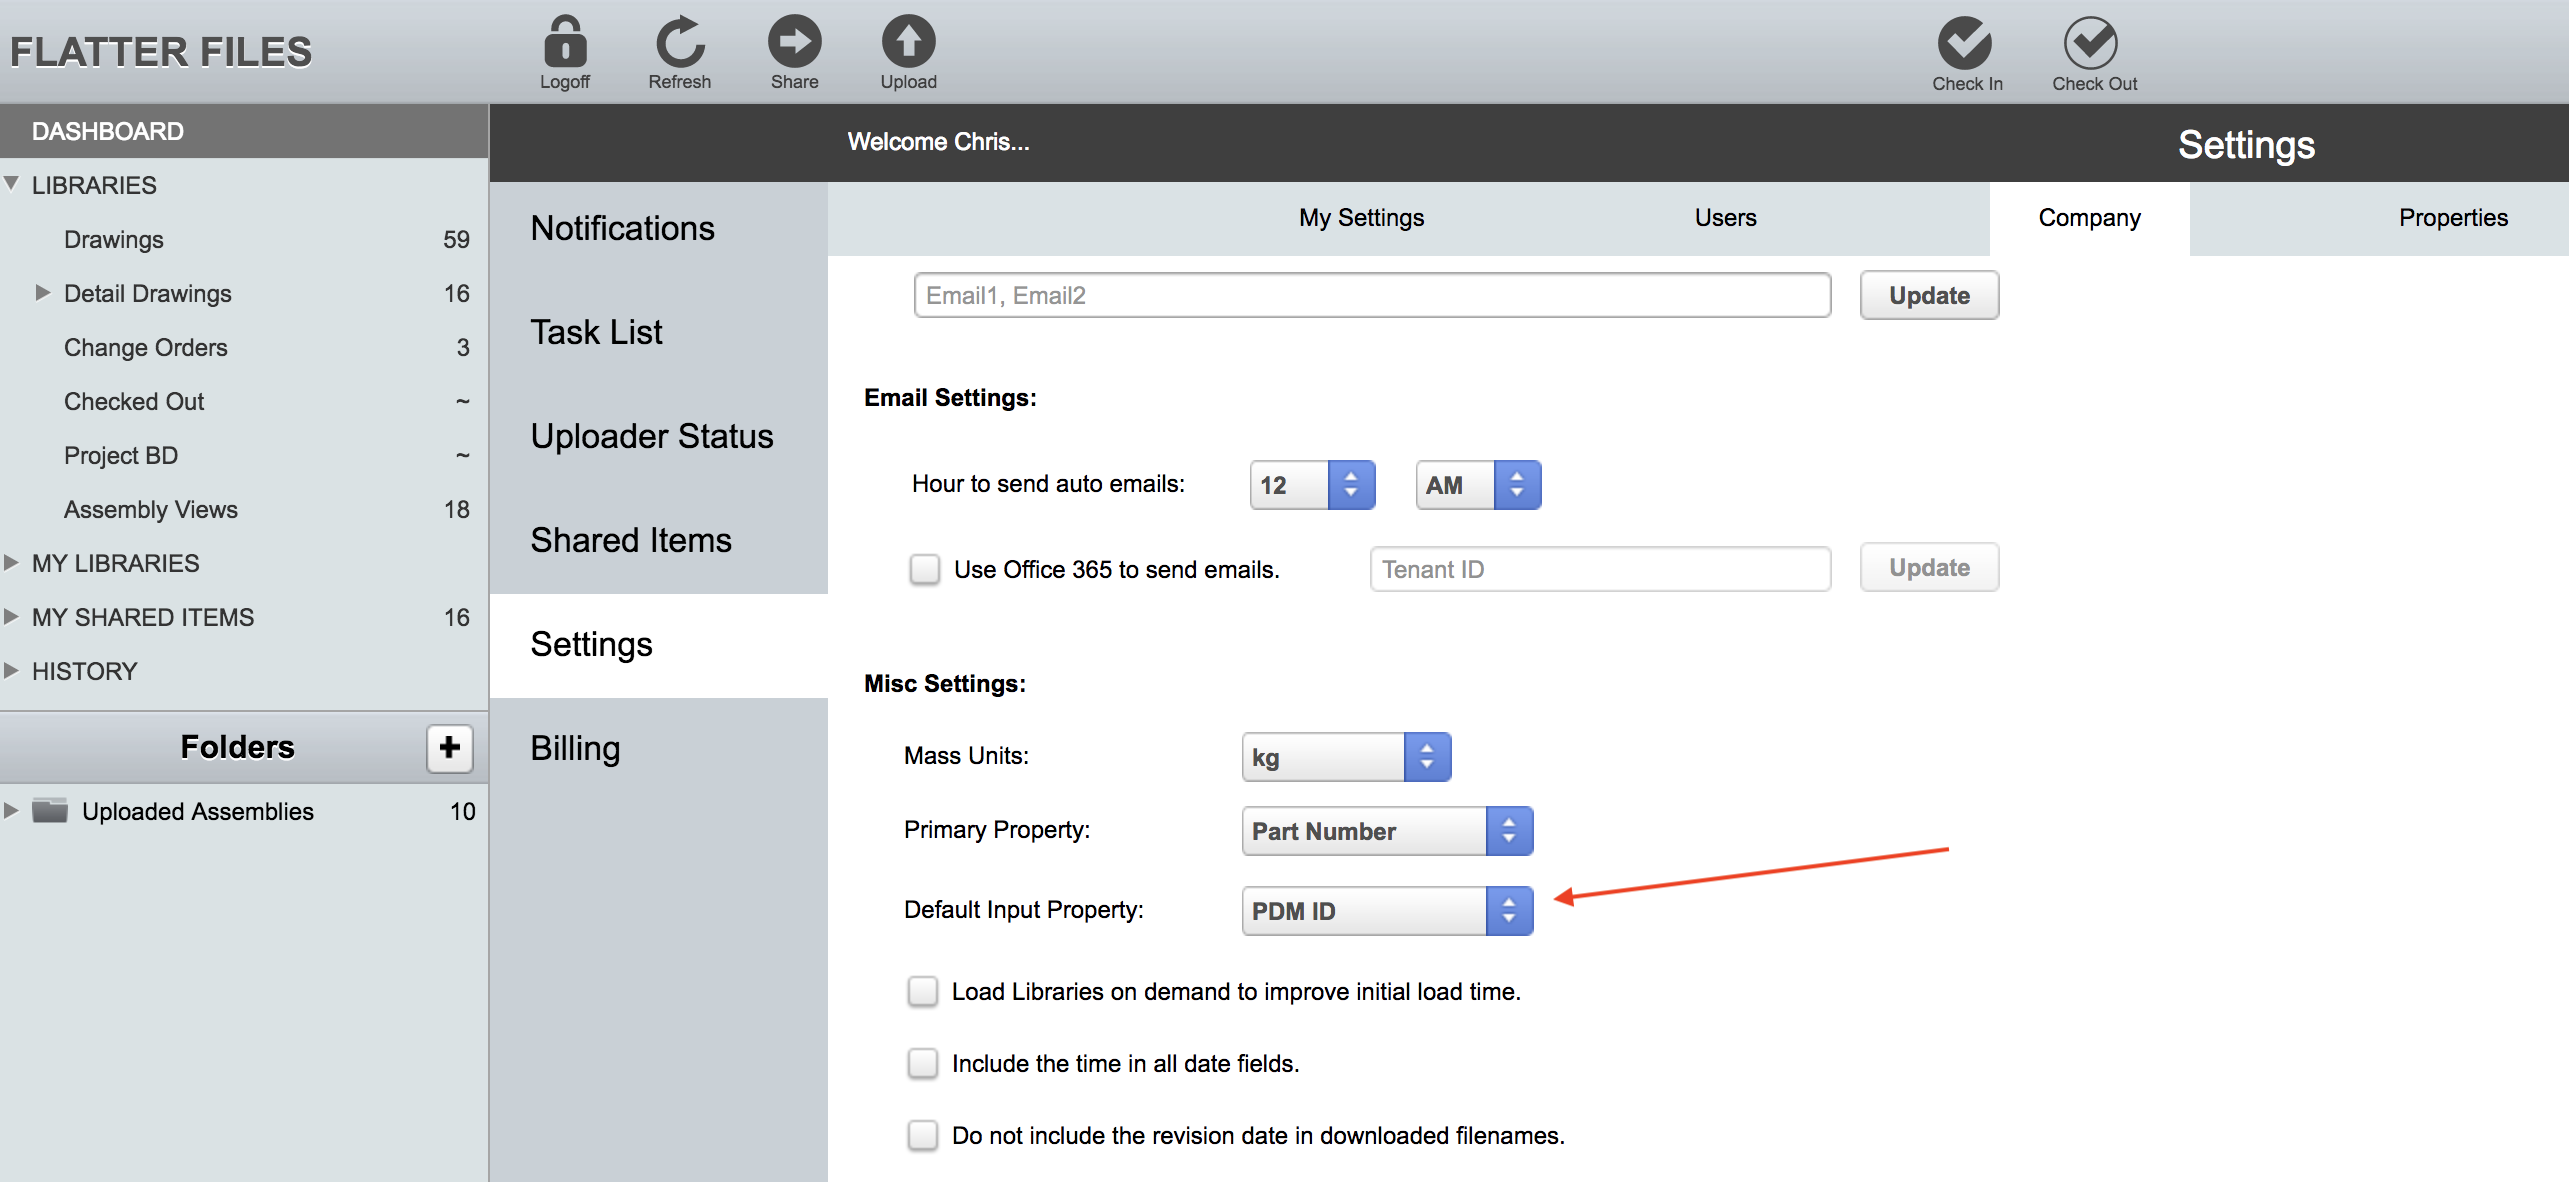
Change the default input property to the custom property that you use for generating the barcodes. Once this property has been changed then that property will always be selected when loading the input page and that property will also be used by the mobile apps when searching for an item that was scanned.
Generating Barcodes
There are many ways to generate barcodes and to incorporate the resulting barcodes into your production workflow. One option is to add barcodes to your production management documentation. Most ERP or similar software systems support barcode generation such that those documents can easily be created and then scanned. In addition, you could generate barcodes and place the barcodes for the corresponding drawing at the various work stations.
Flatter Files can also be used to add a barcode onto your drawing. The idea behind this capability is that it allows you to support both paper and digital methods of content distribution. Imagine your shop prefers to have the drawing printed but at the same time they would like an option to view the 3d model directly on the shop floor. If there is a barcode on the drawing, then the user simply scans this barcode at which point they have access to the same item on Flatter Files. This gives them access to not only the drawing but all of the supporting files that they have been given access to. Thus, if they have access to it then a corresponding 3d model could easily be viewed. This is a great way to augment the standard paper drawing with additional content.
Adding barcodes to all of your drawings and documents uploaded to Flatter Files can be accomplished by simply configuring the new barcode stamp option in the Uploader for the appropriate folder configurations. Go to the Uploader > Edit Configuration > Folder List > Select the folder configuration > Edit > Click the “Select” button next to File Types > File Type Options > The page shown on the left of the image below should now be shown.
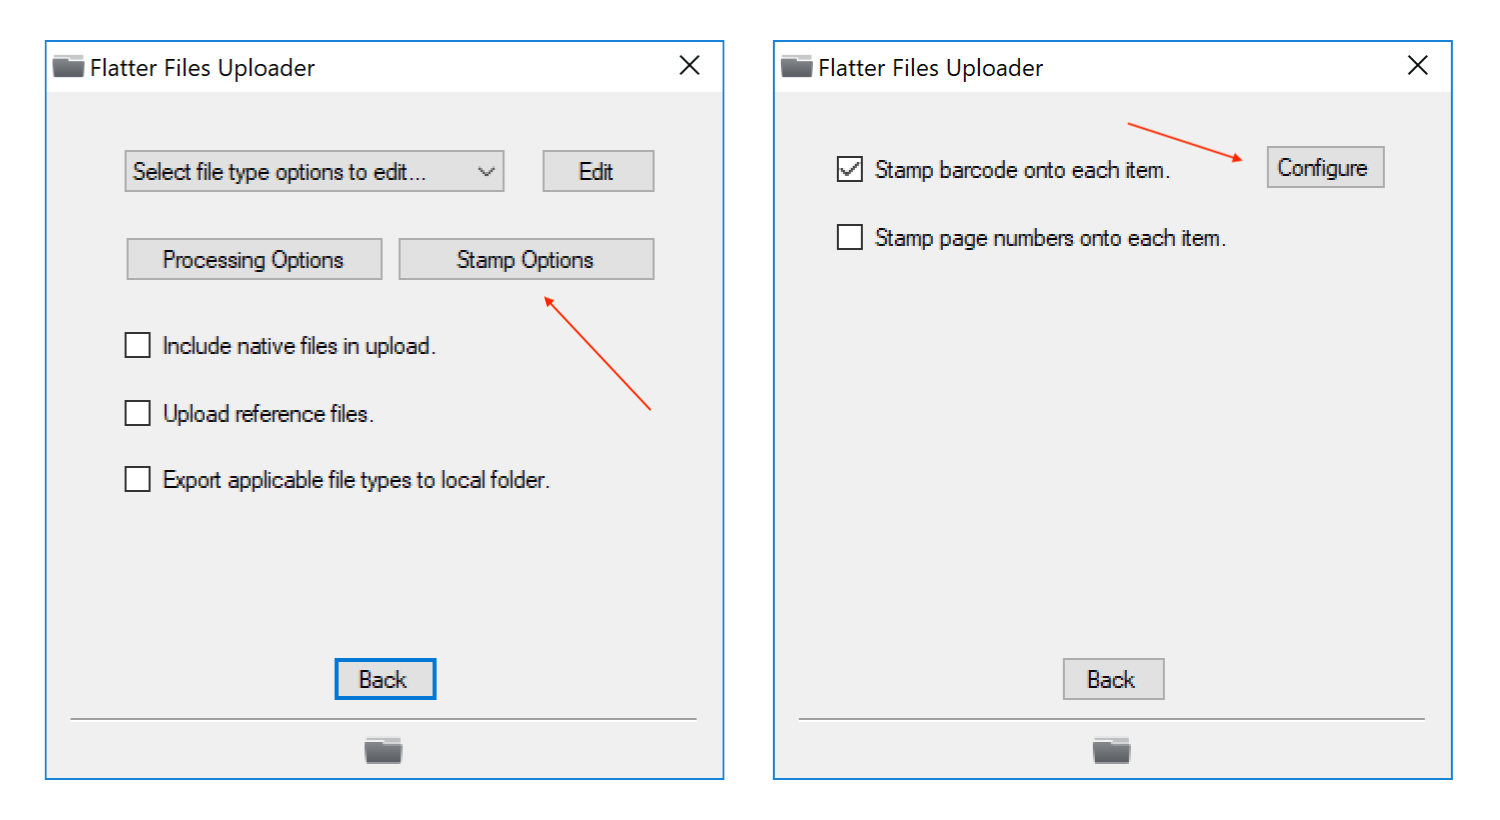
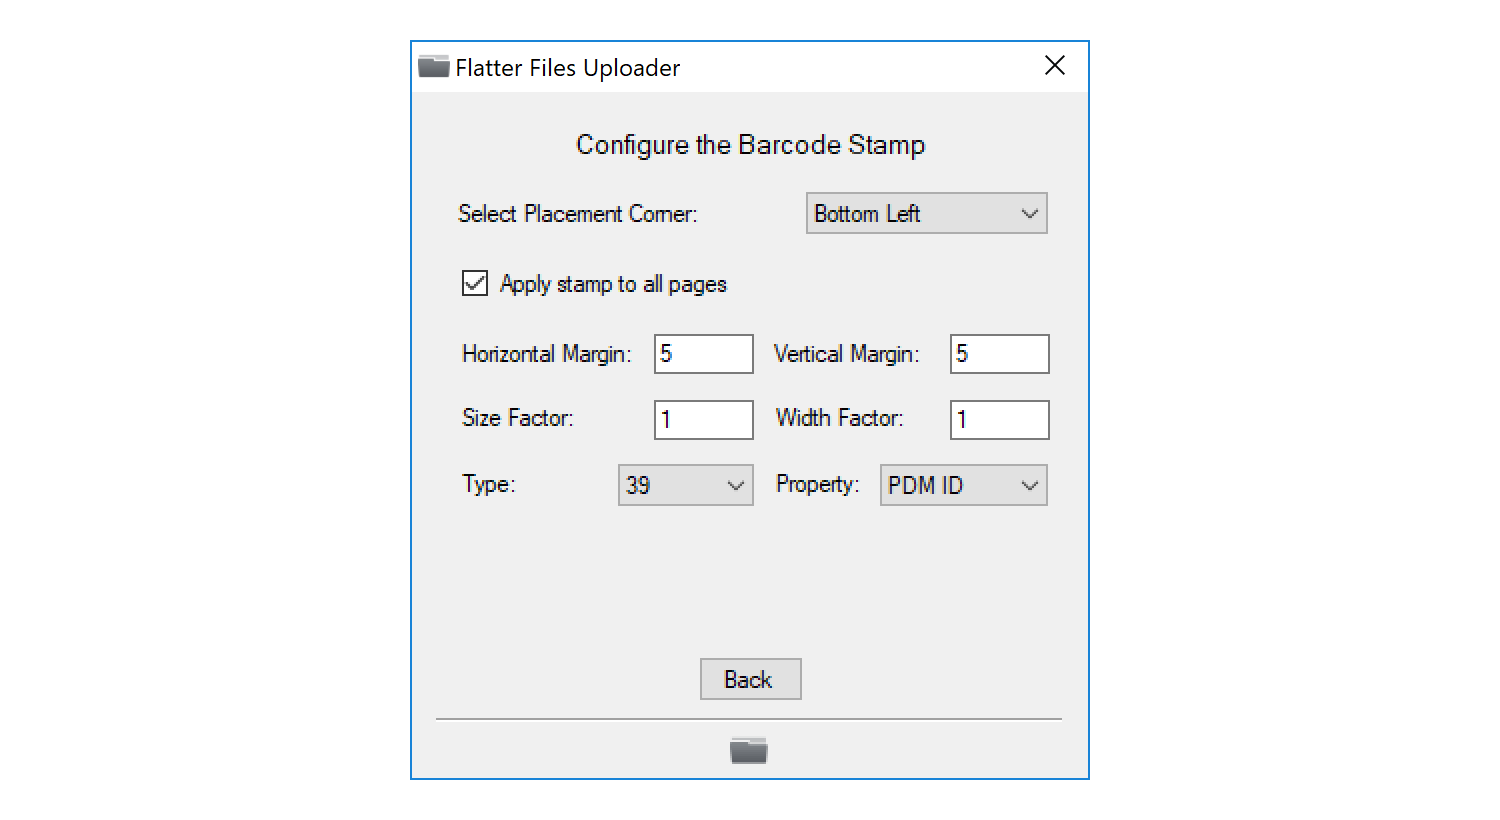
As shown in the image above, click the “Stamp Options” button, enable the barcode stamp and then click the “Configure” button. This will display the page shown in the image below. Configure the barcode placement as desired and select the appropriate custom property that should be used.
This is all that is required to add barcodes to all of your items uploaded to Flatter Files. Obviously, this barcode is only useful if the user already has access to the drawing that they can then scan. As mentioned previously, the most useful place for the barcode would likely be on some type of production documentation or placed directly at the work station.
As you can see, the ability to scan barcodes such that you can easily access the drawing has all kinds of potential to help you improve productivity within your production process. With Flatter Files, barcode scanning can easily be implemented via the mobile applications as well as a standard USB barcode scanner. If you have any questions please contact us at [email protected]. We would be happy to help you evaluate ways to implement barcode scanning within your production facility.