
Flatter Files now includes the ability to include any file type as a reference file for each item. Once the reference files are uploaded they can easily be viewed or downloaded while viewing the item. Most customers already use Flatter Files to auto generate and upload lots of supporting content such as STEP, Parasolid, DXF, etc but the new reference file option allows you to include any additional existing files. This is great way to include as-built images, quality documentation, program files, or any other pertinent information.
Automatic Upload
Reference files can automatically be uploaded by the Uploader for each item. Configuration is completed from within the main File Type Options page in the Upload Folder Configuration. As shown below, there is a new option to “Upload reference files.” Enable this option and then click the “Configure” button that will appear. This will display the configuration options as shown in the image below on the right. PDM references can be included and/or you can simply include items located in the same folder as the source file. If you include files in the same folder, then you will likely need to limit the included files to reference files that contain the source filename in the reference filename.
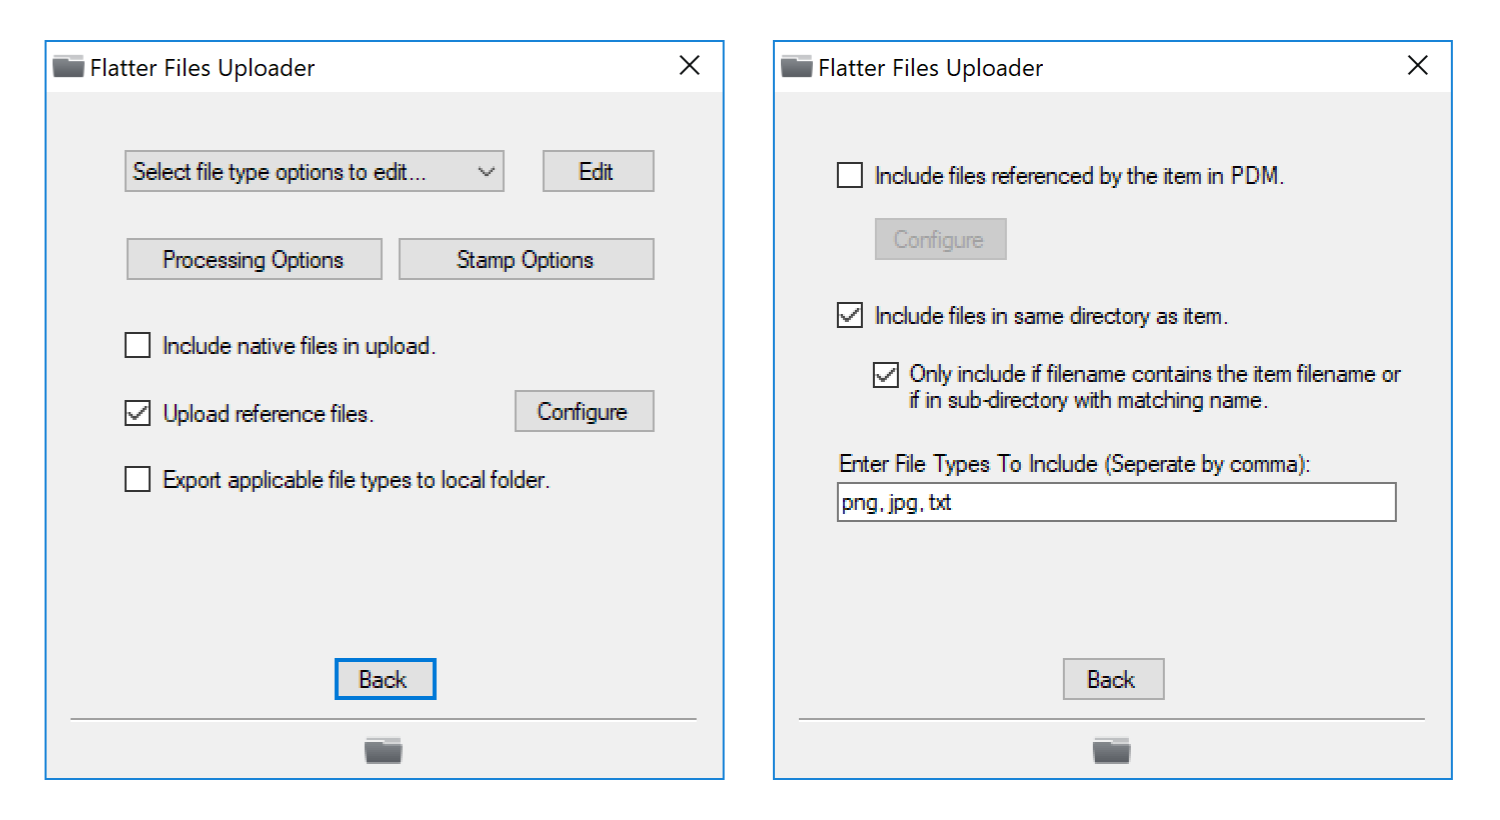
The last setting to configure for the reference file upload is to simply specify the file types that should be considered a reference file. Thus, if you need to upload text files, excel spreadsheets, and PNG image files as reference files then you would enter:
txt, xls, xlsx, png
Flatter Files does not re-upload the reference files each time a new version of the item is uploaded. However, when a new version of the item is being uploaded it checks each reference file and will re-upload any reference files where the PDM version of the reference file itself has increased. If the reference file isn’t located within PDM then it will be re-uploaded anytime the reference file has been modified locally.
Viewing
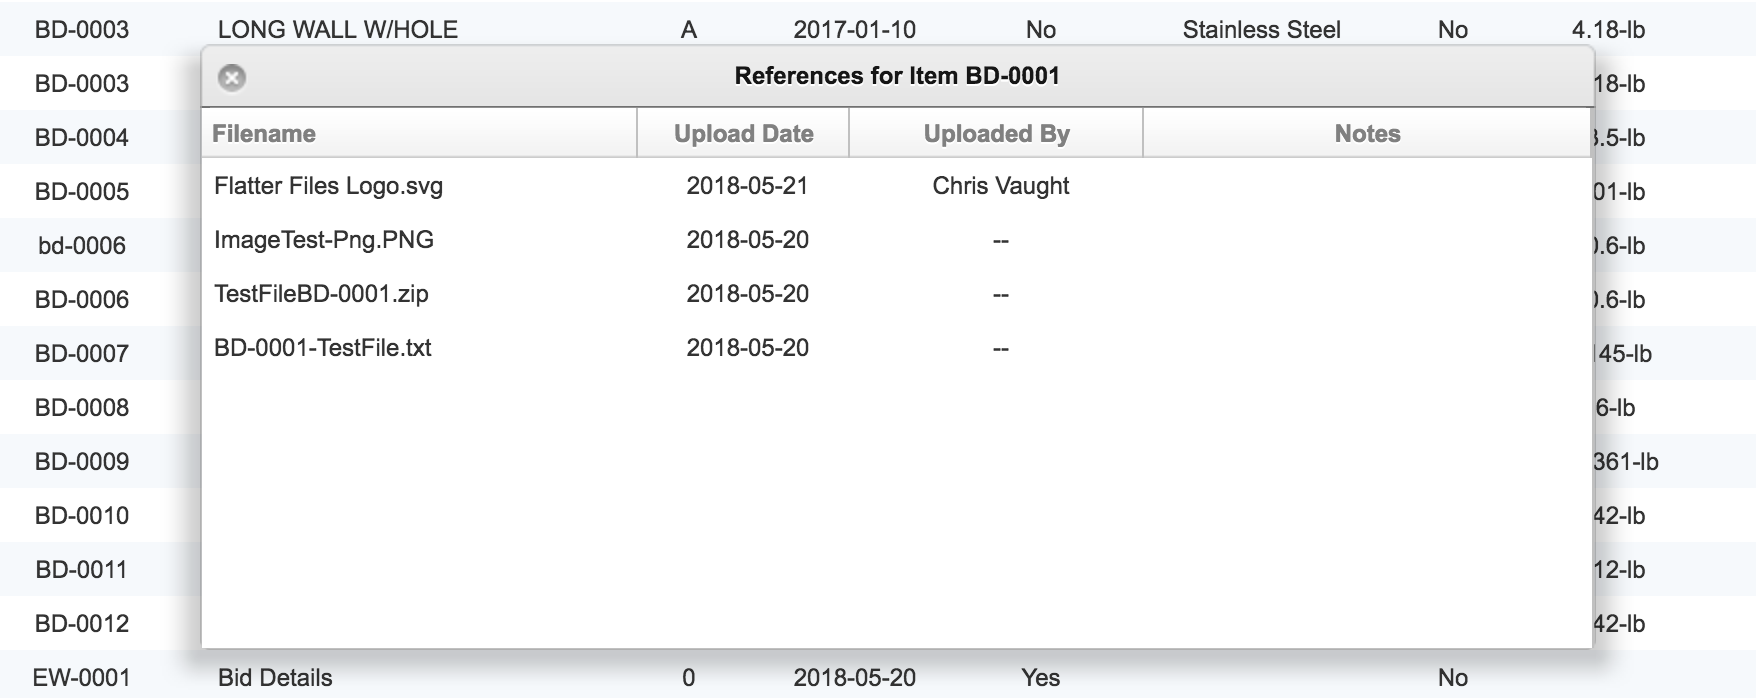
Once reference files have been uploaded, they are easily viewed and/or downloaded from within the Flatter Files web application. Simply right click the item, go to View > References. In addition, when viewing an item you can click the button with a down arrow and then go to View > References. This will display the list of references in a window as shown below:
If the file type of the uploaded reference can be viewed from within a browser, then you can view it by simply double clicking on the reference file or by right clicking and selecting View. The full right click menu is shown in the image below:
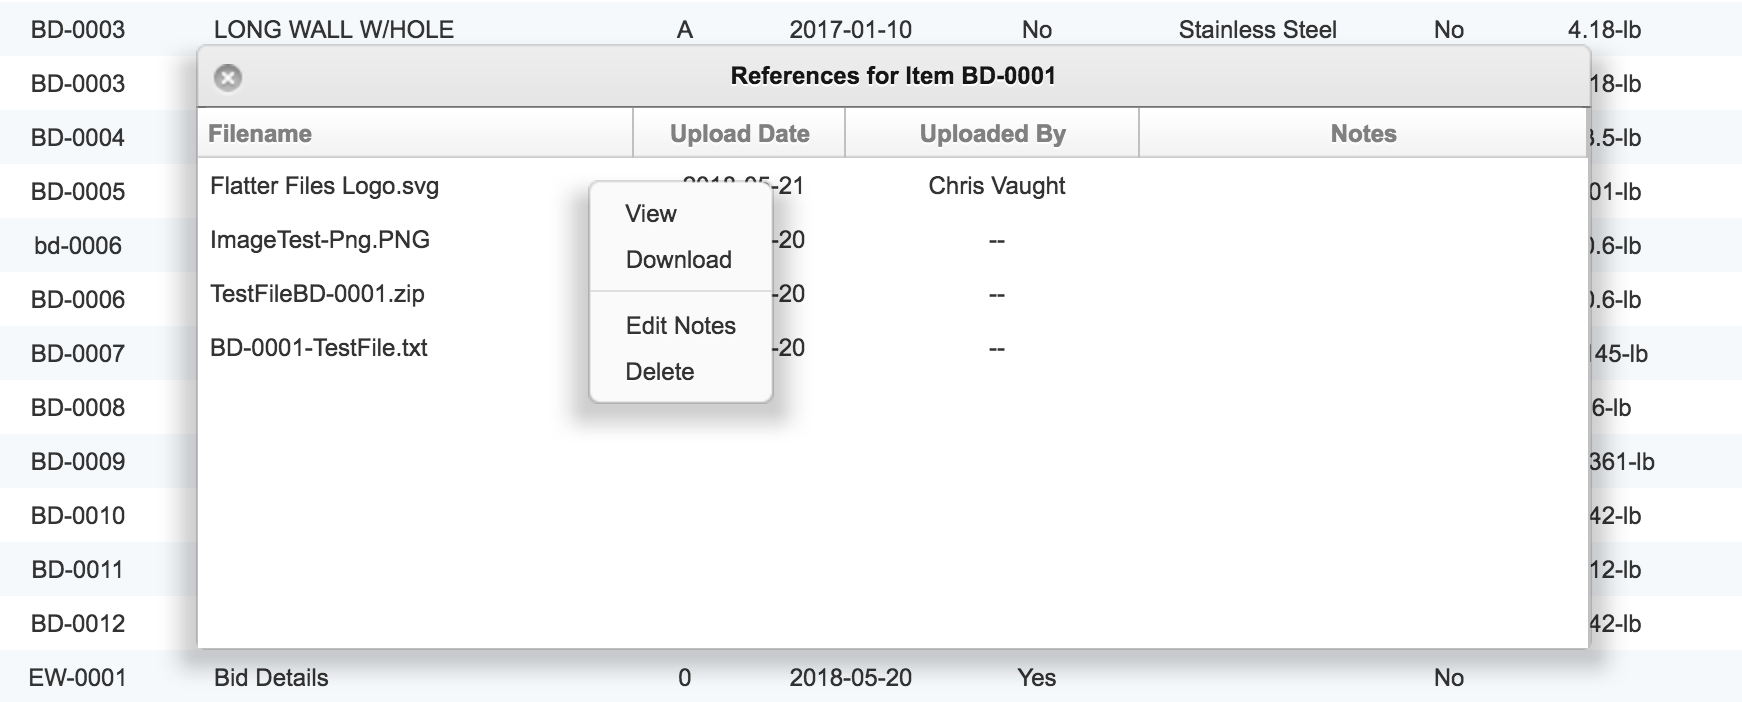
As you can see, there are options to view and download the reference file. In addition, if you are an Admin or Creator then there is the option to add notes or delete the reference file.
Manual Upload
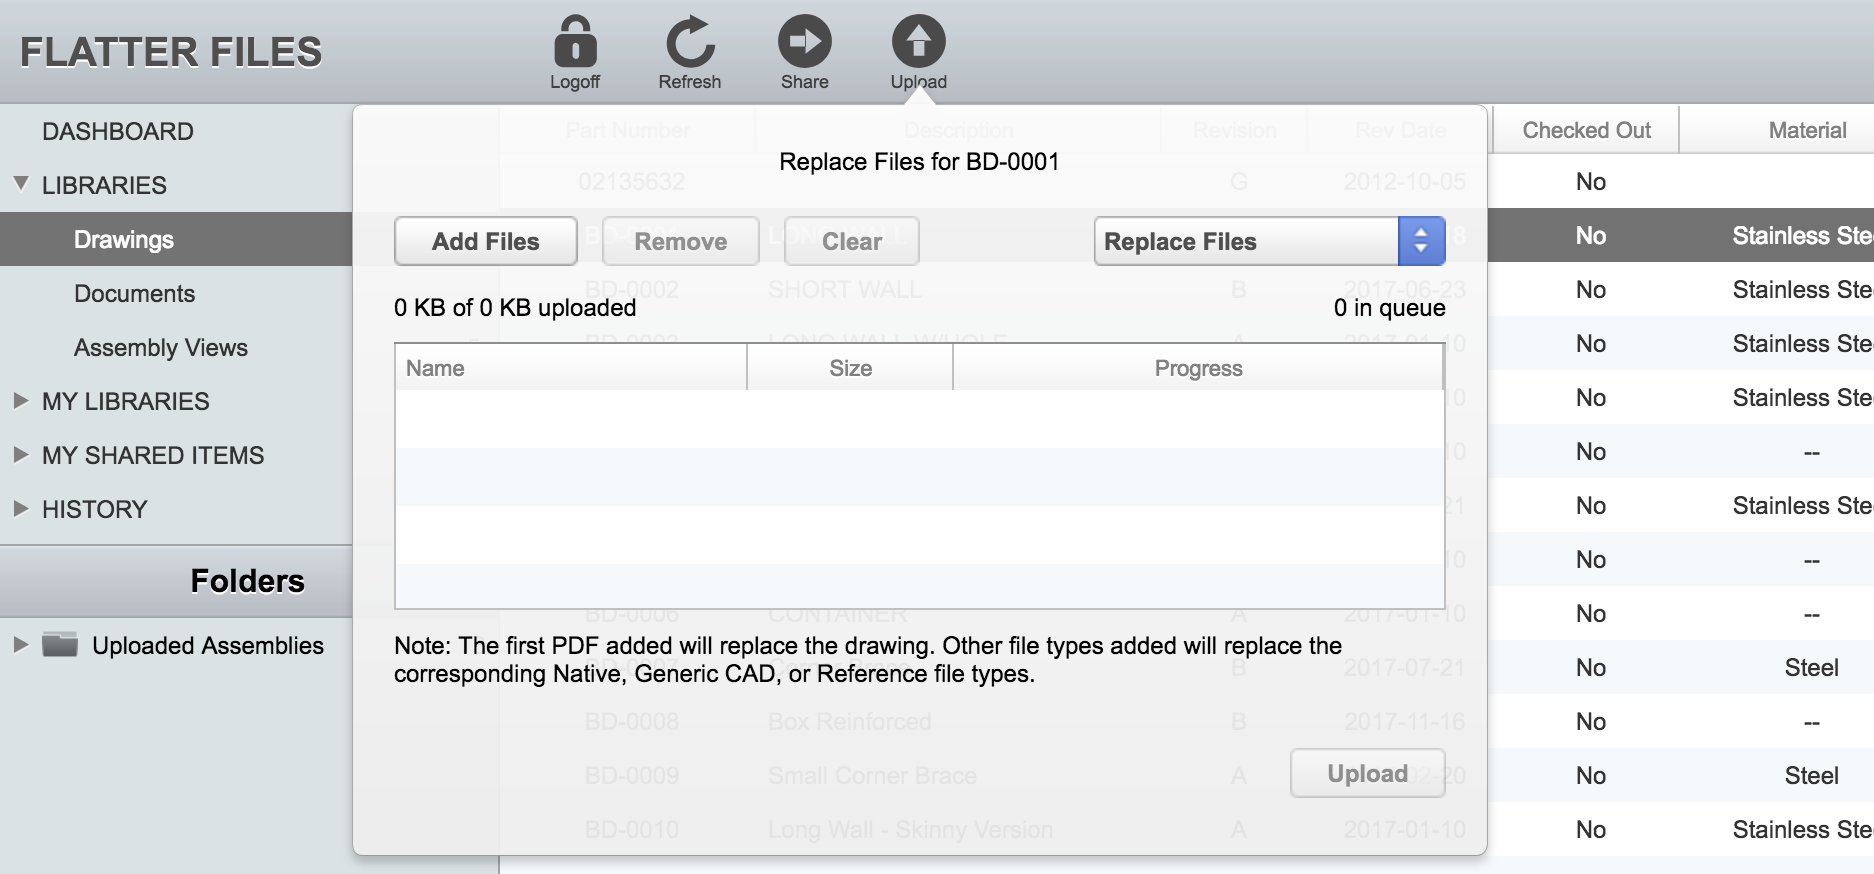
When Uploading a reference file automatically using the Uploader, the Uploaded By column shown above will be empty. However, reference files can also be uploaded manually by Admin and Creator accounts. If a user manually adds a reference file then their name will be listed under Uploaded By. Manually uploading a reference file for an item can be accomplished by selecting the item and then clicking Upload at the top of the web application. This will display the Upload dialog. Ensure that the “Replace Files” option is selected at the top right. Click Add Files to browse to the specific reference files you would like to upload and then click Upload.
It is highly recommended that you primarily use the Uploader for uploading reference files such that the reference file can be synced from a local location and kept up to date automatically if the reference file changes. However, as shown above manual upload is an option if needed.
If you have any questions please contact us at [email protected].