Flatter Files is continuously being developed to add new capabilities, improve user experiences, and fix issues. Below is a summary of some of the new capabilities and improvements from the past few months that have been added to Flatter Files.
Alternate PDFs
Support has been added for creating an alternate PDF when processing SOLIDWORKS drawings. An alternate PDF is created and uploaded alongside the primary PDF of the drawing but has different content that is controlled via drawing layers. As shown in the image below, you specify specific layers in the Uploader that you want hidden or shown for the primary PDF. Then by checking a single box the opposite can be uploaded as the Alternate PDF.
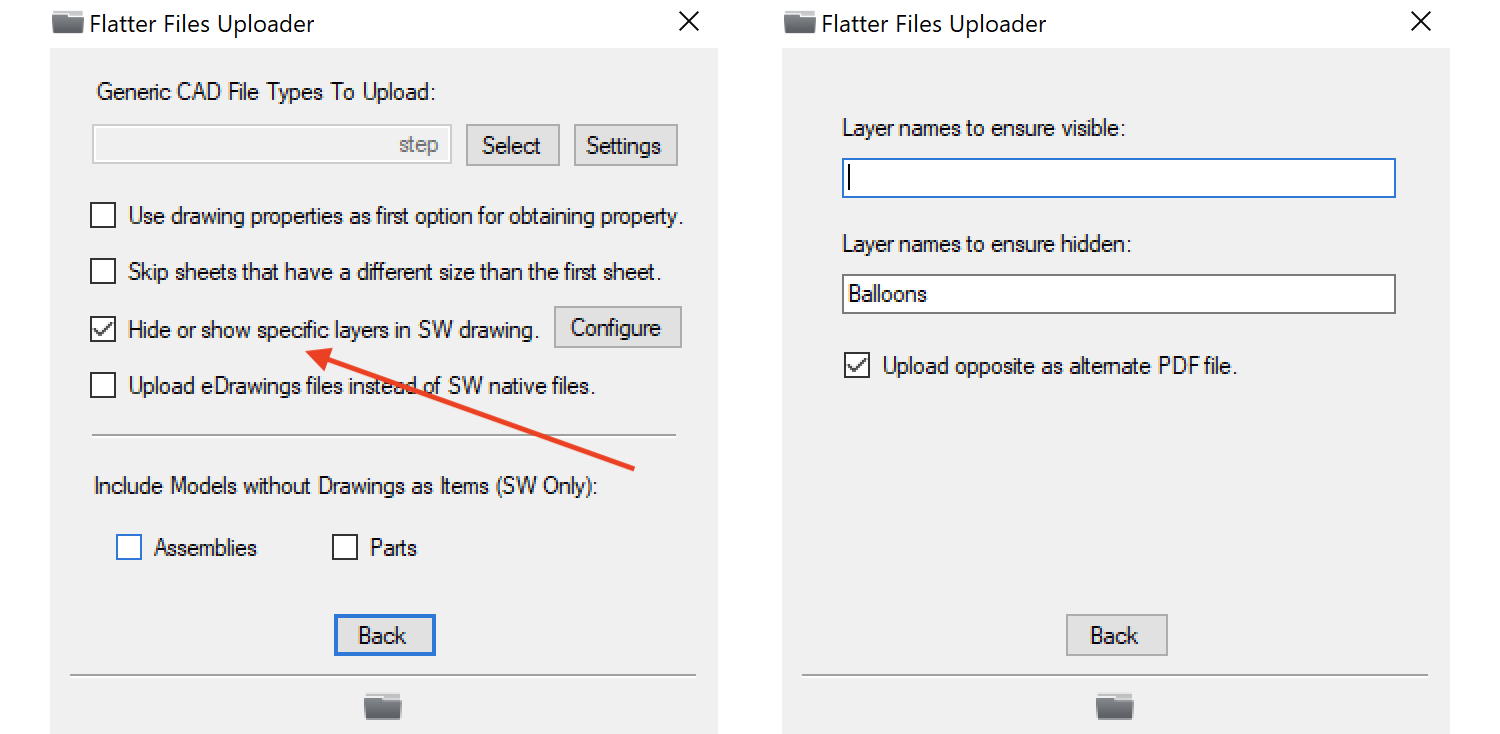
The result is that when viewing the item on Flatter Files the primary PDF is shown but with a single click the user can view this alternate PDF. For example, consider the scenario where you have a layer called Balloons and this layer contains inspection callouts. Flatter Files can now upload the PDF where it ensures the Balloons layer is hidden and then upload an Alternate PDF with the Balloons layer shown. You might then name the Alternate PDF something like “Inspection” to designate it as the view for when conducting the inspection. The resulting option in the view right click menu is shown below.

The name of the Alternate PDF can easily be changed to any value by going to Dashboard > Settings > Company > Misc Settings. The setting is shown in the image below.

The idea for adding support for Alternate PDFs came directly from a customer. We are very interested to see how other customers will use this new capability.
Stamp Property onto PDF
Flatter Files now supports stamping any property data onto the PDF when the Uploader creates and uploads the PDF. This allows you to stamp content that is dynamic such as the current PDM state of the item or other property data that isn’t shown on your drawing. The settings in the Uploader are located within the File Type Options page as shown below.
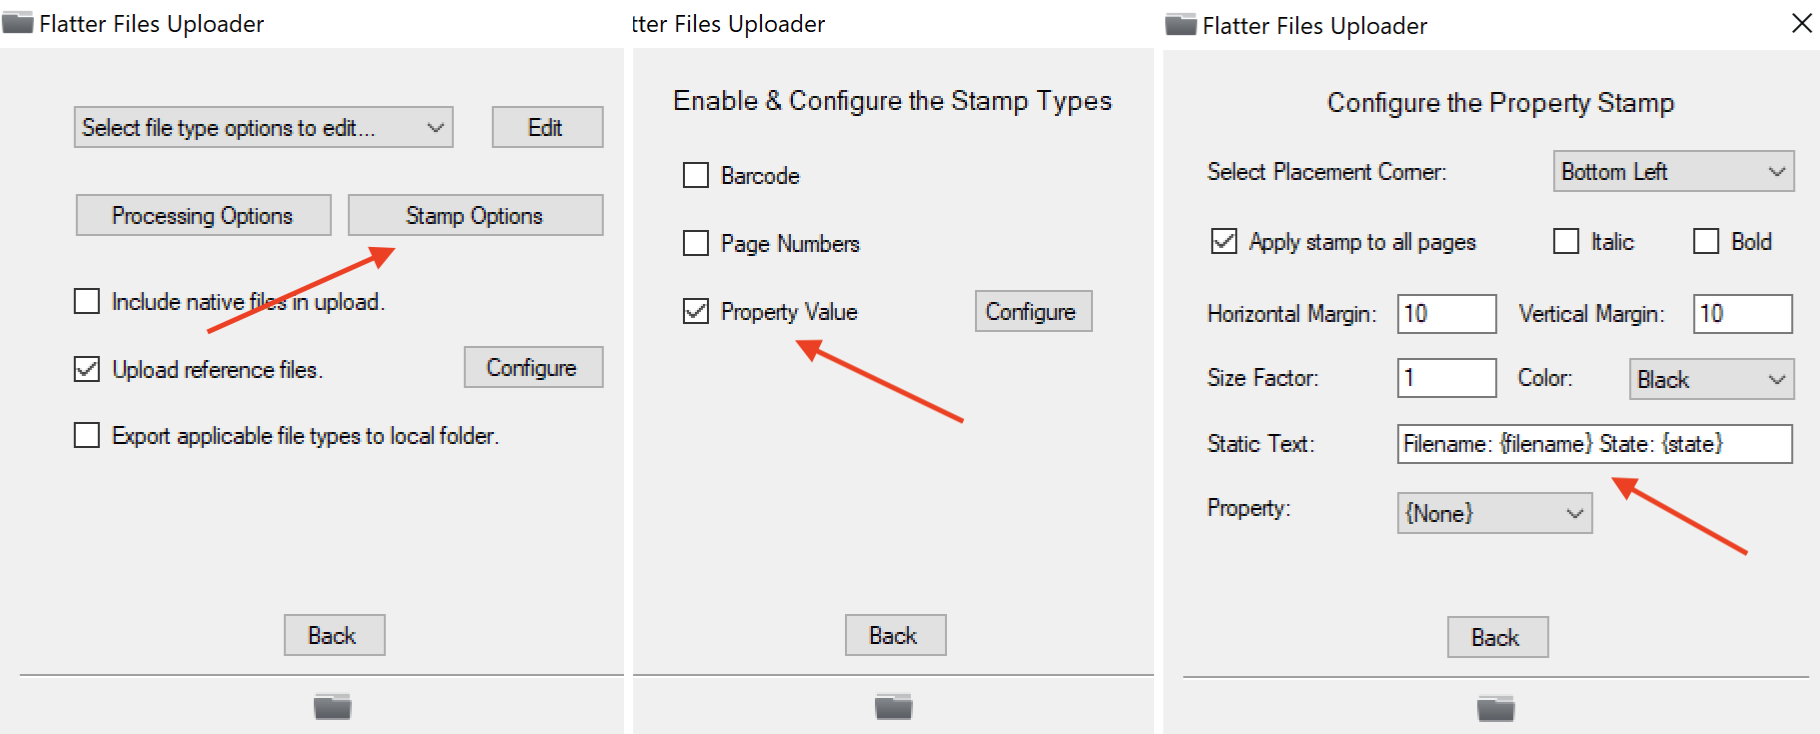
As shown in the screen on the far right of the image above there are two key settings. Static text and Property. If you want to stamp a single property then you can optionally enter additional text in the static text field and then select the property. For example if you wanted to stamp the filename you could enter “Filename: “ for the static text field and then select the filename property. If the filename for the item is 123456.slddrw, the result of the stamp would consist of the following:
Filename: 123456.slddrw
If you need to stamp multiple property values then you can use the method that is shown in the static text field in the image above. Basically you can stamp as many property values as needed by surrounding the property name with brackets. Assuming the item was in the Released state, the value for the text entered in the image would produce:
Filename: 123456.slddrw State: Released
Android App is now in Amazon App Store
We have published our Android Application to the Amazon App Store such that you can install and use it on your Kindle Fire tablet devices. The application can be found by searching for Flatter Files in the app store or by using this link. Please let us know if you find any questions or find any issues when using the application on your Kindle Fire tablets.
Specify Library based on Model
When uploading drawings from SOLIDWORKS or Inventor you can now specify the Library that the items should be placed in based on the model type. This allows you to have a Library that contains all of your Part Drawings and a different Library that contains all of your Assembly Drawings. To do this click the Config button next to where you select the Upload Library in your folder configuration as shown in the image below. Then enter two library specifications where the property is equal to Model Extension and you select a different library for the different extensions. The configuration is shown below for specifying that SOLIDWORKS parts should be placed in the Parts Library and the SOLIDWORKS assemblies should be placed in the Assemblies Library.
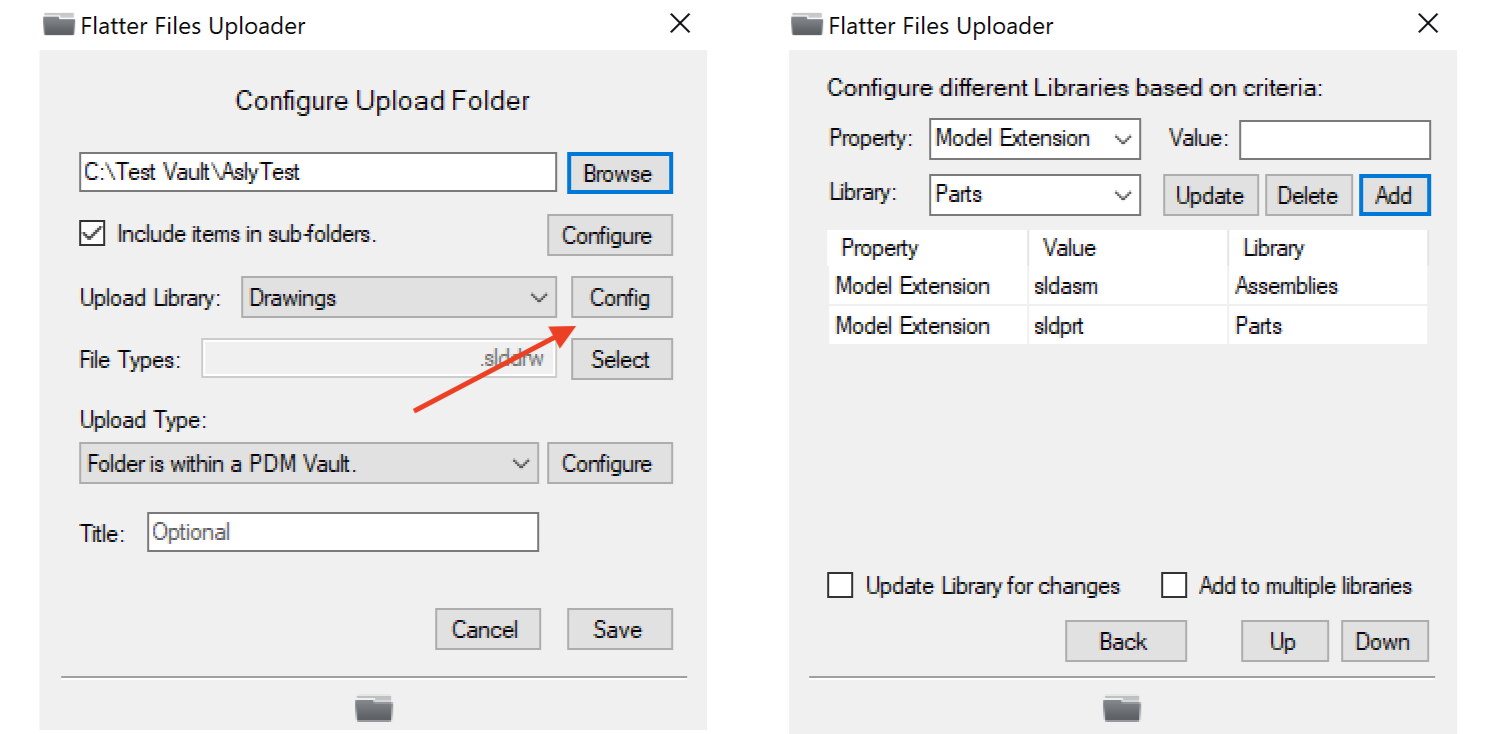
Keep in mind that for the above configuration to be possible, you must first create the two Libraries on Flatter Files by right clicking “Libraries” in the web application and selecting “Add Library.”
New Export Type
Support for three new export types have been added for SOLIDWORKS files. The three new types are SOLIDWORKS Pack and Go Model, 3D PDF, and 3D DWG. SOLIDWORKS does not support direct export to 3D DWG. Thus, you must have DraftSight Pro installed to generate this export. The Uploader will actually first convert the SOLIDWORKS model to a temporary SAT file, open that in DraftSight, and then export it to 3D DWG using DraftSight.
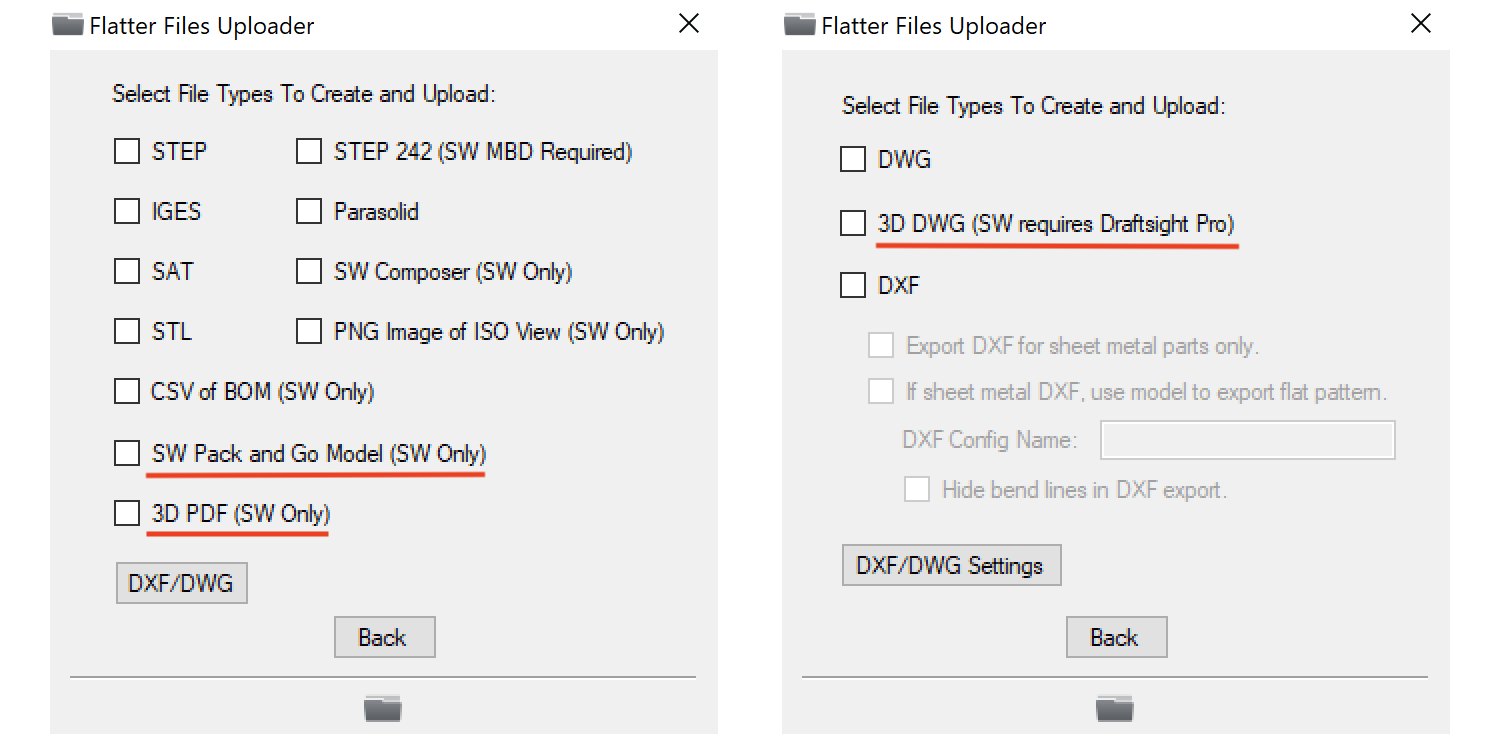
All three new export types can be accessed via the Flatter Files applications while viewing the item just like all of the existing export types.
Missing File Check
One of the major benefits of using Flatter Files for distributing your content is that the resulting content that is created (PDF, STEP, etc) remains connected back to the local source file. For SOLIDWORKS content the local source file is typically the SOLIDWORKS drawing and as new revisions of the SOLIDWORKS drawing are created the resulting content is also automatically updated. If for some reason the source file is deleted locally or no longer configured for upload by the Uploader then the Uploader will warn you that the previously uploaded file is missing. You are then given the option to either ignore or delete the item from Flatter Files. The Uploader now includes the ability to run this check on demand. Simply go to the Uploader menu > Process File and click the new “Run Check” button at the bottom as shown in the image below.
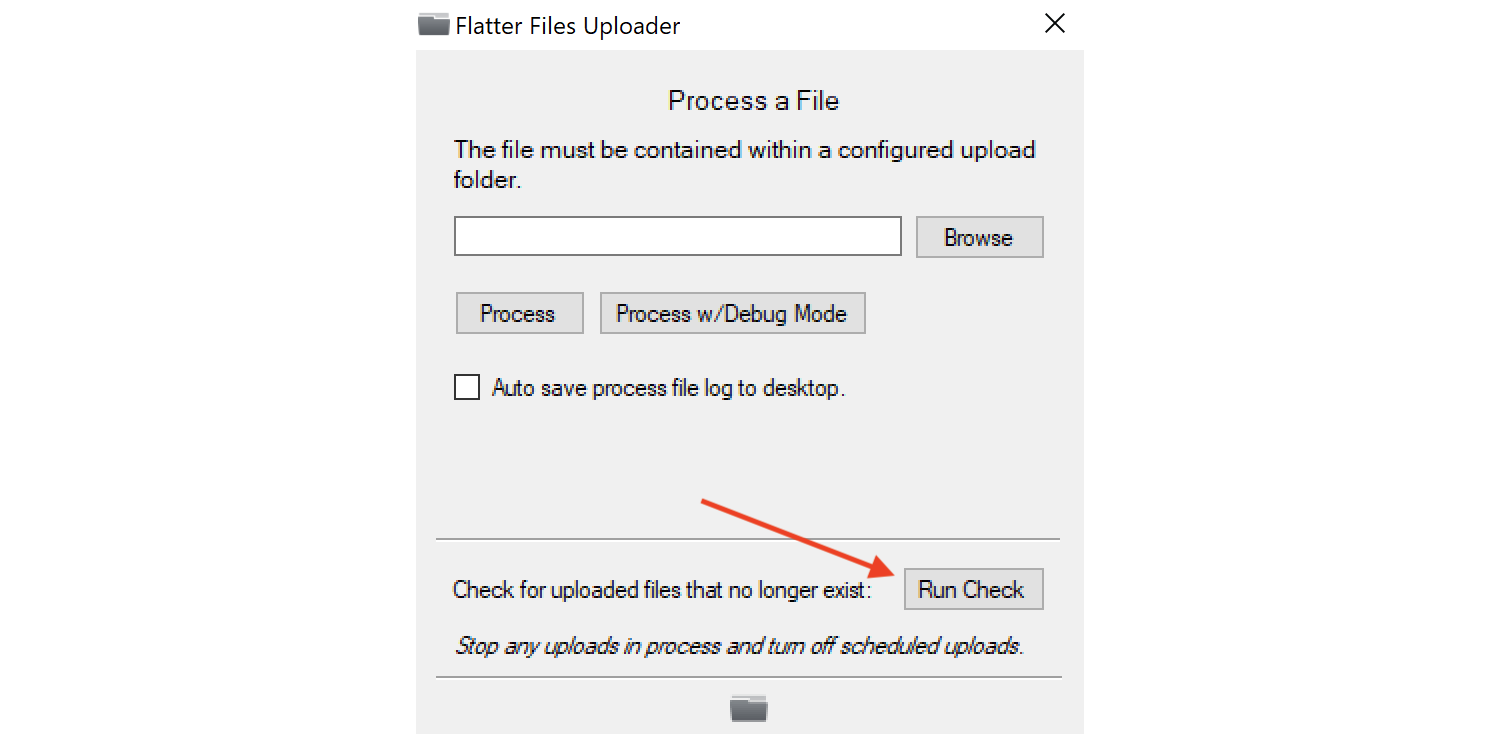
If files no longer exist locally or no longer are configured for upload then you will be shown a button to click to view the list of files. You can ignore or delete the files from Flatter Files as needed.
Process File Update
Using the Uploader’s Process File command is very common when debugging issues with a specific file. Sometimes you might need to send Flatter Files support additional information regarding the processing for help. In the past you would need to turn on debug mode, process the files, then turn debug mode off. There is now a new option in the Process File view that allows you to process the file in debug mode. This option will automatically turn debug mode on, process the file and then turn debug mode back off automatically. The new option is shown in the image below.
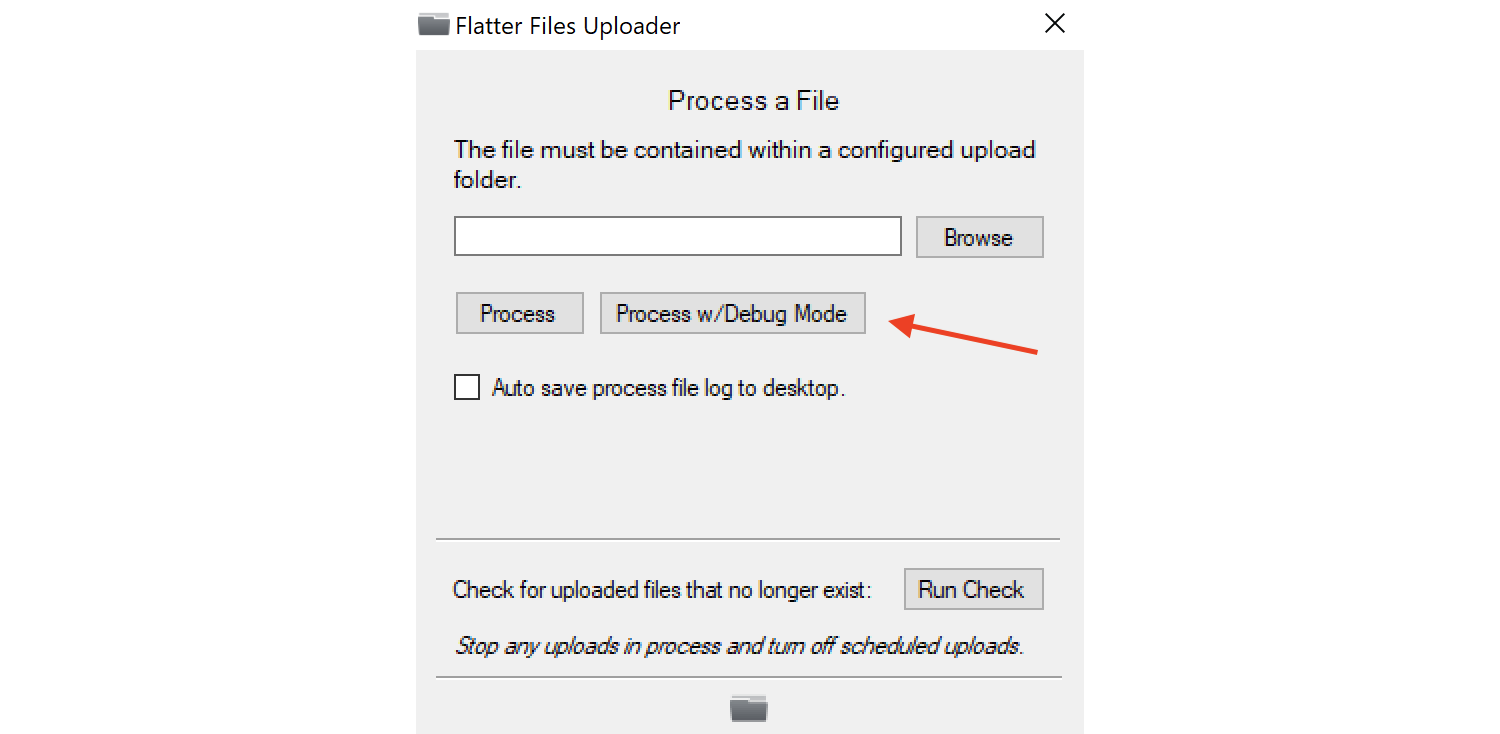
The Process File file location input field has also been updated. It now supports dragging and dropping a file such that the path is automatically added for the file dropped into the input field.
Install Beta Uploader
Often times, new capabilities and bug fixes are added to a beta version of the Uploader. The beta releases are not a separate installation just a newer version. The Uploader includes a setting that allows you to switch the update frequency to Beta such that you get releases early. It is recommended to always leave the update frequency set to Current but yet at times Flatter Files support may recommend that you install a Beta release to fix an issue or test new functionality. To make this easier we have added a button to simply install the beta version without having to change the update schedule. The button is located by going to the Uploader menu and clicking Settings. The resulting view and button is shown below.
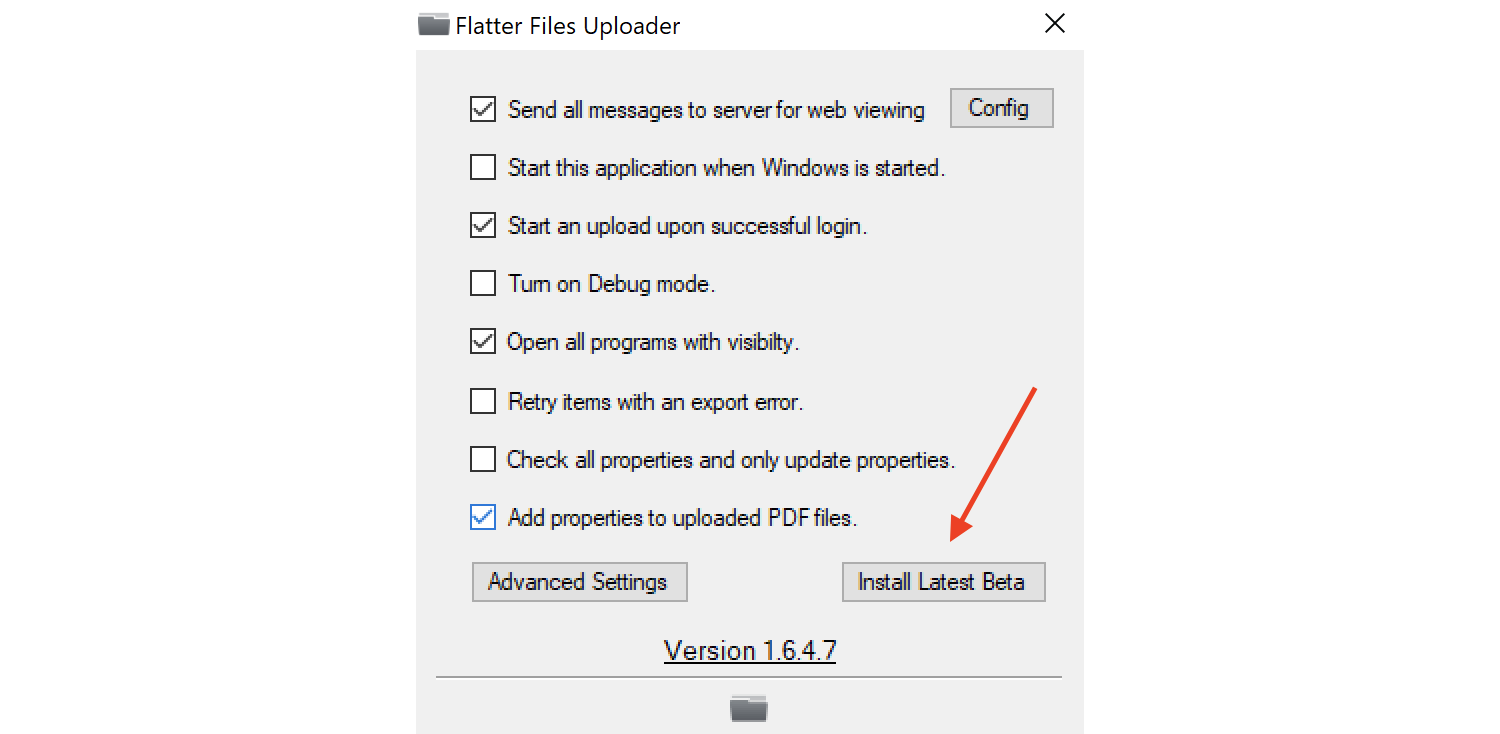
When you use this method to install the beta version you won’t get future beta updates but you will continue to get the new Uploader updates when the non-beta releases occur. Thus, you can click the button, install the current beta, and yet not have to worry about changing the update frequency.
As you can see, it has been a busy few months adding new features and capabilities to Flatter Files. If you have any questions or enhancement requests, please do not hesitate to contact us at [email protected].