
For years, Flatter Files has included native mobile applications for iOS and Android such that the best possible user experience could be provided on those devices. Each year, usage of those applications has grown as more and more of our customers have deployed tablets and other mobile devices. Now, it is very common for companies to use tablets on the shop floor and/or in the field.
Recently, sales of Windows 10 tablets have grown rapidly, especially Microsoft Surface devices. Thus, we decided to invest heavily into the Windows 10 platform by developing a Windows 10 native application for Flatter Files. This new application is designed specifically for using touch on either a convertible laptop or tablet device, such that the best possible experience can be provided on those devices.
This new application will also operate without issue on desktop and non-touch laptops. Viewers on non-touch devices may decide they prefer the native application over the web application due to performance or interface preferences. However, for the time being, the web application continues to be more feature complete, such that there are many things only supported in the web application. In addition, all Admin functionality continues to only exist in the web application. The native Windows 10 application is focused entirely on the viewer experience, just like our iOS and Android applications. Moving forward, we will continue to invest in this new application along with our existing iOS, Android and web applications, such that the absolute best user experience can be provided regardless of the device type.
Install the Application
To install the application, simply go to the Microsoft Store on your Windows 10 device and search for Flatter Files or go directly to the application by clicking this link. Simply click the blue “Get” button which will install the application. Moving forward, all application updates will be installed automatically.
Interface
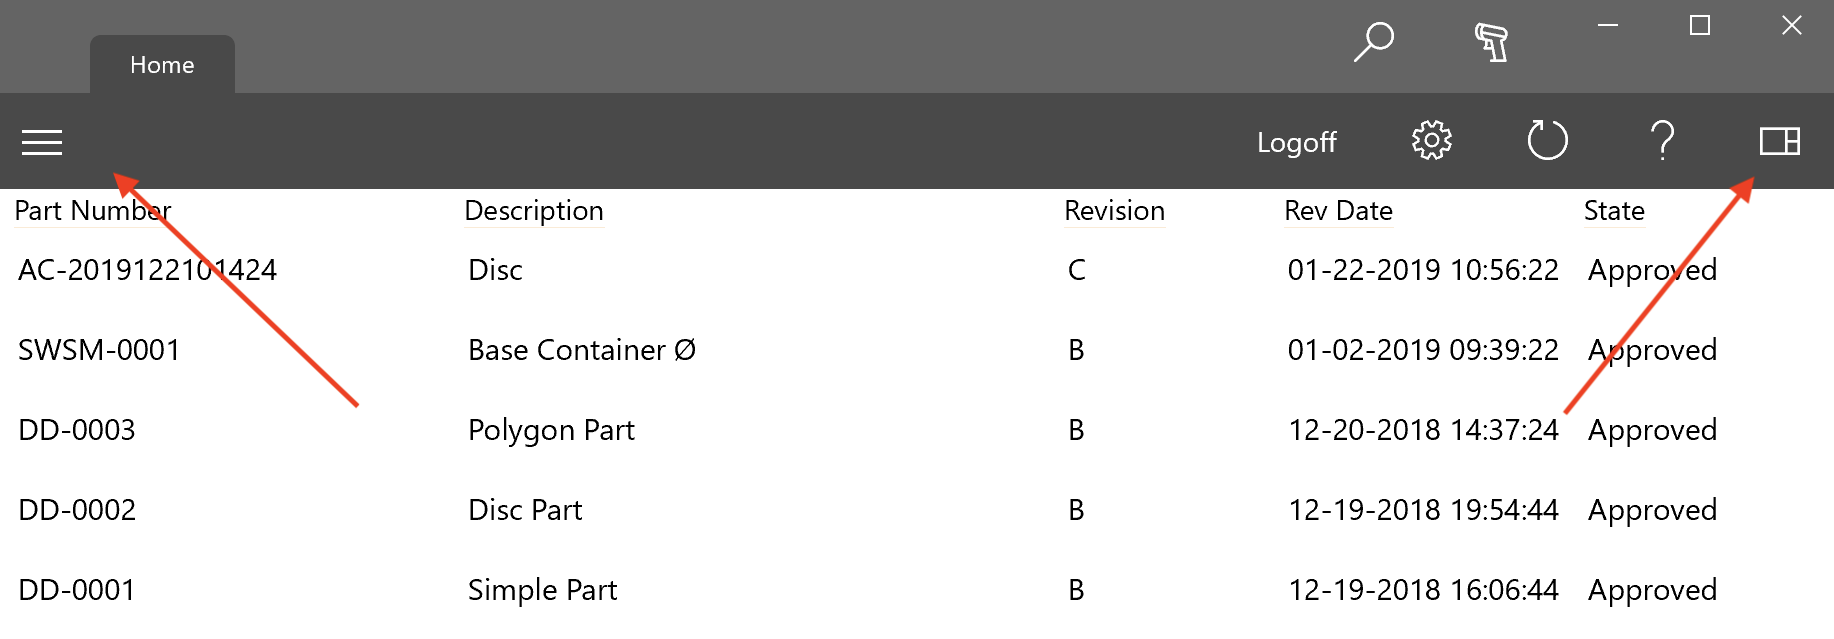
When you first open the application, you will be prompted to login with your user credentials. Once you login, the following screen is shown.

As you can see, the initial screen after login is very similar to the initial screen after logging into the web application. Unlike the web application though, this screen is responsive to the device window size. Thus, if you open the app on a small tablet or you make the app window small, the previews on the right side will be hidden. If the window of the app is even smaller, then the library listing on the left side will also be hidden. There is a corresponding button on the left side and on the right side to show or hide the library listing and preview images as shown below.
Selection
Just like in the web application, you can click or tap an item to select it and the corresponding preview image will be scrolled to if the previews are shown. Since the app is designed to work entirely with touch only, selecting an item also displays an action bar at the bottom of the application. The action bar allows you to perform various operations on the selected item or items and is shown below.

Starting on the left side, the first option allows you to close the action bar which will also clear the selection. The next option toggles the selection type. By default when you tap on an item, it is selected and the previously selected item is no longer selected. With a keyboard you can select multiple items by holding down Ctrl or Shift before tapping or clicking on another item but that isn’t possible without a keyboard. Thus, you can change the selection type, such that each subsequent item that is clicked or tapped is added to the current selection list, instead of replacing it.
The next three options in the action bar are straight forward. They allow you to open, print, or download the selection. If multiple items are selected, then multiple items will be opened, printed, or downloaded when using these commands. The next option in the action bar is the ability to view the current selection in a list that can be reordered. Simply drag and drop the item listing as need to change the order. The last item is the number of items currently selected.
Viewing an Item
The app uses a tab interface for item viewing. Each time you open an item, it is opened in a new tab and the tab contains full access to all related content for that item. There are multiple ways to open an item.
- Double click or double tap the item
- Press and hold the item
- Right click the item
- Select the item and click the Open icon shown in the bottom action bar.
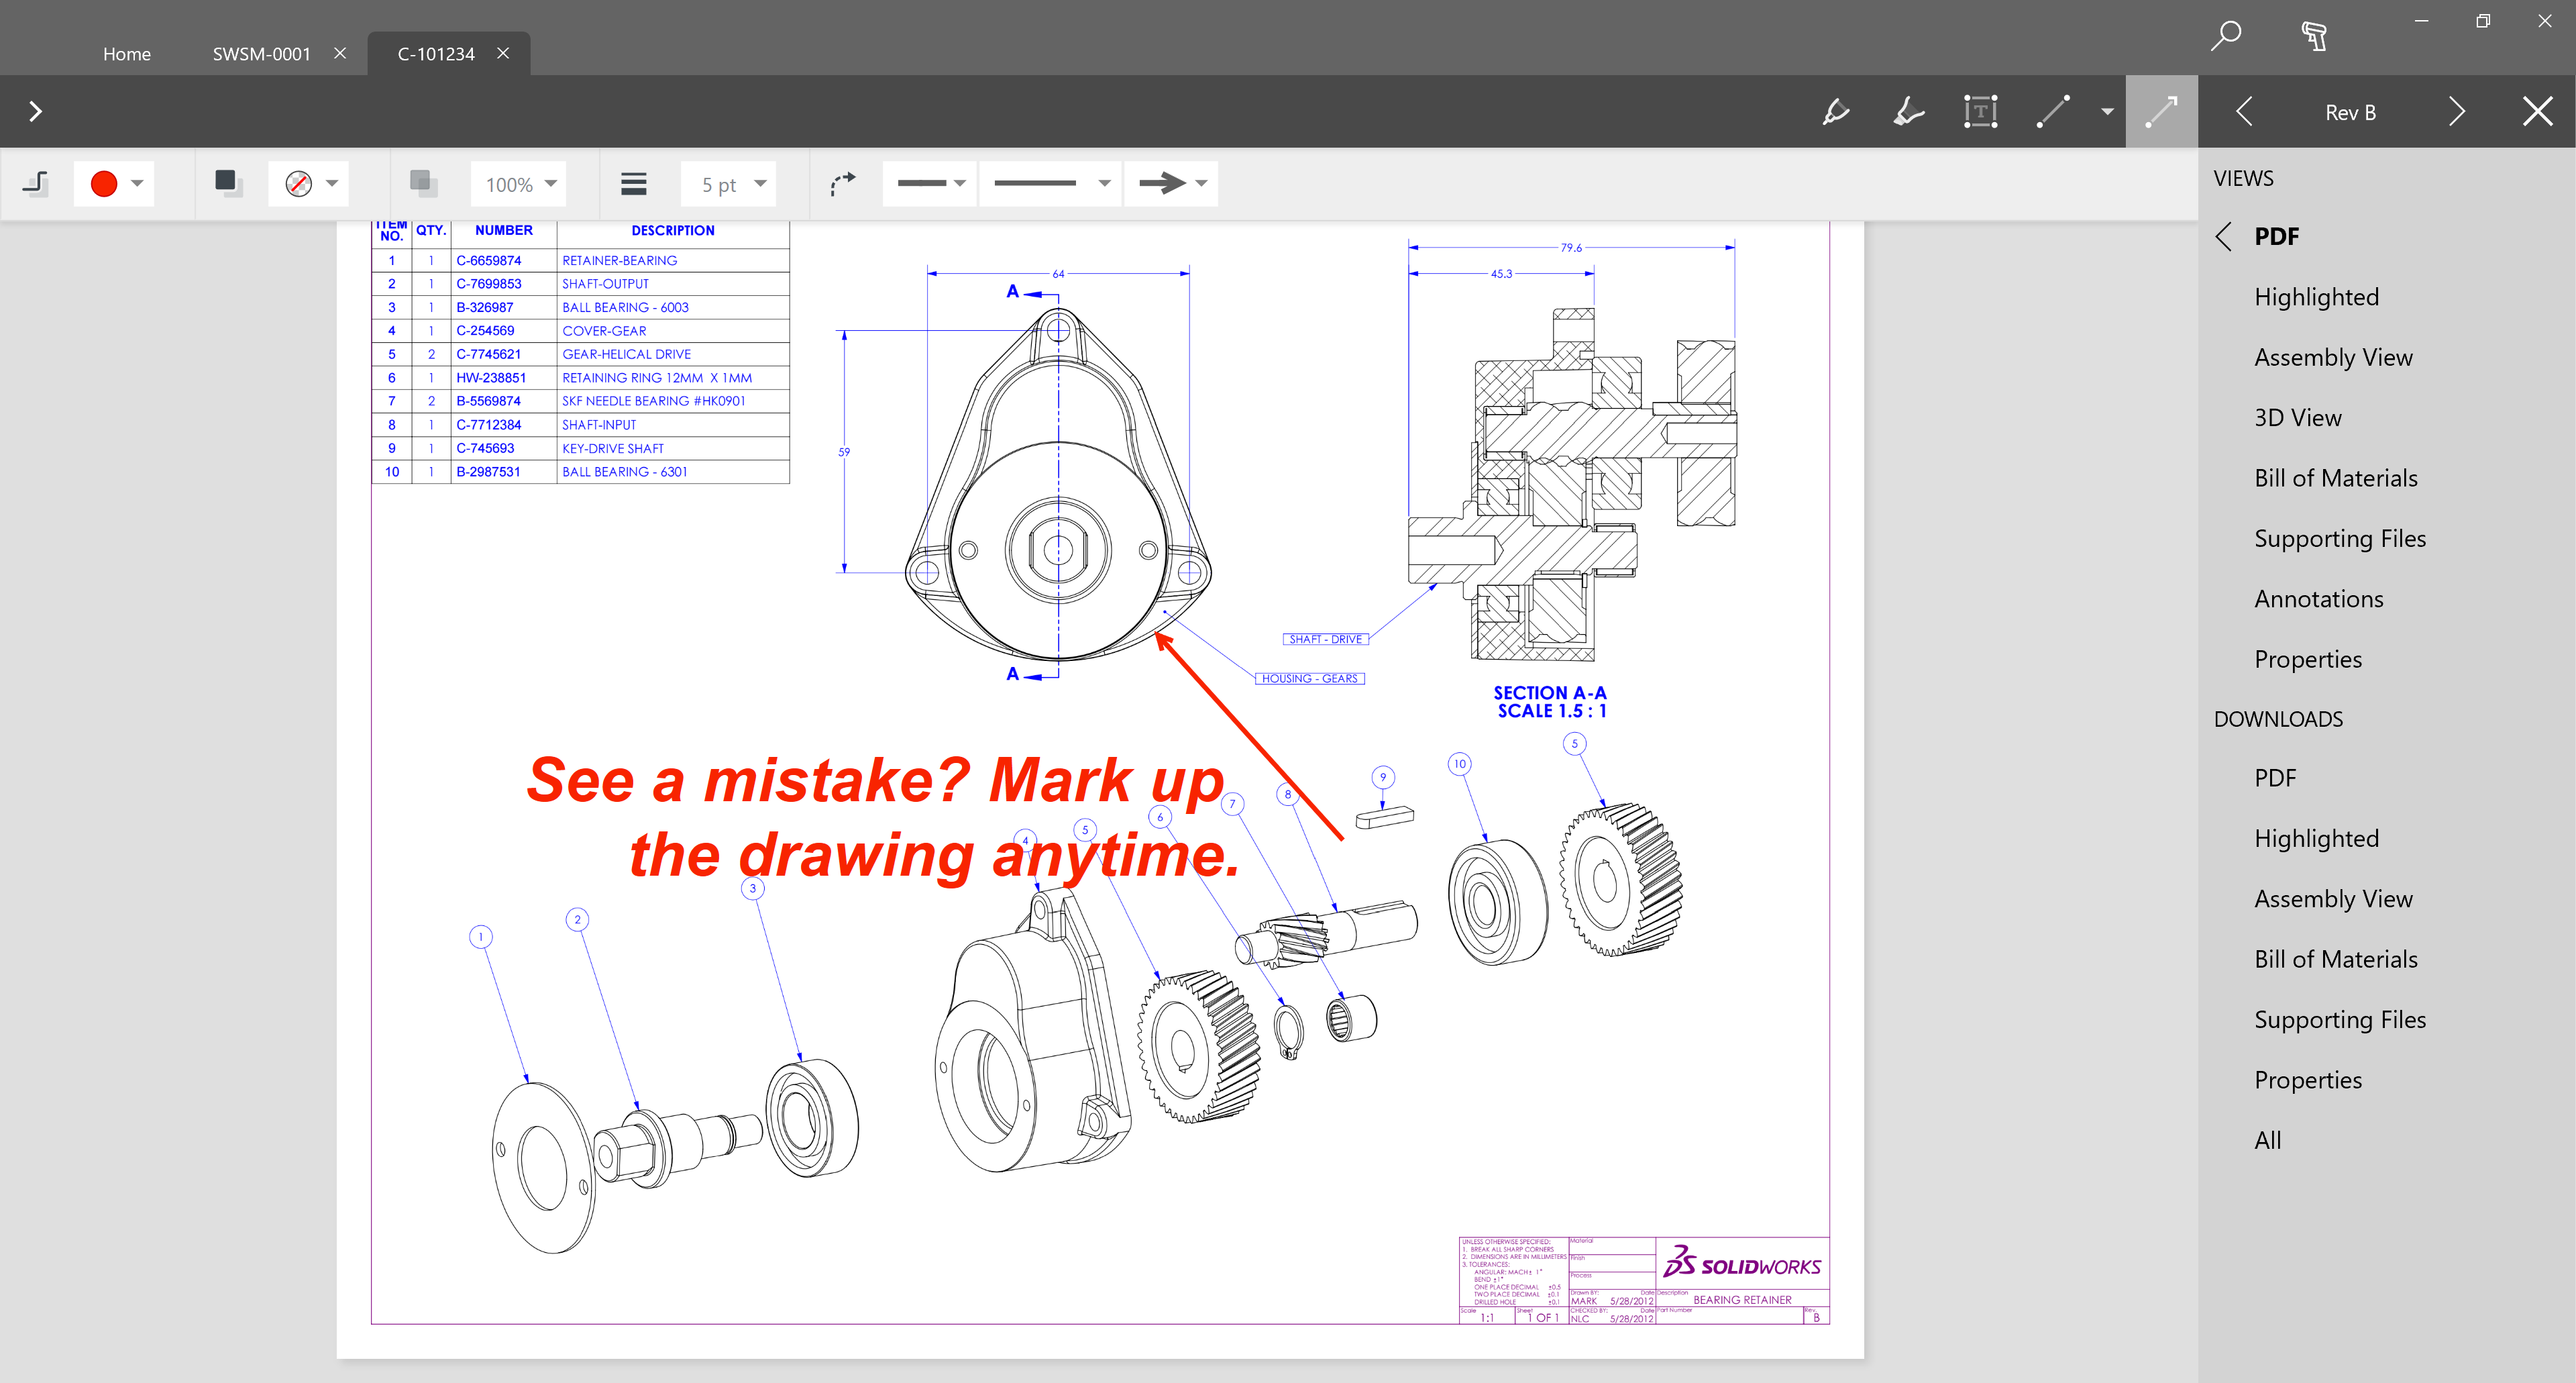
The image below shows an item opened. As you would expect, the latest revision of the item is immediately displayed.
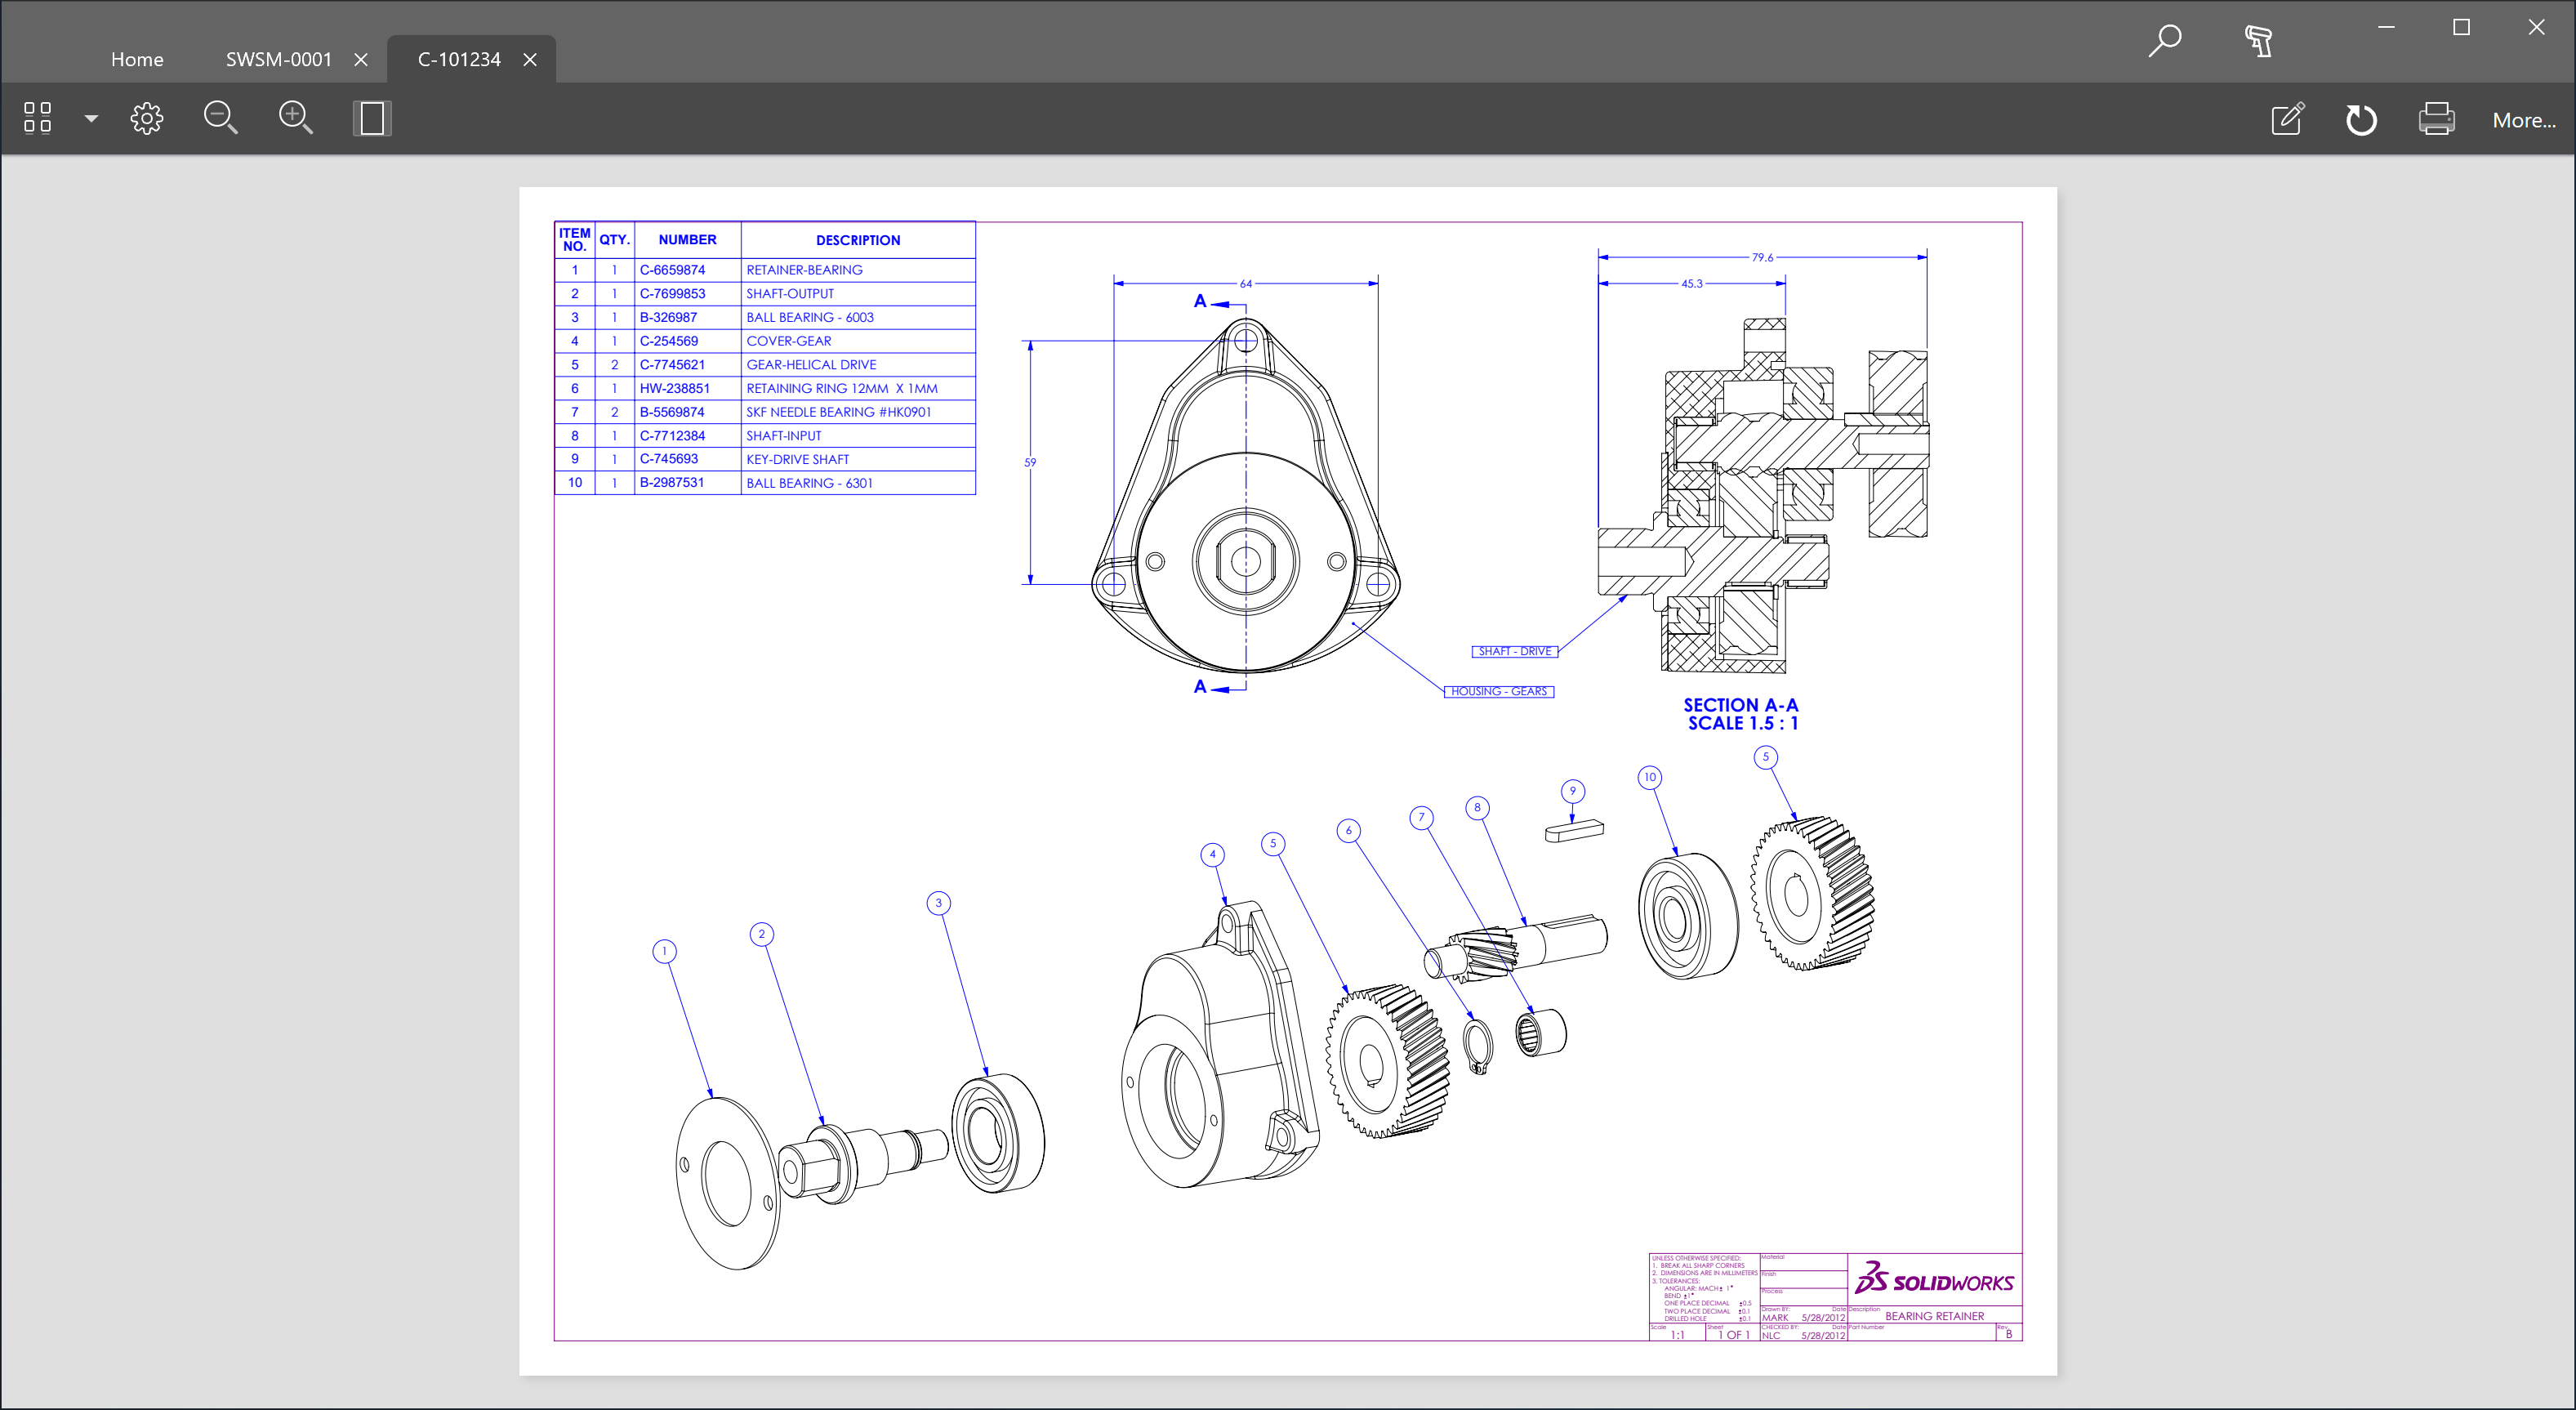
When viewing an item, there are all the typical options available, such as zoom, mark up, print, etc. In addition, at the top right there is a “More…” button that can be clicked or tapped. This displays a panel along the right side with various view and and download options. The options listed depend on what the user can access and what content the item contains. The panel is shown in the image below.
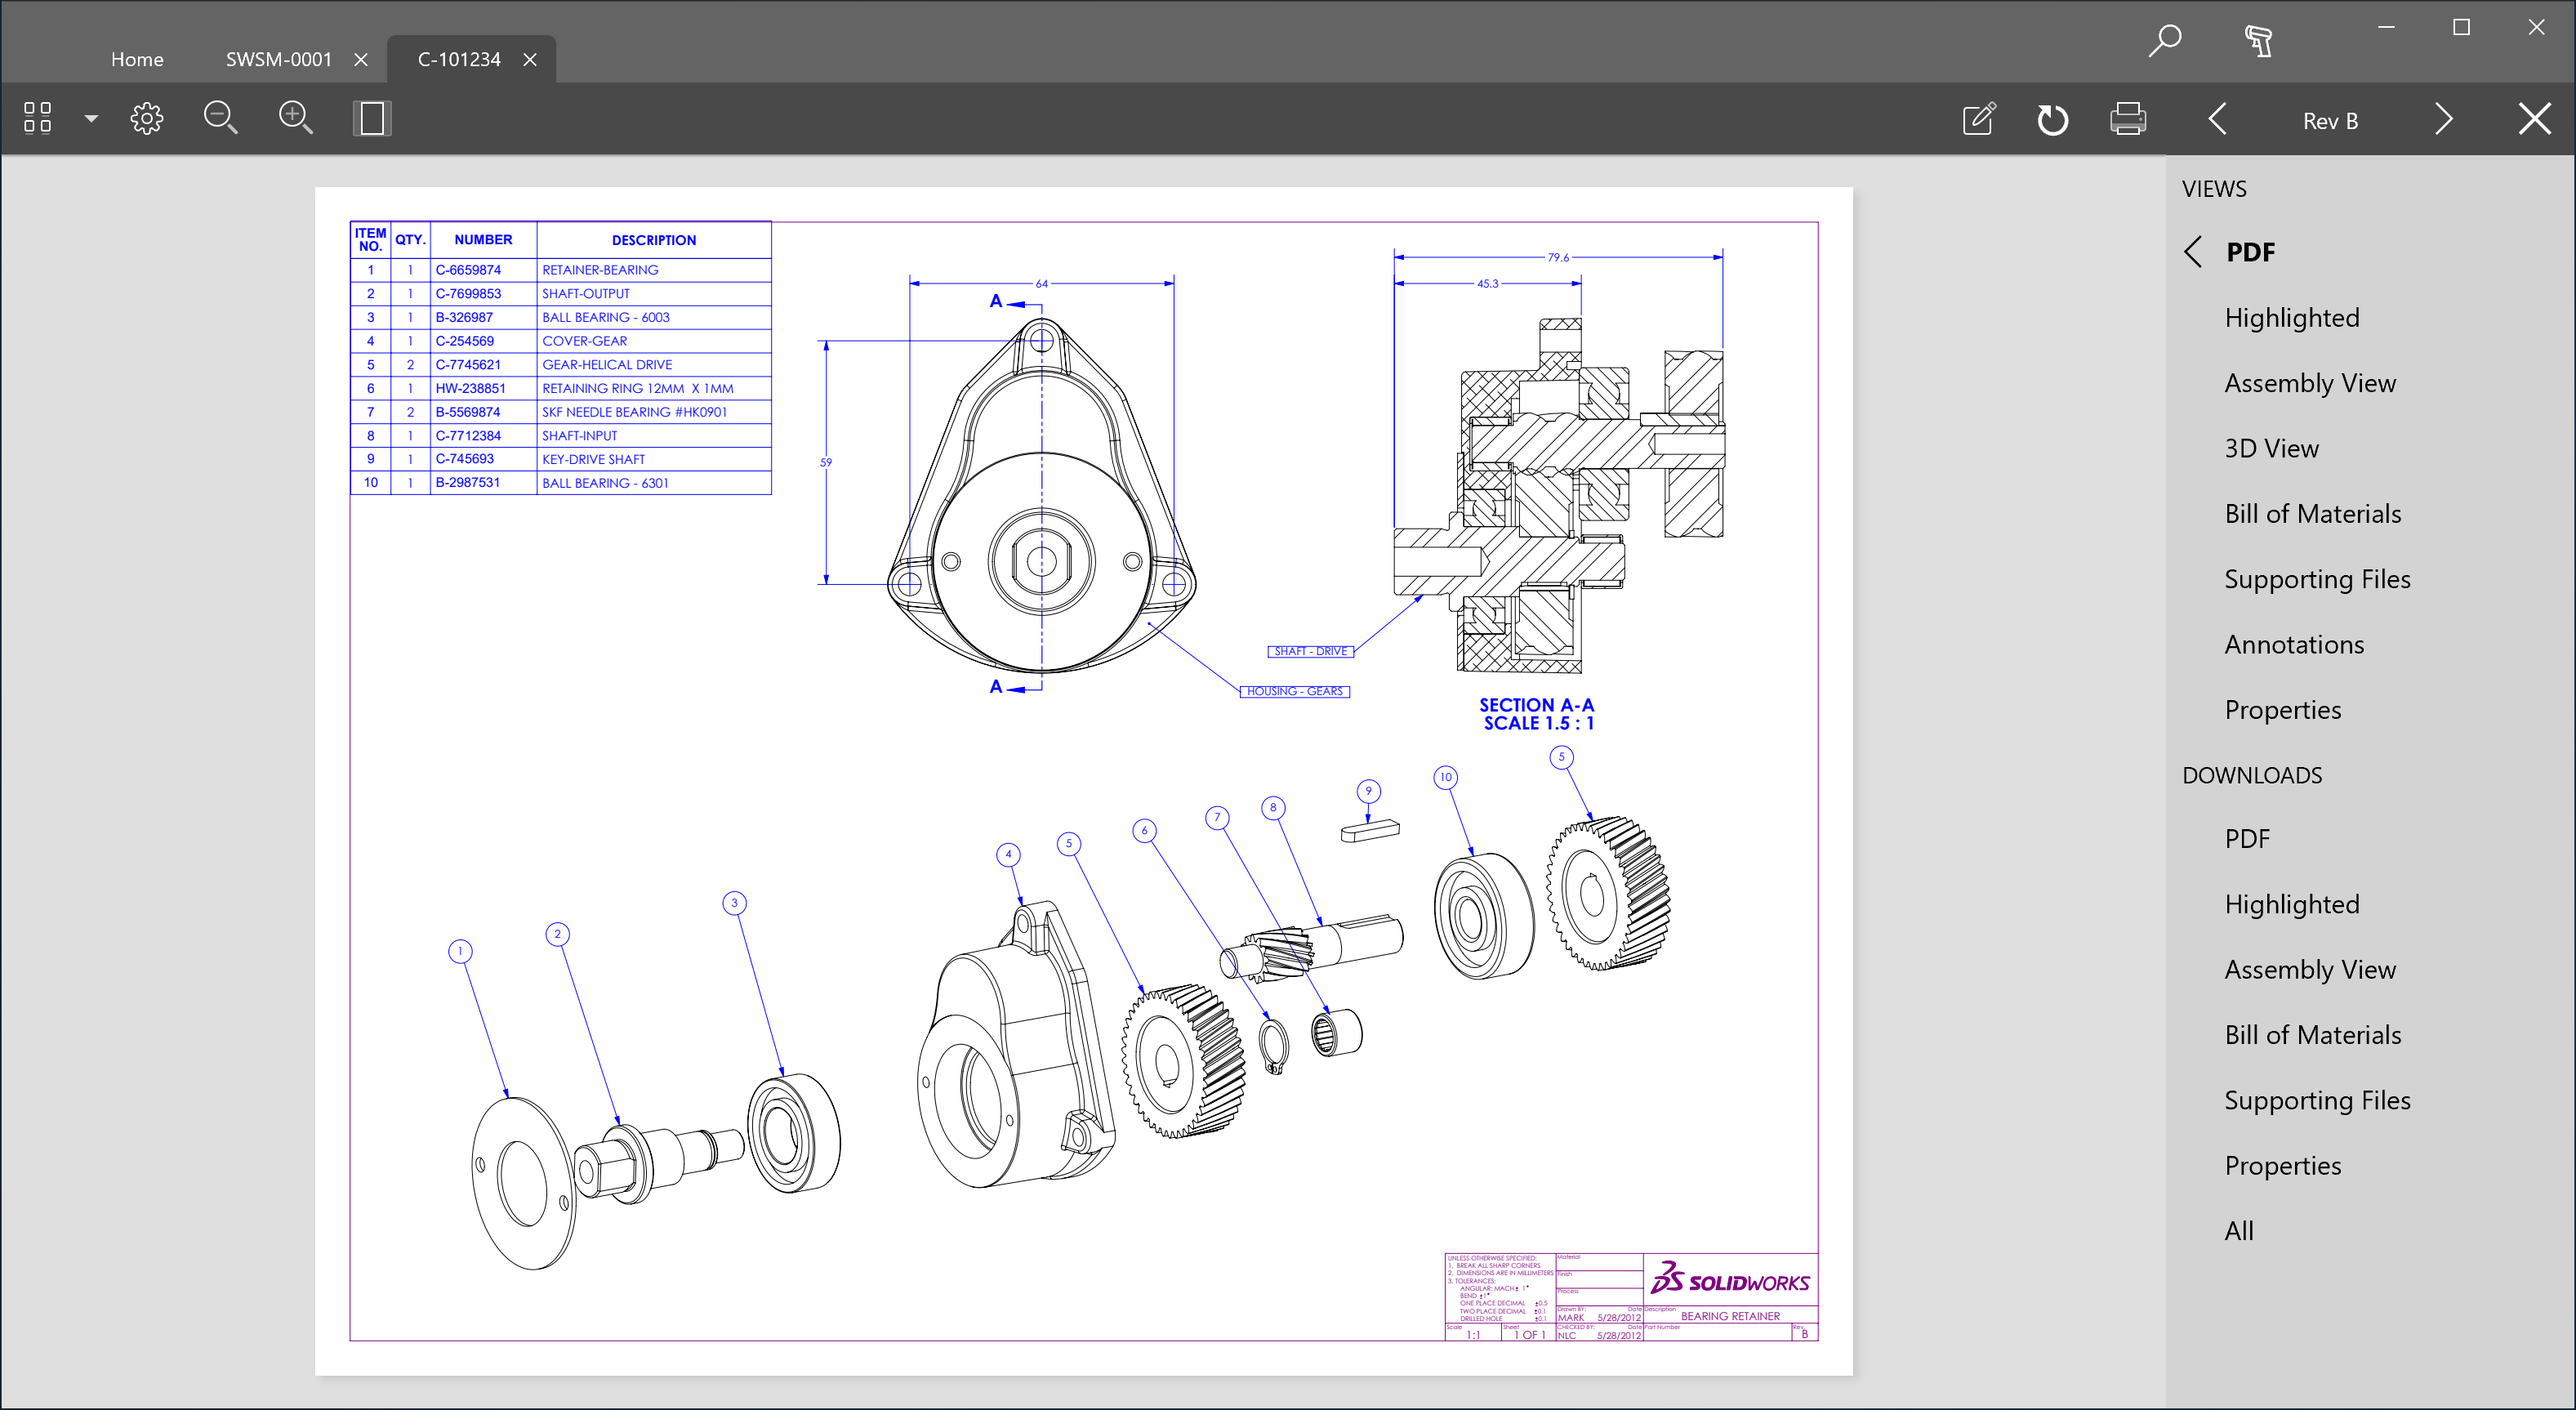
The top bar of the panel also includes the ability to navigate the revision history if the user has access to previous revisions. The top right of the panel also includes a “X” button that allows you to close the panel.
Each item is displayed in a new tab. If you attempt to open an already opened item, then you are navigated to the tab that is already open. To return to the Home tab, you tap or click the Home tab or you can use Ctrl + H. Additional shortcuts for various functions are listed in the help page, which is accessible by clicking the question mark on the Home tab.
Search
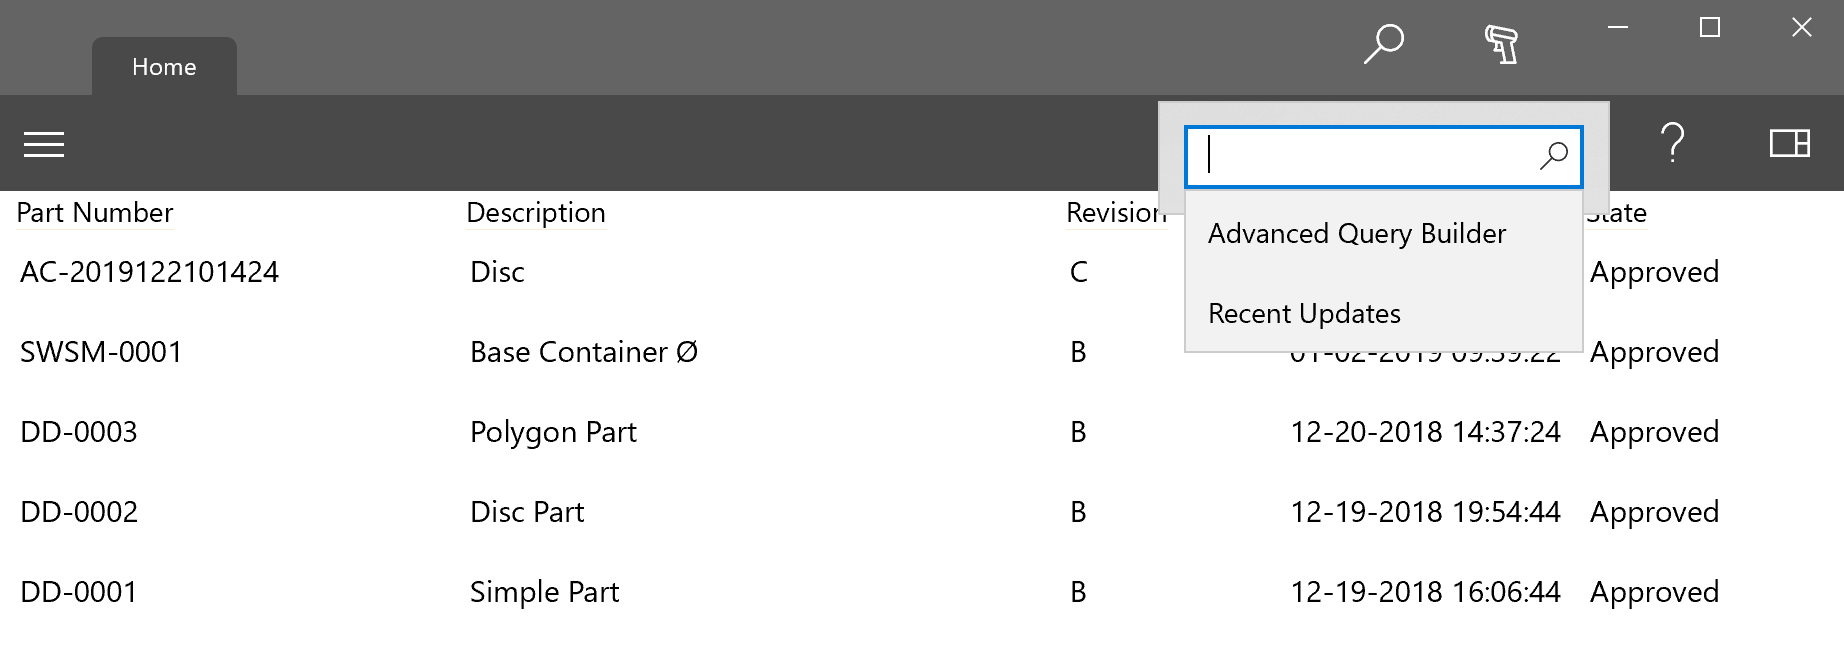
To initiate a search, simply click the search icon at the top right of the application or use Ctrl + F. A search can be initiated at anytime even if you aren’t currently viewing the Home tab. When you submit the query, however, you will be taken to the Home tab for a display of the search results. When entering a query, you also have two additional options, Advanced Query Builder or Recent Updates. If you click the Advanced Query Builder, then a fully featured query builder will be shown to create the query. Selecting Recent Updates will display the current list of Recent Updates from your account. This is the same list that is shown when you first log in.
When viewing search result, the column headers can be clicked or tapped for the purpose of sorting using that column. To change the direction of the sort, simply click or tap the column heading again.
Barcode Scanning
Multiple types of barcode scanning are supported within the application. Click the barcode scanning icon at the top right to see a list of the options available for your device. If you plug in a new barcode scanner or add a camera after the application has started, then you might need to click the refresh button at the top right of the list to retrieve the updated options. In addition, once you have decided on your barcode scanning method, you can use the “Remember Selection” input to not have to pick from the list each time. This selection can be cleared by going to the Home tab > Settings > Click or tap “Clear” next to the saved barcode scanner value.
If your device has a built in camera or an external camera selected, then you should see an option to use the camera to scan the barcode. The image below shows that option as the second item listed. Your list may be different and it is likely that the name of the camera option will be different since the name is dependent on the specific camera.

All devices will have the option called “Barcode Scanner Keyboard Input.” This is simply a way to easily use a generic USB barcode scanner that functions as a keyboard input. Clicking or tapping this option will result in the screen shown below. The input field will be selected, you can immediately scan a barcode with the scanner and it will fill in the value received and perform a search for the item. You can also quickly display this input method by using the shortcut Ctrl + I.
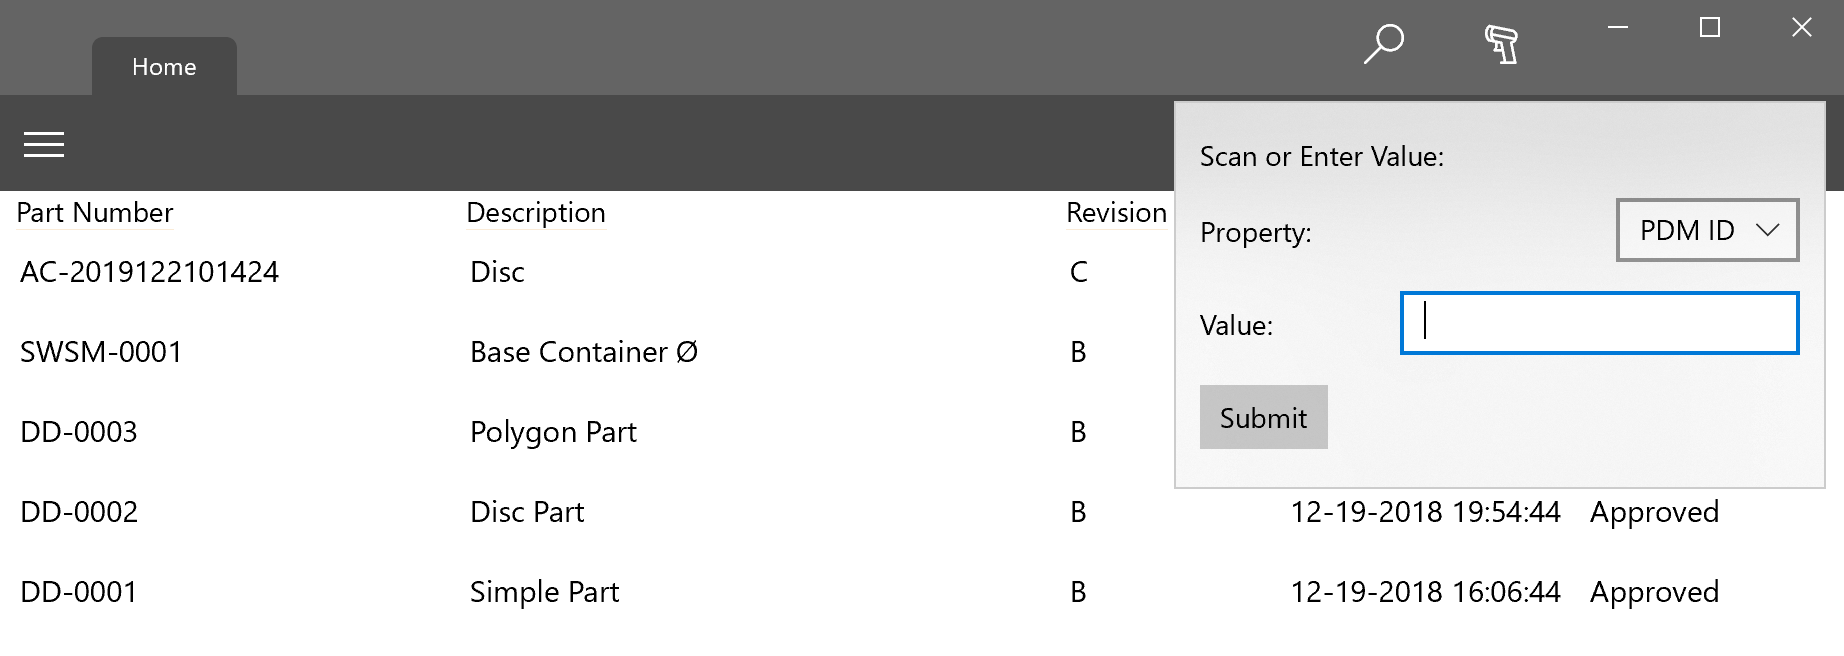
If you have a USB barcode scanner that is configured for HID Point of Service Mode, then additional functionality is possible and the scanner will show up in this list as a separate option. In the list shown previously, the option named “Voyager-1250” is this type of barcode scanner. Voyager-1250 is the actual name of the barcode scanner as it appears to Windows. Selecting this option will allow the application to directly connect to this type of barcode scanner and you don’t have the display inputs on the screen. Once connected, you simply scan items and they will be displayed automatically in the application. In addition, if you save this selection then the application will automatically connect to the barcode scanner when the application is opened and you can immediately start using it.
Annotations
Just like our other applications, the Windows 10 application includes a fully featured ability to create annotations. Users can easily use touch or a stylus to add the mark ups and then send the annotation to the appropriate personnel.
This new Flatter Files Windows 10 application is a powerful viewing application that should provide a best in class experience for Windows 10 tablets and convertible laptops. We are very excited to get this application into the hands of our customers and look forward to your feedback. If you have any questions or enhancement requests, please do not hesitate to contact us at [email protected].