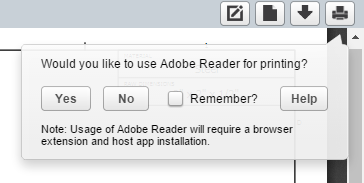
A few months ago we released the Flatter Files Extension which made it possible to print with Adobe Reader from Chrome. Recently we added support for Firefox starting with Firefox version 50 such that Adobe Reader can be used to print from both Chrome and Firefox. This has been very beneficial because both Chrome and Firefox have inconsistencies when printing from the browser where as Adobe Reader has no such issues. The technology developed to enable this local printing capability has now been expanded to support local viewing. This allows you to open the PDF, Native, and generic CAD files that have been uploaded to Flatter Files locally with a single click. Previously, users would have to download the file and then open it in the appropriate application.
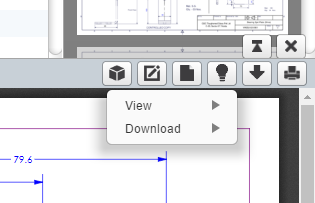
There are now three new options, View In Adobe Reader, View In eDrawings, and View In Native App. All three options are now part of a new View submenu shown when you click the download button. Instead of just getting a list of files to download when you click Download, the menu below is initially shown.
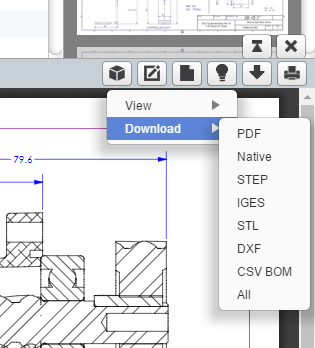
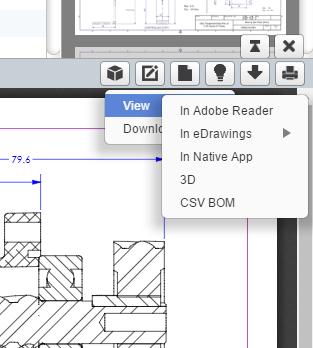
The same download options are still shown in the Download submenu when you hover the mouse over Download. This is shown on the left below. However, if you hover over the View option the new View submenu is shown which includes the new options. This is shown on the right below.
The View In Adobe Reader option is pretty straightforward. The PDF currently displayed in Flatter Files will be opened locally using Adobe Reader.
The View In Native App option is only included if corresponding native files have been uploaded per your Uploader configuration. If they have been uploaded then clicking the option will open the native file locally using the default application assigned to that file type. For example, if it is a SOLIDWORKS file then SOLIDWORKS will be used or if the native file type is a Word document then Word will be used if it is installed. Keep in mind that for both cases the correct application must be installed locally. Otherwise Windows will ask what application you would like to use to open the file.
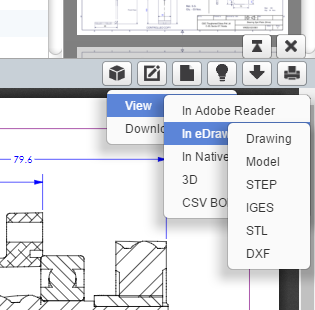
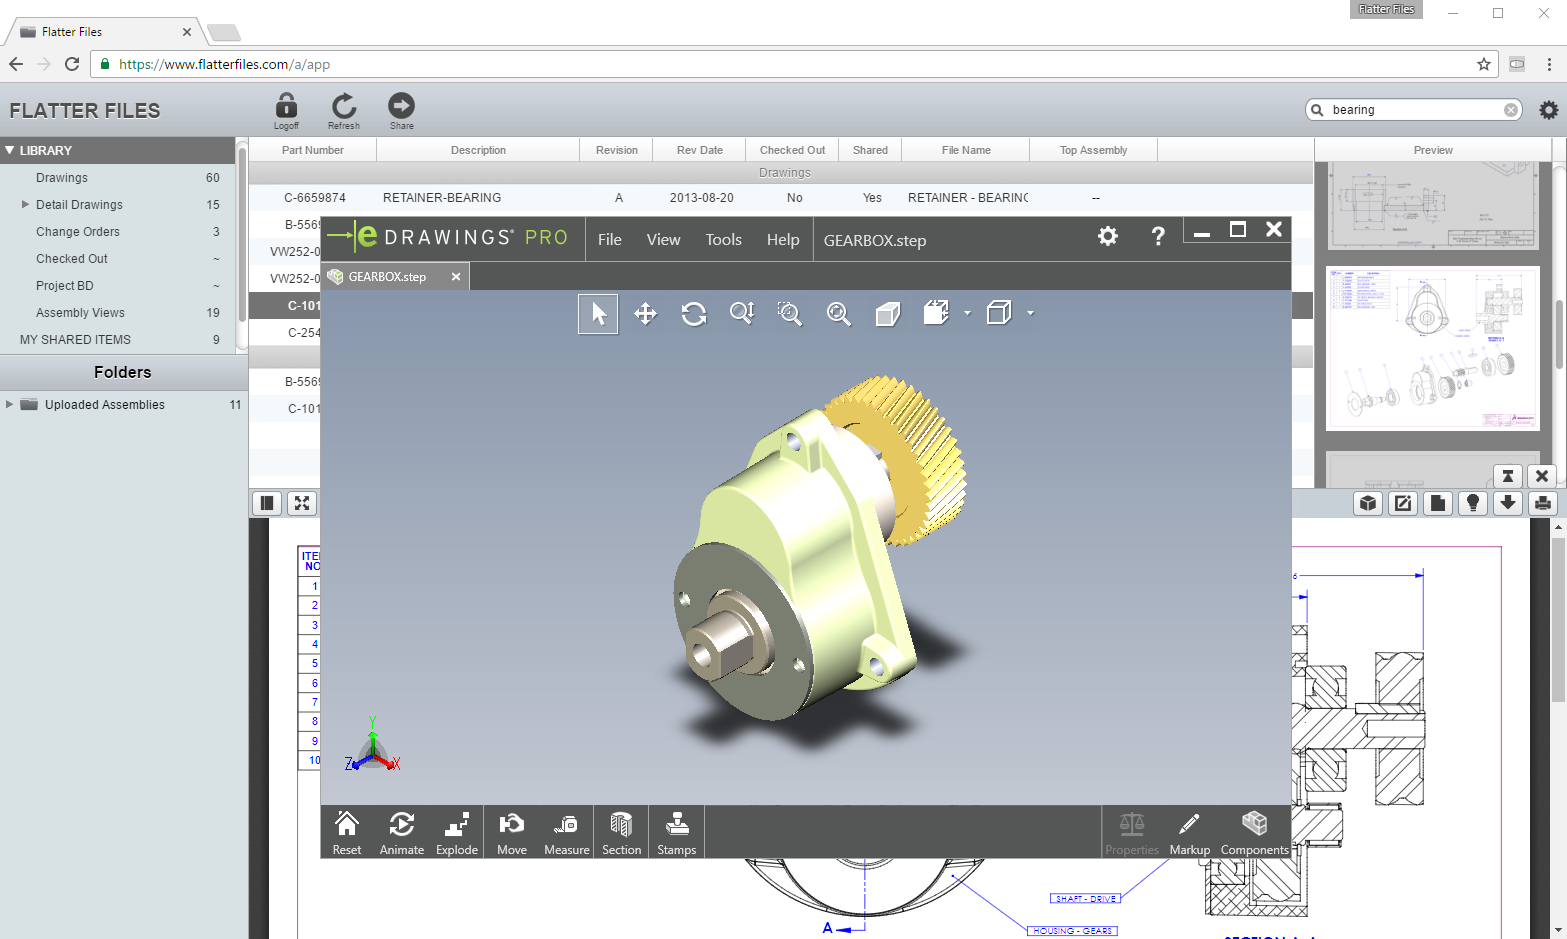
The View In eDrawings option will display options to open the supported Native and Generic CAD files in eDrawings. eDrawings 2017 added support for opening STEP and IGES files so those options will be listed if they have been uploaded per your Uploader configuration. In addition, eDrawings supports opening DXF, DWG, and STL which will each be listed if they exist for the item. If you have uploaded the Native SOLIDWORKS files or uploaded eDrawings files as the Native file type then a Drawing and Model option will be listed. The eDrawings submenu is shown in the image below. Keep in mind, that eDrawings must be installed on the local machine for this functionality to work. If it isn’t installed the user will be prompted to download it.
The ability to open the generic CAD files directly in eDrawings is a very unique and beneficial capability. For example, if a user wants to view the corresponding STEP file for an item, they can now simply click the download button, proceed to the View In eDrawings option, select STEP and automatically eDrawings will be opened with the appropriate STEP file.
If you have any questions or enhancement requests, please do not hesitate to contact us at [email protected].
One of the more popular features of Flatter Files is the ability share links with specific email addresses. Even as the items are updated with new revisions or properties, the same password protected link will continue to display the most recent version of the items contained within it. This functionality is most frequently used for automatic distribution of your content to your suppliers such that they always have access to up to date drawing information.
Recently we have added a couple of new enhancements for sharing items externally. These are discussed in detail below.
Library Share
An entire Library can now easily be shared. A benefit of sharing a Library directly instead of just selecting the items from within the Library is that the share will automatically be updated as the corresponding Library has items added or removed from it. This makes it very simple to share an entire product line or job specific drawings with a supplier even if the list of drawings required is evolving.
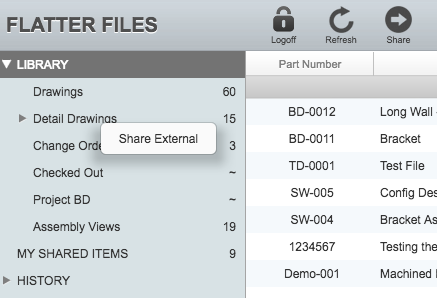
To share the Library, Simply right click on the Library and select the option “Share External” as shown in the image below. This will then display the same share dialog as shown above. Unlike when sharing selected items, a Library share isn’t created automatically due to the potential large volume of items that can be shared all at once. Therefore, when you submit the share it won’t show up immediately in My Shared Items but will eventually. You can also click “Refresh” in the web app to check for when it has been added.
Set Specific Revision
By default, the shared link always will display the latest revision when accessing an item. Sometimes though it might be useful to share a specific revision. Once the item is set to a specific revision it will always display that specific revision unless you manually change it back to using the latest revision. Therefore, if the item is updated with a new revision it will not automatically be displayed from within the shared link since you have set it to a previous revision.
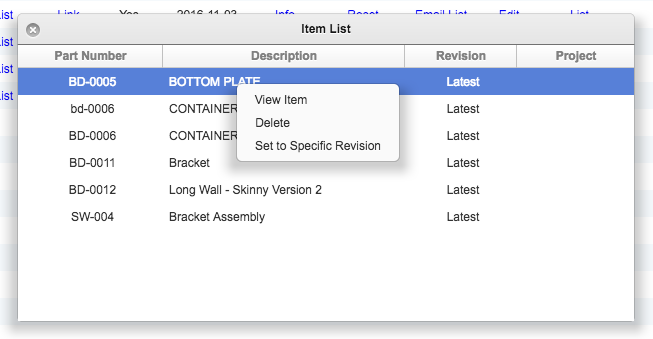
To set an item to a specific revision, right click on the item from within the Item List and select “Set to Specific Revision.” A dialog will appear that allows you to select the revision. Select the appropriate revision and then click Submit. This will change the Item List revision value from “Latest” to the revision that you selected.
Reminder Emails
One of the best parts of sharing items externally using Flatter Files, is that the recipient can automatically receive emails anytime any of the shared items are updated with a revision. Flatter Files now supports the ability to automatically send reminder emails if the recipient does not access the link. The reminder emails can be sent daily or weekly. The share options are shown below with the new reminder option enabled.
Share Settings
If you enable automatic emails when a share item is updated with a new revision, the email is normally sent at midnight Central Daylight Time. This is done such that the supplier only receives a summary email at the end of each day that contains all of the updates throughout the day. If you would prefer to send the update email as soon as any update occurs then enable the new option “Send share updates immediately after upload.” If this is enabled, then as soon as the Uploader finishes updating an item that has been shared externally the appropriate update email will be sent. This setting is located in the Company settings and is shown in the image below.
When a share is created, only the person that creates the share can manage it under My Shared Items. Often times though you will want to add the share to a user group such that your colleagues can also manage the shared link. To automate this process, you can now desinate that the share be added to a specific user group. The options include the ability to add it to the User Groups for the User that is creating the shared item as shown in the image above.
If you have any questions or enhancement requests, please do not hesitate to contact us at [email protected].
Flatter Files development is continuous and is based on customer feedback. We have been adding so many new features and capabilities that we have fallen way behind on updating everyone via this blog regarding all the new features. Below is a quick summary of the most recent updates.
Print with Adobe Reader
When printing with Google Chrome, sometimes the result does not match the PDF shown. This is primarily due to a bug in Chrome when handling dashed lines. To ensure an accurate print, Flatter Files allows you to now use Adobe Reader to print your drawings when using Chrome. This requires the installation of the Flatter Files Chrome Extension and a small host application. Details regarding how this works can be found in the printing documentation.
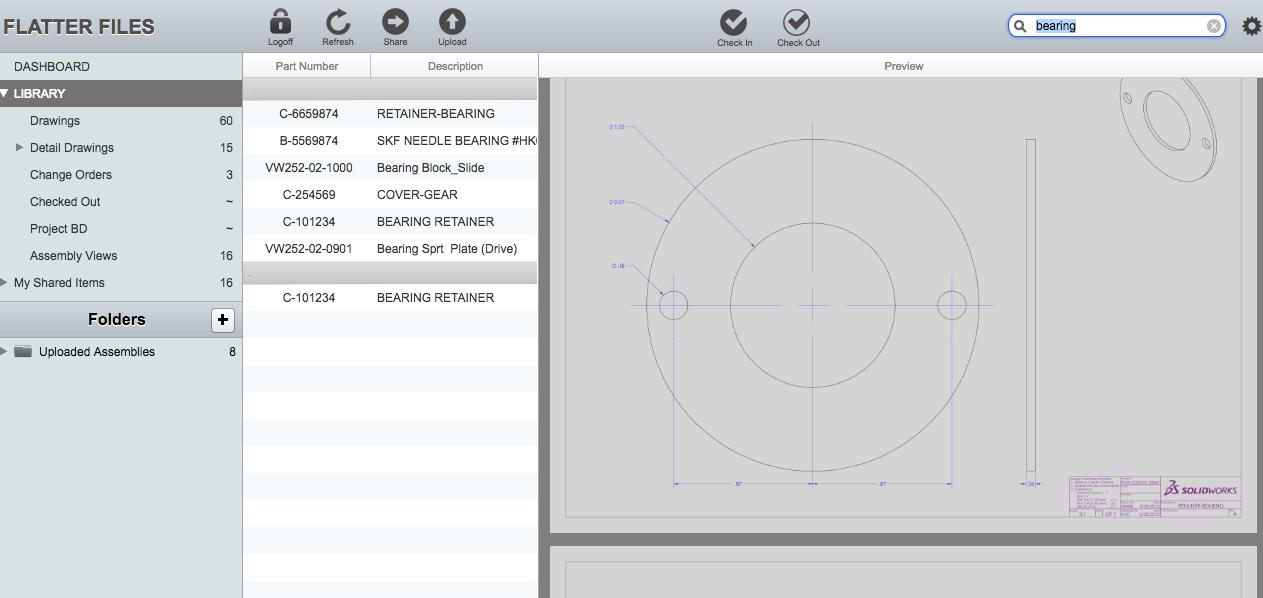
Large Preview Images
When an item is uploaded to Flatter Files, a preview image is automatically generated. Recently we made a change to this process to create a preview image that is approximately 4 times larger. That means you can now widen the preview image list on the right and the images will become much larger making it easier to determine if you have located the correct item. A greatly enlarged preview image is shown below.
Property Download
All of your uploaded Property data for each item can now be easily downloaded. Simply select the items, then right click and navigate to the Download submenu. Then select the new option “Properties.” This will download a CSV file containing all of the property data for the items that can easily be opened in Excel.
Search Enhancements
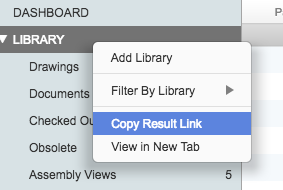
When you search for an item, you can now easily link to the specific search results. Simply enter you query and display the search results. Then right click on “LIBRARY” and select “Copy Result Link.” The resulting link is effectively a bookmark to that search and is only valid if the user is able to login to the account.
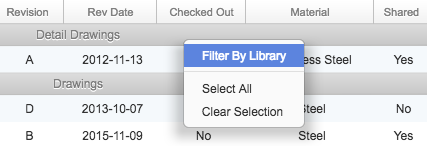
If a search result list contains items from multiple Libraries it is now very easy to limit the search result to a specific Library. Simply right click on the Library heading and select “Filter By Library” or even easier simply double click the Library heading. This will perform a new search that returns all of the items matching the query and contained within that specific Library.
Create Public Link
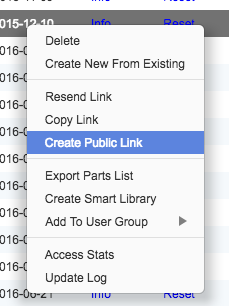
Flatter Files can now be used to make some of your documentation publicly available. You must first create an external shared link. Once the external link has been created, simply right click on the item in your “My Shared Items” library and select the option “Create Public Link” as shown in the image below. You can then copy the resulting Public Link and anyone that you send the link to will be able to access the items without logging in.
PDM Reference Attachments
Flatter Files has long supported item Attachments where one item is linked to another item. Previously these could only be set up manually. If you are using Flatter Files in conjunction with SOLIDWORKS PDM Standard or PDM Professional (EPDM) they can now be created automatically based on your PDM references. The PDM Reference configuration options are shown below. To enable this feature simply enable the option titled “If reference is being uploaded as item make it an attachment.”
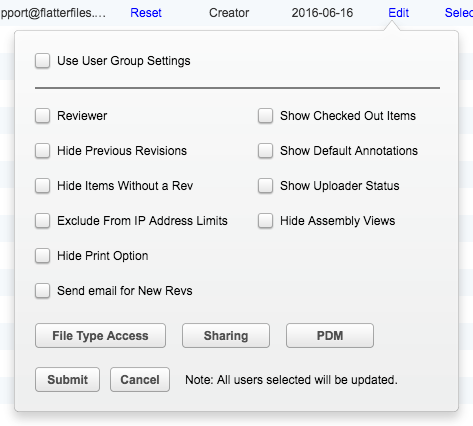
Hide Assembly Views
Flatter Files now includes a new User setting such that your Assembly Views can be totally hidden from specific Users. Simply display the User settings and check the option titled “Hide Assembly Views.” The option is the last option in the right column as shown in the image below.
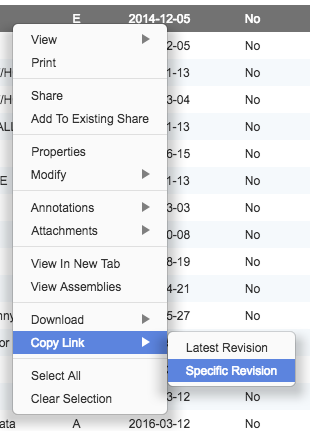
Specific Revision Links
Flatter Files by default always display the latest revision. In addition, when you link to a specific item in Flatter Files it has historically always shown the latest revision. Access to the previous revisions after the latest revision was shown is a simple User option. Now, you can link to a specific rev and even as new revs are created the link will continue to display that specific revision instead of the latest revision. To facilitate this functionality, the “Copy Link” option in the right click menu has been updated to provide two options. The first option is “Latest Revision” and the second option is “Specific Revision.” If Specific Revision is selected then a prompt will appear that allows you to designate the revision you would like to link to.
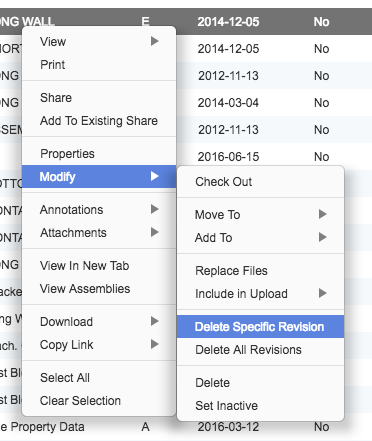
Delete Specific Revision
If an item is uploaded from a PDM system, typically all of the existing revisions are uploaded. Flatter Files now supports the ability to delete a specific revision. For historical revisions, once the revision is deleted it won’t be re-uploaded. If the revision is the latest revision then the Uploader will re-upload the revision again. This makes it quick and easy to troubleshoot an upload issue or test different settings.
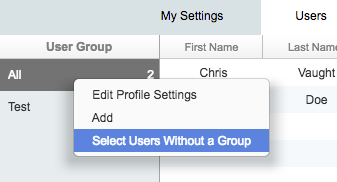
Select Users not in a Group
If you are actively using User Groups to control User settings then often times it would be useful to determine which users don’t belong to any Groups. You can now do this by right clicking on the “All” User Group and selecting the option “Select Users Without a Group.” You can then scroll through the list of Users and each User not in a group will be selected such that they are easy to identify.
As you can see, it has been a busy few months adding new features and capabilities to Flatter Files. If you have any questions or enhancement requests, please do not hesitate to contact us at [email protected].
Flatter Files continues to add new features on a regular basis based on customer feedback. Small improvements are made weekly and quite regularly very significant enhancements are made that greatly enhance Flatter Files as a whole. Lots of new stuff has been added since the last update. Below is a quick summary of the most recent updates.
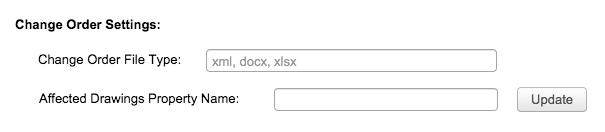
Change Orders
If you are uploading Change Orders to Flatter Files, then you can now connect the Change Orders to the Drawings. This will result in searches for a Change Order number returning both the Change Order and the Drawings referenced by the Change Order. In addition, searches for the Drawing number will result in both the Drawing and the related Change Order.
Configuration is completed from within your Company Settings. Details on how to configure can be found in the documentation. If you are updating an existing account with Drawings and Change Orders already uploaded, then only new Change Orders will be properly linked. If you would like to link existing Change Orders, then either increment the revision or delete the existing Change Order such that the Flatter Files Uploader re-uploads the Change Order.
BOM Table Export
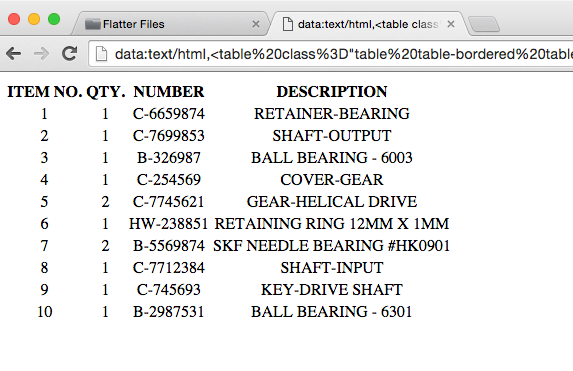
Flatter Files now support extracting BOM and Cut List Tables from your SOLIDWORKS drawings. If enabled, each table contained in the drawing will be exported to a CSV file that can easily be downloaded or viewed. Enabling this functionality can be done in the same manner that Generic CAD files are enabled. In addition, to the existing options such as STEP, IGES and many others there is a new type called CSV of BOM. Enabling the CSV of BOM option will create and upload the CSV file for each BOM or Cut List table contained in the drawing.
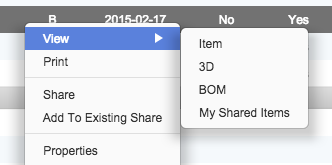
Once the CSV files have been uploaded, they can easily be downloaded in the same manner that the Generic CAD files can be downloaded. In addition, they can be viewed directly by simply right clicking on the item, displaying the View submenu and selecting the option titled BOM as shown in the image above. This will open a new tab with the resulting table view shown below.
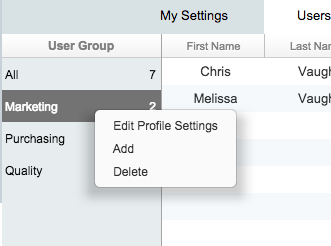
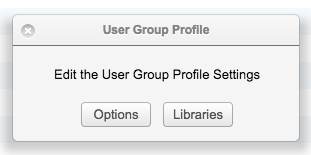
User Group Profile Settings
User Group functionality has been expanded such that User Groups can now be used to assign settings to a User. The User settings for a User Group can be applied to any User, even Users that are not part of the User Group. This provides tremendous flexibility and makes it infinitely easier to update large groups of users by simply modifying the User Settings for the User Group instead of having to modify each individual User’s unique settings. Details on how to manage User Group Profile Settings can be found here in the documentation.
Local Exports
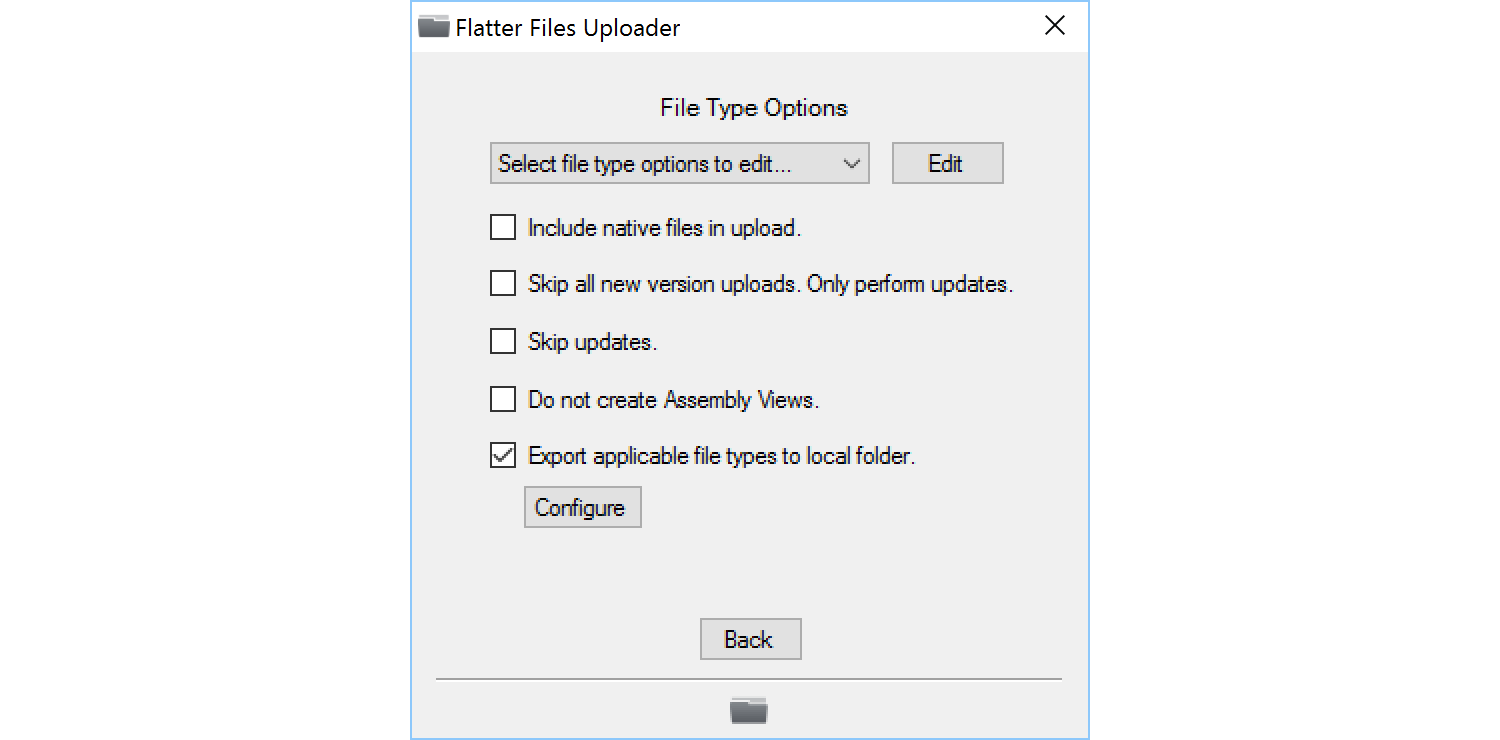
The Flatter Files Uploader now includes an additional file type option that allows you to specify if you would like to copy specific files being uploaded to a local folder. Once you have enabled the option, then you must specify the file types to export and the folder to export the files to.
Keep in mind, only file types being uploaded to Flatter Files will be possible to save locally. Consider a scenario where you have configured native source DXF files to be uploaded and native source SOLIDWORKS files. In addition, you have selected SOLIDWORKS files to also have a DXF file uploaded. If you then entered DXF to be exported locally, then each native DXF file will be exported locally and each created DXF file from the SW source file will be exported locally. This results in a DXF file for each item uploaded to Flatter Files. In addition, if you entered a STEP file to be exported locally but didn’t specify that the SW files should have a STEP file created then there won’t be any STEP files exported since none exist.
Annotations Video
We recently created a new video that highlights the ability to annotate drawings in Flatter Files. This video specifically highlights the new ability to send an annotated drawing directly to a specific user or users. The video is shown below.
As you can tell from this post, we believe in continuous improvement and listen closely to what our customers need. Feel free to let us know what you think of these updates and if you have any questions or enhancement requests, please do not hesitate to contact us at [email protected].
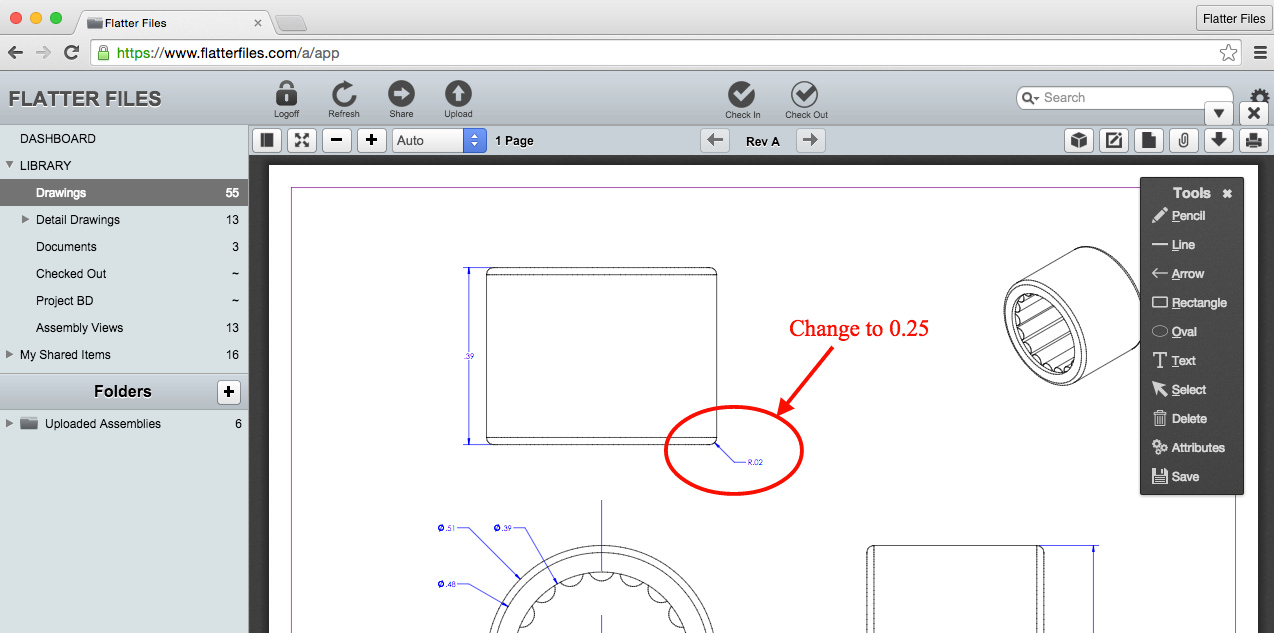
Flatter Files has been updated to support the creation of annotations directly from within the Web Application. Thus, you can now mark up your drawings and documents directly on any desktop or laptop computer without any additional software. This greatly enhances the ability to collect feedback and review design documents.
Marking up a drawing from within the Web Application couldn’t be simpler. To get started, click the Annotation button and select the option Create Annotation. This will display a Toolbar with various annotation types. Use the Toolbar to complete the mark up and then click Save at the bottom of the Toolbar. A save dialog window will appear with additional options. When you click Submit the annotation will be saved.
For more details, please check out the corresponding documentation.
In addition, if you have any questions or need help, please do not hesitate to contact us at [email protected].