
Assembly Views are collections of individual drawings. Often a single drawing does not contain all of the information necessary to convey the intended design. Therefore, to communicate your design and corresponding changes, you must ensure everyone has all of the drawings needed and also ensure the latest version of each drawing is being used. Assembly Views simplify this process by creating a hierarchy collection of the individual drawings needed using the latest drawing revision. This is the key advantage to Assembly Views, they auto update any time any of the individual drawings or documents contained with the Assembly View are modified.
There are two types of Assembly Views. The first type is an Uploaded Assembly View. This is an automatically generated assembly view that uses the assembly structure contained within the solid model. Uploaded Assemblies are extremely powerful because they don’t require manual creation and the hierarchy stays up to date as the hierarchy of the model changes. Uploaded Assembly Views work with solid modeling CAD packages. Currently Inventor and SolidWorks supported solid model CAD packages in Flatter Files. The second type of Assembly Views are Manual Assembly Views. This is where you drag and drop individual drawings as necessary to create the hierarchy desired.
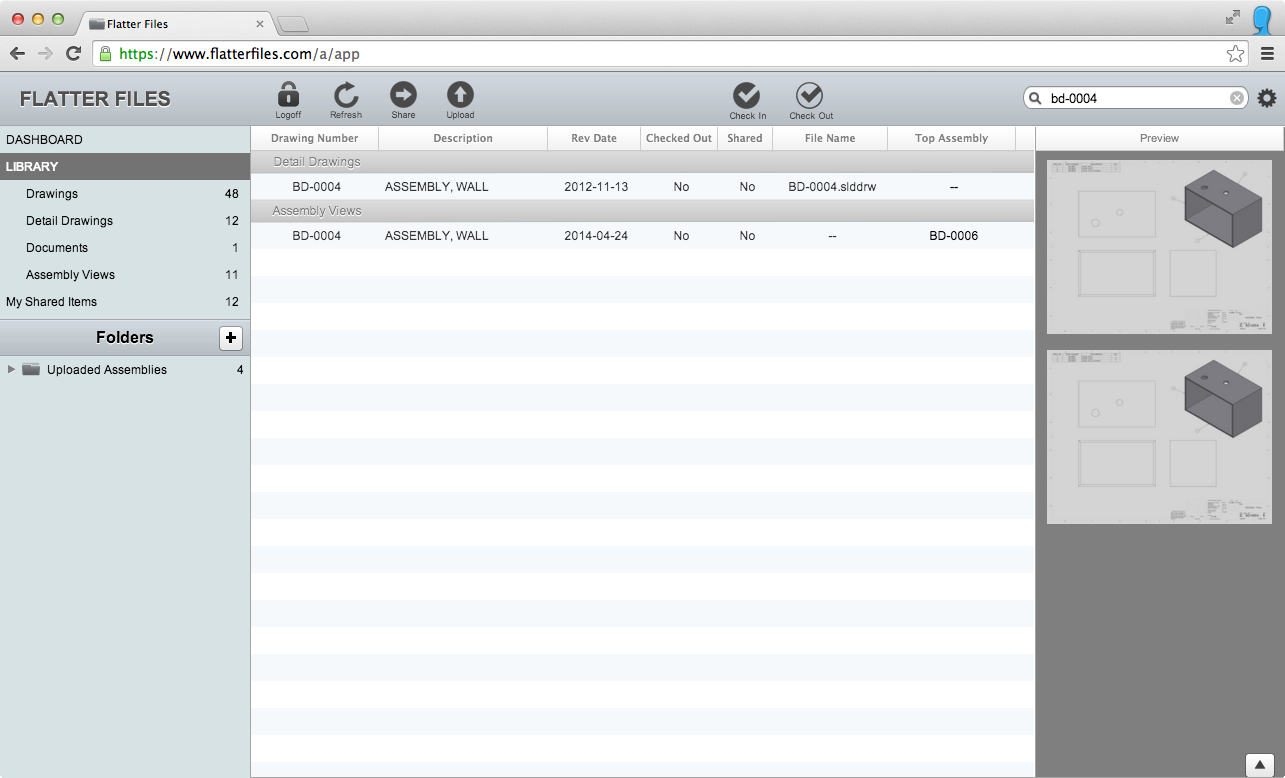
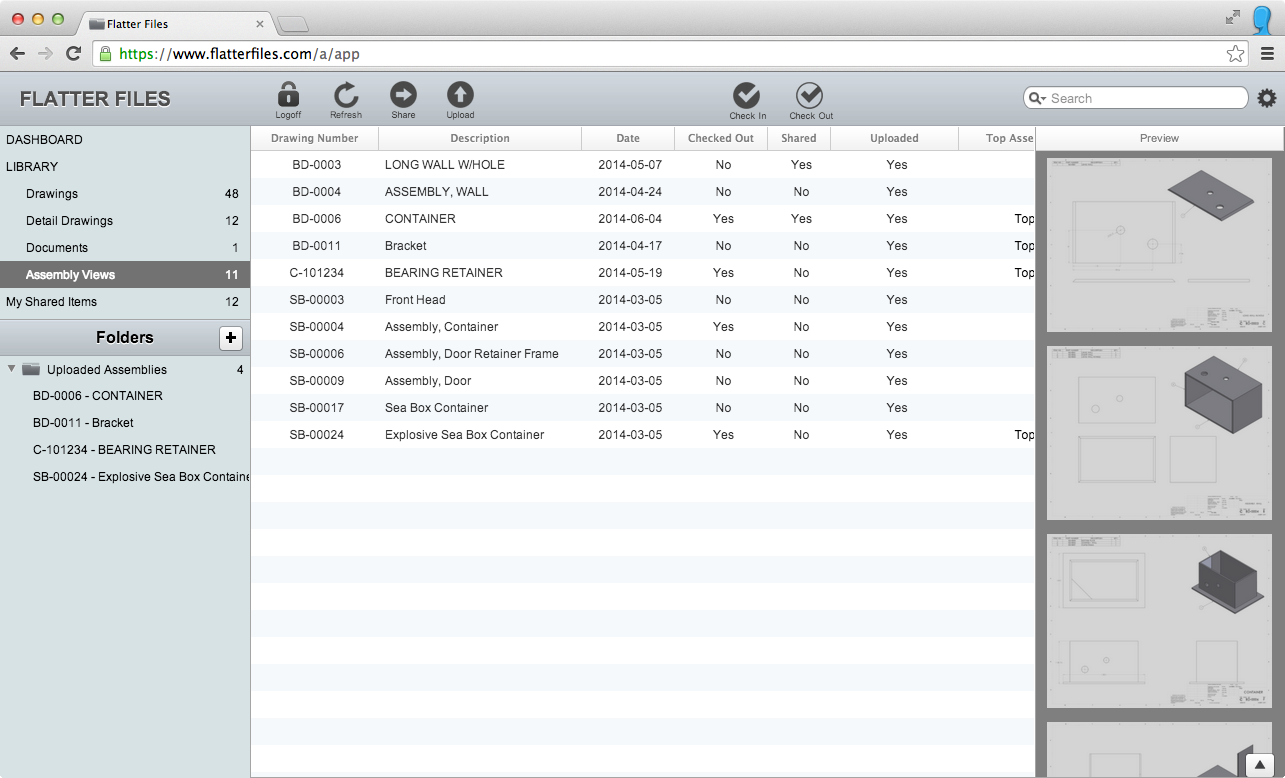
Viewing an Assembly View is as simple as viewing a drawing. Search queries also search for Assembly Views. Search results contain a separate section called “Assembly Views” for the items returned that are an Assembly View. When an Assembly View is returned, the top level drawing that was used to create the Assembly View will also be returned since the drawings have similar properties. The image below shows a search result for a drawing number that also returns an Assembly View. At first glance, this may appear to be duplicate items but the first item is just the single drawing for this assembly part. The second item is the Assembly View which not only contains the drawing for the assembly part but also the drawings for all of the items contained within this particular assembly. As you can see, the second item is grouped under the header “Assembly Views” making it clear which item is a drawing and which is an Assembly View. To view the Assembly View, just double-click on it and it will be rendered in the browser in the same manner as drawings are displayed.
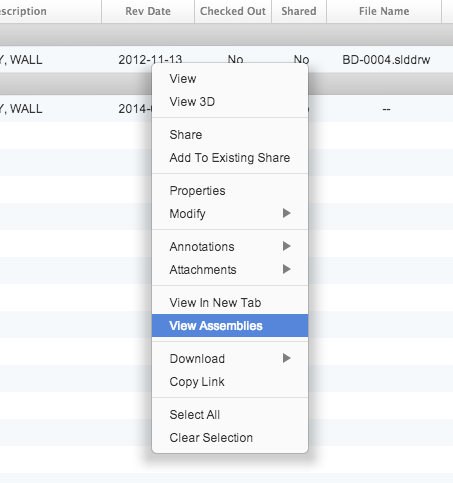
If the search result returns many drawings and you weren’t sure where the Assembly View was located, right-click on any drawing and select the option “View Assemblies” which will return a listing of any Assembly Views for this particular item.
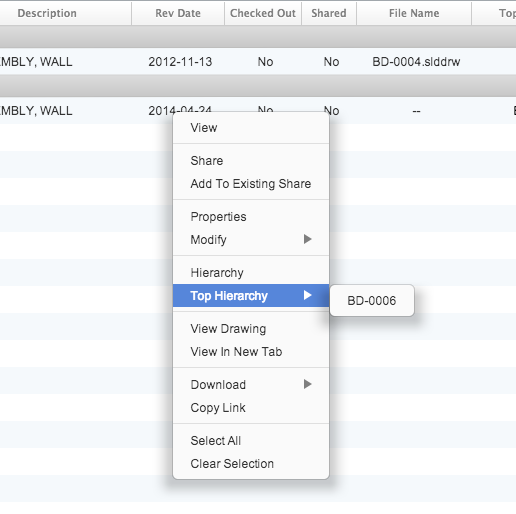
The associated hierarchy for any Assembly View can be viewed. Right-click on the Assembly View and there will be two related options. The first option is “Hierarchy” and the second is “Top Hierarchy.” An Assembly View is created for top assemblies and sub assemblies. Sub assemblies can be contained within multiple top assemblies. Thus, the “Top Hierarchy” option displays a submenu which can contain multiple top Assembly Views. The hierarchy corresponds to the individual drawings that are contained within the Assembly View.
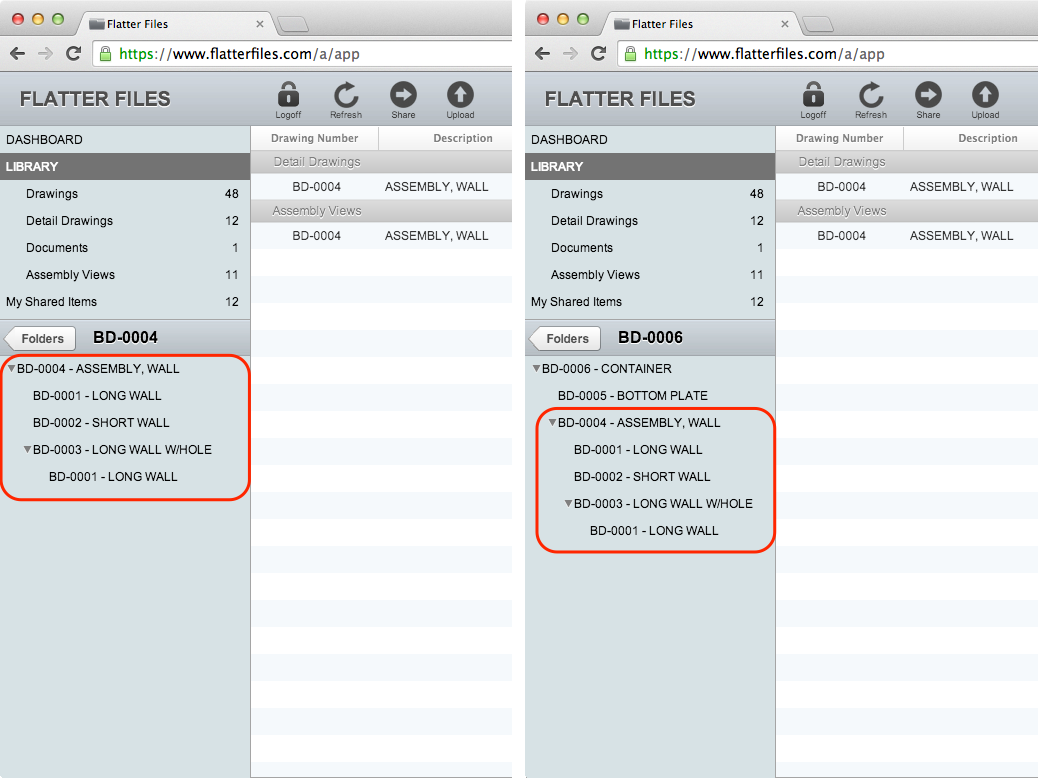
Selecting the option “Hierarchy” for the Assembly View will display it’s associated model hierarchy (bill of materials) on the left-hand side of the web application. The left-hand side of the image below shows the resulting hierarchy surrounded by a red annotation. Selecting the option “Top Hierarchy” will display the corresponding top model hierarchy for the item which will also contain the hierarchy for the specific Assembly View’s hierarchy since it is a sub assembly. This is shown in the image below on the right-hand side. The corresponding item’s sub assembly hierarchy is highlighted with red annotation for clarity.
Assembly Views will display in your search results but they can also be browsed from within the Assembly View library. On the left-hand side of the web application under Library, click on the “Assembly Views” option. This will load a listing of the Assembly Views. This will include both top level Assembly Views as well as all of your sub level Assembly Views.
When viewing the hierarchy for the Assembly Views in the Hierarchy section, the hierarchy was being displayed in the Folders view. The Folders view of each Assembly View can be accessed directly. The Folders view is located in the bottom two-thirds of the left hand side of the web application. The size of the Folders view can be adjusted by placing the cursor at the top edge of the view (right above the title “Folders”) and dragging in the desired direction.
The Folders only contain top level Assembly Views. To view the associated hierarchy, click on the Assembly View. This displays the hierarchy and you can view the Assembly View by clicking anywhere on the hierarchy. Once the PDF is loaded into the viewer, you can navigate within the PDF by clicking on any of the items within the hierarchy.
Your account can contain as many Folders as you would like. Administrator and Creator accounts have the option to add additional Folders by clicking on the plus button. This will automatically add a folder called “New Folder.” To rename a Folder, right-click on the folder and select the “Rename” option.
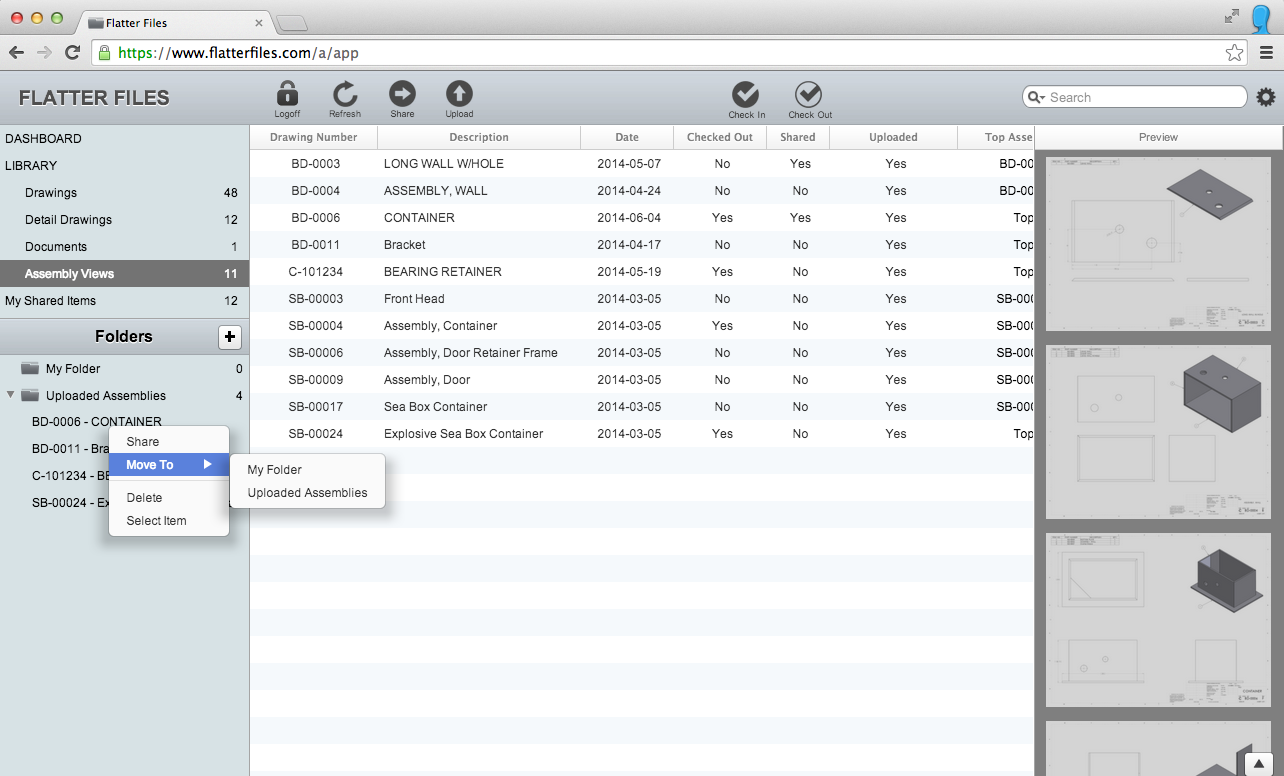
The top level Assembly Views can be organized into various Folders. To change the Folder for a top level assembly, right-click on the item and there is a “Move To” option, which will display the list of Folders. Select the Folder that you would like to move the Assembly View into. Once again, this functionality is only available for Administrator and Creator accounts. Also keep in mind that the Folders and the contents of each are company wide such that everyone will see the same Folders with the same contents.
There are two ways for the Assembly Views to be created. If you are using Inventor or SolidWorks then the Assembly Views are automatically created when you perform an upload. If you are not using Inventor or SolidWorks and would like to manually create a few Assembly Views, refer to the manual section below.
Assembly Views are created automatically for Inventor and SolidWorks because both are solid modeling CAD packages. When drawings for these CAD packages are uploaded, the appropriate model hierarchy data is also uploaded to Flatter Files. Flatter Files then processes the data and creates the Assembly Views. The hierarchy data is automatically shown in Flatter Files, but the actual Assembly View isn’t created or updated unless all of the drawings within the Assembly View are checked in. Thus, if you are viewing an Assembly View and the item is checked out, the Assembly View is not currently updated with the latest versions of all of the drawings.
Many of your models in Inventor and SolidWorks contain models that do not also correspond with specific drawings. This is common for purchased parts, for example, where you download the model but there is no need for a corresponding drawing since it is purchased from a vendor. In this scenario, Flatter Files creates a Placeholder within the hierarchy. This Placeholder does not affect the resulting Assembly View. But it allows you to drag and drop an existing drawing or document that has been uploaded onto the Placeholder to update the Assemble View to contain this item. Thus, if you have documentation for the purchased item that you would like to include this is a handy way to facilitate it.
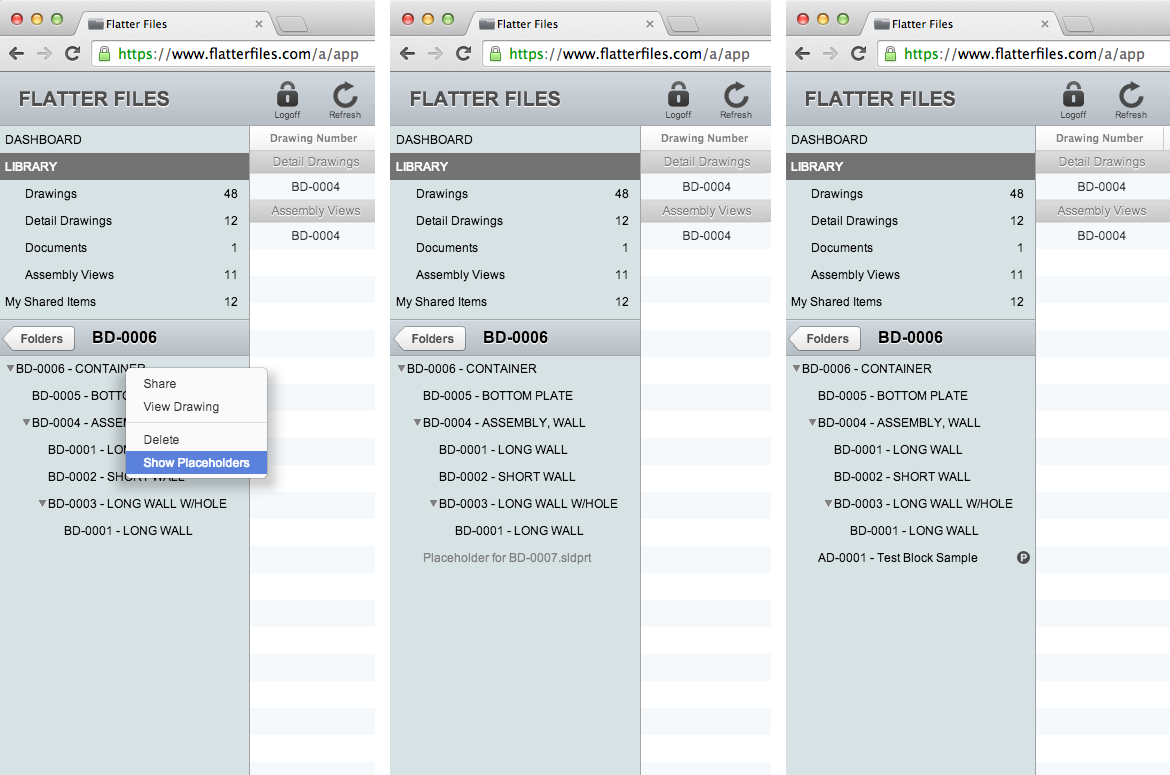
The image below shows the three steps for adding an item to the placeholder. While viewing the hierarchy, right-click on the top level and select the option “Show Placeholders”. This will reload the hierarchy. Grey text is shown at the location of the placeholder within the hierarchy that reads “Placeholder for —filename—”. To add an item, locate the drawing or document by searching for it or browsing to it and then drag the table entry onto the grey placeholder text. The right-hand side of the image below shows the resulting hierarchy. As you can see, this item is denoted with a small P icon to indicate that the Assembly View contains this placeholder. To remove the item, right-click on the placeholder and select “Delete”.
Assembly Views can be created manually by Administrator and Creator user types. To create a new Assembly View, drag and drop an existing drawing or document into a Folder. This creates a top level Assembly View. To add drawings or documents to the hierarchy of this Assembly View, click on the top level Assembly View and then drag and drop additional items to create the hierarchy. If you drop an item onto an item within the hierarchy, it will add a level to the hierarchy and the item that you dropped it onto will also become a sub Assembly View. You can repeat this process many times. This is best explained by watching the video below. The video illustrates first creating a new folder, renaming the folder, and then creating an Assembly View.