
Flatter Files supports the creation and organization of Annotations. When you are viewing a drawing on any device or computer and you see a mistake or want to make an addition to a drawing, you can immediately add it directly to the pdf from within Flatter Files. The annotated drawing is then uploaded to Flatter Files and is available for viewing. In addition, specific users within your company can receive an email notification when an annotation is created. This makes it quick and easy for viewers to add annotations that are easily accessible by the appropriate technical staff.
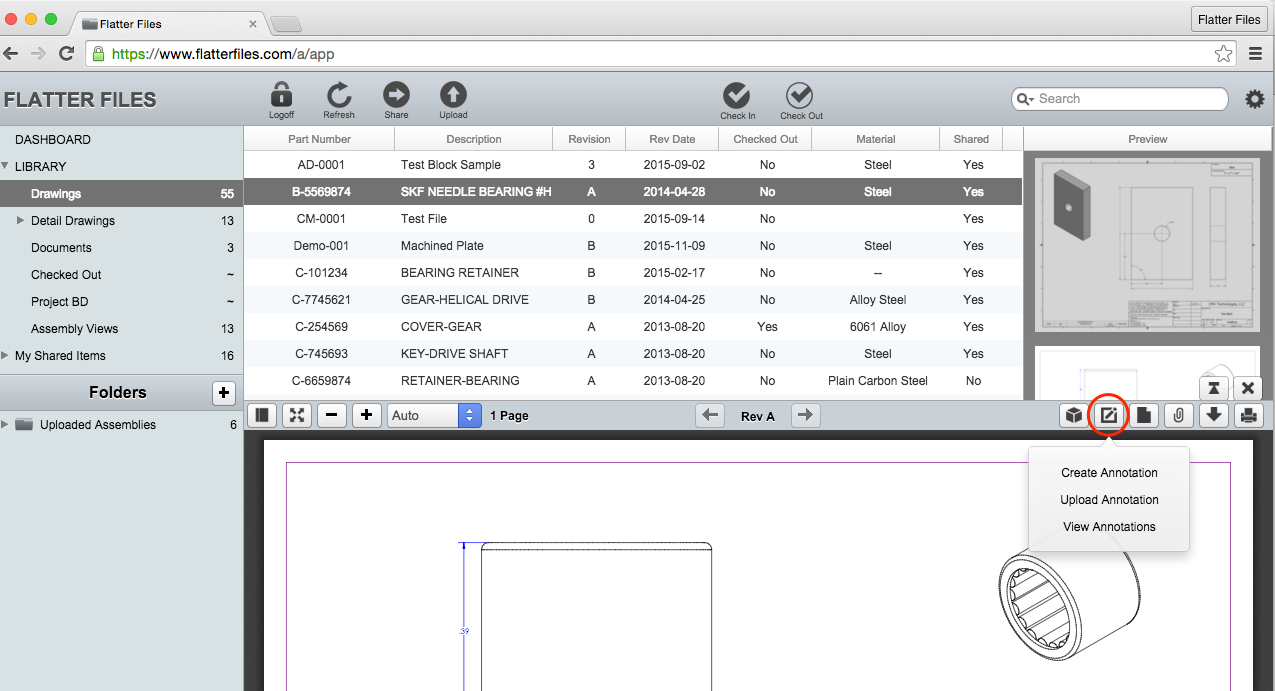
Annotated pdfs can be created directly from within the web application. When you are viewing a drawing in the web application, simply click the annotation button near the top right of the pdf viewer. You will be presented with a minimum of two options, Create Annotation and Upload Annotation. If the current drawing contains an annotation that you can access, then a third option to View Annotations will also be included. The image below shows the three options and the PDF Viewer’s annotation button is circled in red.
To create an Annotation, simply click the Create Annotation option. This will display the Annotation Toolbar. The toolbar includes all of the options for creating annotations within the web app. Select the desired Annotation type and simply draw on the PDF. The Toolbar and a resulting example annotation is shown below.
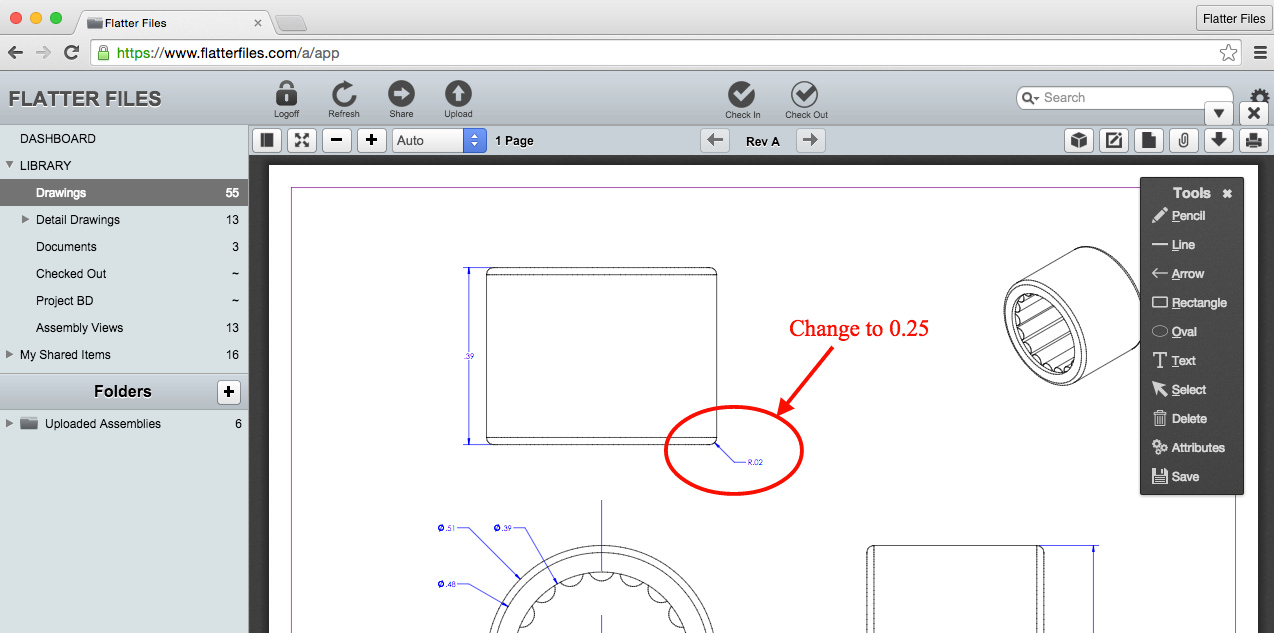
The Toolbar supports many shortcuts. Each of the primary drawing commands can be invoked using Alt plus the first letter of the command. For example, to start an Arrow use Alt + A. When using the Rectangle or Oval command, hold down Ctrl while creating the shape to lock the aspect ratio to 1 and thus create a square or circle. You can also hold down Ctrl to create horizontal or vertical lines. In addition, undo is supported via Ctrl + Z.
Once the PDF has been marked up appropriately to convey the requested change, click the Save button at the bottom of the Annotation Toolbar. This will process the current Annotations and then display a dialog. The dialog is shown in the image below.
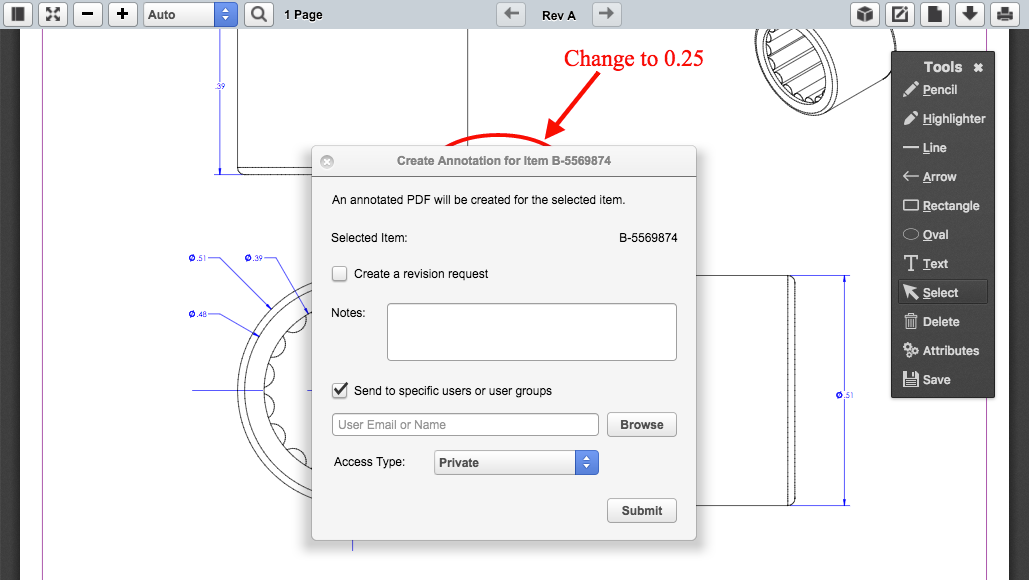
The dialog allows you to enter additional notes and either select whether you want an additional revision request notification created to track the progress or if you would like to send the annotation to a specific user. The revision request option won’t be displayed if your company has disabled the revision request capability. If you select the option to send to a specific user or user group, then you can click the browse button to select the users or groups.
When sending annotations to specific users or user groups, annotations have three Access Types that you can choose from when creating the annotation. The types are Private, Default and Public. A Private annotation is only accessible by the creator of the annotation and the selected users and user groups. A Default annotation is accessible to all users that have the user setting Show Default Annotations enabled by the Administrator in addition to the selected users and user groups. A Public annotation is available for viewing by a all internal users. Once the annotation is created, the access type can be changed.
In addition to creating the Annotation directly within the web app, you can also upload an existing PDF as an annotation. Simply click the Annotation button and then select Upload Annotation.
To create an annotation in the iOS application or Android application you simply add the annotations and then save the annotated drawing to Flatter Files. This is shown in the video below using an iPad. The same functionality is available for the iPhone and Android devices.
Annotations that are uploaded to Flatter Files are available for viewing on all of your devices. In addition, an email can be configured to be sent to specific users notifying them that an annotation has been created. This provides a great way to facilitate potential changes directly from the viewers of the drawing to the appropriate engineering or design team for review. The first video below highlights how to view the annotation on the web application and the second video demonstrates how to view the same annotation on your Android device.
Anyone within your company can create annotations but only users that are granted access can view the resulting annotations. This is simply a user setting that can easily be enabled for any users that need access. Documentation for this setting is discussed in the options section of the Users documentation page.
When an annotation is created, it is likely that specific people within your organization should be notified so they can determine how to handle the proposed annotation. Flatter Files allows you to set specific email addresses to receive this notification. Details regarding this can be found on the Company Settings documentation page.