
When a Flatter Files account is created, the user signing up for the account also creates a user account. This user account is automatically configured as an Administrator account. User accounts exist within your company account such that each person within your organization that needs access to Flatter Files can have their own unique password for accessing Flatter Files.
There are three types of user accounts. They are Viewer, Creator, and Administrator.
The Viewer user account type only has read only access. Viewers cannot add, delete or edit content. Viewers also cannot check in or check out items. However, Viewer accounts can be made a reviewer and you can enable or disable access to the content which will discussed in the User Management section below. Viewer accounts also cannot log into the Uploader application since they aren’t allowed to upload content. It is advisable that as many user accounts as possible be Viewer accounts since a Viewer account can not accidentally edit or delete content.
The Creator user account type adds the ability to add, delete and edit content to the capabilities of the Viewer user type. Thus, your engineering and design staff likely should be given Creator accounts. Although, if you are skipping the review process and only using a single computer to upload content, it is advisable to also give the engineering and design staff Viewer user accounts.
An administrator account has full access to modify the account settings as well as add, edit and delete user accounts. An account can contain multiple Administrator accounts.
User management can only be accessed by Administrator accounts. For user controlled settings, please the see Settings section below.
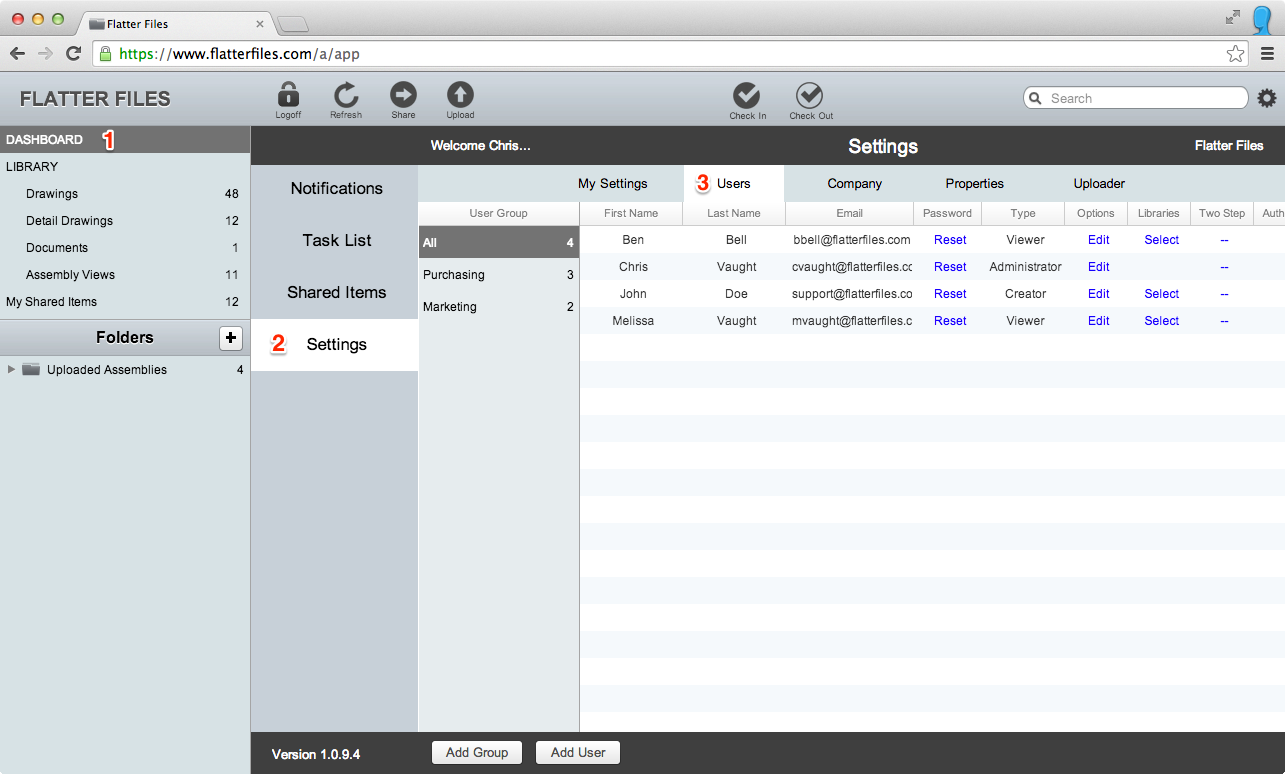
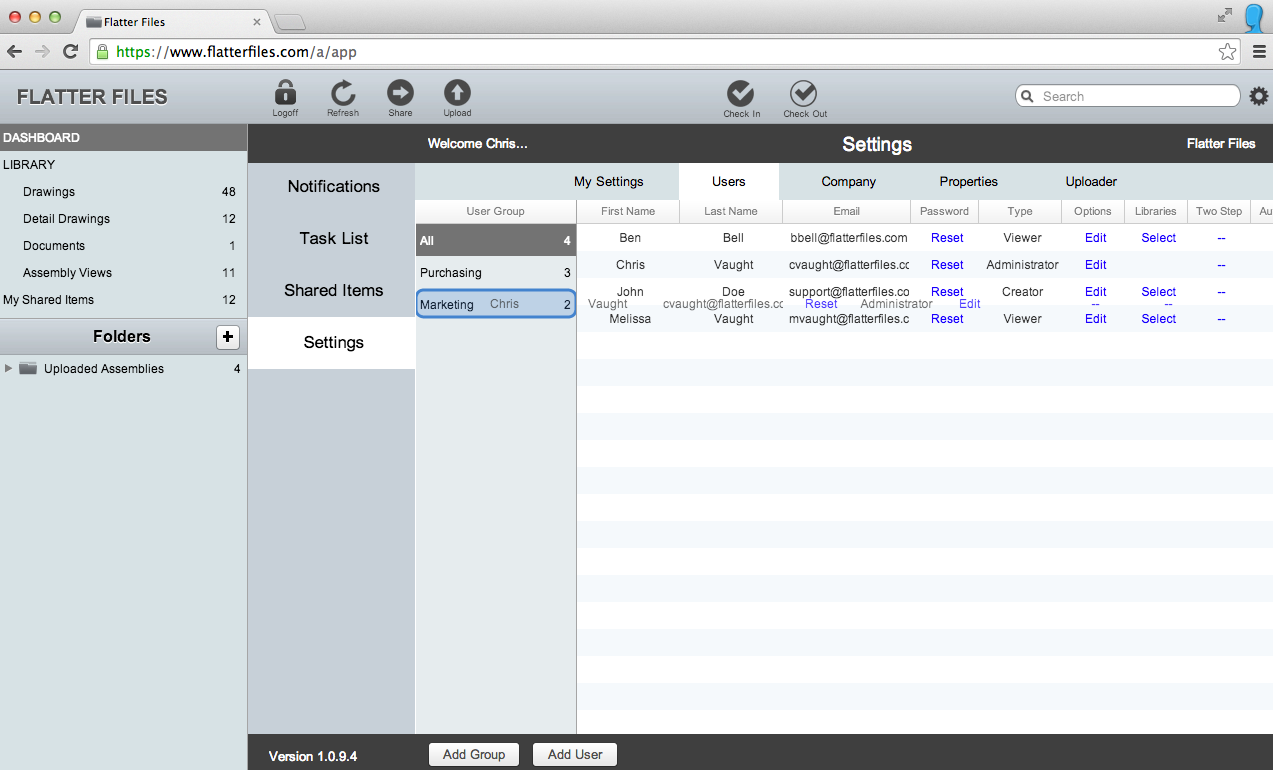
To view the current user list, click on Dashboard at the top left of the web application. The Dashboard contains four options along the left-hand side, click on the Settings option. Along the top of the Settings page, click on Users. This will display a list of the current users for your account. The image below numbers the clicks required to get to the list of Users page and the resulting list of Users.
To add a User to your account, click the Add User button at the bottom of the view when viewing the User List or right-click on an existing user and select the Add option. Both methods will result in the following window being displayed.
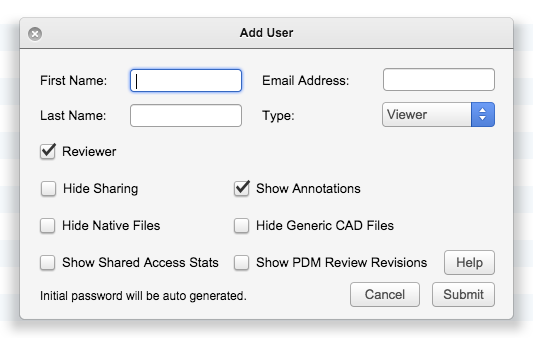
Enter a first name, last name and email address for the user you would like to add to your account. By default the User Type is Viewer. Click the drop down menu to change the type, if necessary. The initial password for this user account will be automatically generated by the server as a random set of characters. The user will receive an email with the password and explanation regarding the user account. The user can change their password when they login. There are also 6 user specific options that can be toggled on or off. These options will be discussed in the next section. To finish adding the new user to your account, click the submit button.
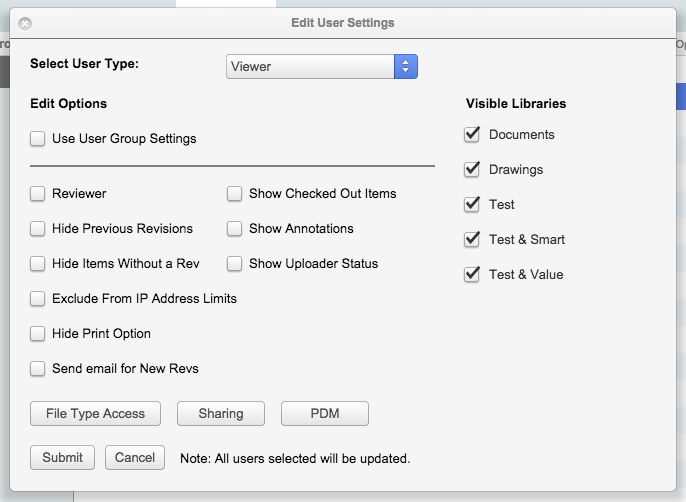
Each user account that you add to your account can be customized with regard to their capabilities through multiple options. When adding a new User, the majority of the options are available for you to enable or disable. Once the user has been created, all of the options can be accessed by clicking the blue Edit link under the Options column as shown in the image below.
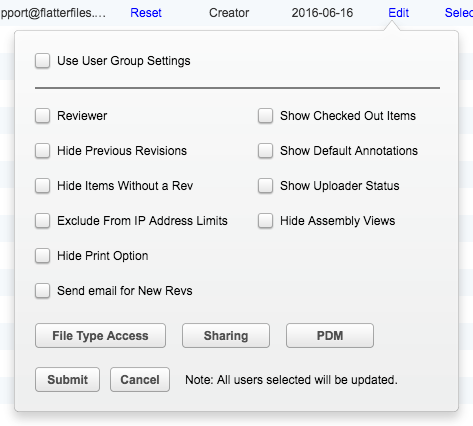
The first option at the top of the Options dialog is the ability to apply User Groups settings for the user instead of using unique settings for the user. This allows you to only have to manage the user settings for the groups instead of each unique user. Details on how to access the settings of a User Group can be found in the User Group Profile Settings section below. When a user is added to a User Group a prompt will appear asking if the User Group settings should be applied to the user. In addition, any user can have any User Group settings as their settings without even actually being part of the User Group. Simply, enable the option to use User Group Settings and then select the appropriate User Group that you would like to use as the settings.
If you are using the built in Review Process in Flatter Files, then the first option shown in the left column will determine if the User is considered a Reviewer or not. In addition, if you have elected to hide the Dashboard from your Viewers then you can provide access to the Dashboard to specific users by making them a reviewer.
Each item can contain multiple revisions. To block access to previous revisions such that the user can only view the latest revision enable the option “Hide Previous Revisions.” In addition to this per user setting, there is also a company setting that allows you to block previous revisions for all viewers.
Drawings can be uploaded that have yet to have a revision created on Flatter Files. In this case, they aren’t accessible to view since the item currently only consists of property data. If you would like to block these items that don’t have a revision from the user then enable the option “Hide Items Without a Rev.”
“Exclude from IP Address Limits” applies if you have limited access to specific IP addresses and would like to exclude specific users from these limits. By enabling this option, the specific user will be able to access Flatter Files from any IP address.
Enable the “Hide Print Option” to remove the default print button that is displayed when viewing the drawing. Once this setting is enabled, a Configure button will be displayed. Click this button to limit the hiding of the print button to specific Libraries.
The last setting, “Send Email for New Revs” allows you to specify that the user will receive an email anytime a new revision is created. Once this setting is enabled, a Configure button will be displayed. Click this button to limit the new revision emails to specific Libraries.
If your account setting block access to checked out items, then you can enable access to the checked out items for select users by enabling the “Show Checked Out Items” option. It is typically advantageous for the technical staff to have access to the checked out items.
Users can create annotations, but only specific users can view the annotations that are created. To enable access to the annotations for the user, enable the option “Show Annotations” option.
All Administrators and Creators can see the Uploader Status page within the Dashboard. In addition, Viewers can be enabled to see the Uploader Status page by enabling the “Show Uploader Status” option.
Assembly Views are a very useful time saving feature that allows you to easily access all of the items associated with a specific Assembly. Sometimes though you might prefer to block access to the Assembly Views from a specific User. To do so, simply enable the “Hide Assembly Views” option.
The image below shows the dialog that is displayed with you click the File Type Access button. This dialog allows you to control which files the user can access. The first option “Hide PDF Downloads” allows you to block the ability to download the PDF files.
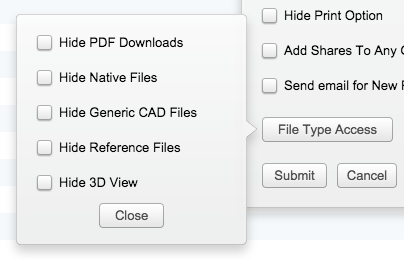
If you have uploaded the native files using the Uploader app, access to these files can be blocked by enabling the “Hide Native Files” option. The Uploader app also can be configured to create and upload generic CAD files such as IGES, STEP, STL, DXF, and DWG files. If you would like to block access to these files then enable the “Hide Generic CAD Files” option. If you are using Flatter Files along with EPDM, then you can enable uploading of EPDM Reference files. The option “Hide Reference Files” allows you to block access to these files. The last file type setting is the ability to hide the 3D view.
The image below shows the dialog that is displayed with you click the Sharing button. This dialog allows you to specify the external sharing settings for each user. By default, users can share items externally. To block access to the ability to share an item externally, check the option “Hide Sharing.”
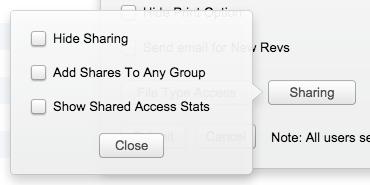
The next setting, “Add Shares To Any Group” allows the user to add a share to user groups that they aren’t a member of. If this is not enabled, then when the user creates a share they can only add it to the user groups that they have been added to.
To enable a user to have access to the shared access stats, enable the option “Show Shared Access Stats”. This will allow the user to see the Access stats option when they right-click on a shared item. This option isn’t applicable if you have blocked the ability to share items from the user.
The last user option settings are only applicable if you have integrated Flatter Files with a PDM System. Click the PDM button display the applicable settings. The first option, “Show PDM Review Revisions” applies to accounts that are uploading PDM Review Revisions. By default, users cannot access the Review Revisions unless this option is enabled.
The second option allows you to designate that for this user, PDM Review Revisions should be included in new rev emails. Typically a PDM Review Revision isn’t considered a full revision so it isn’t included but if you enable this option then it will be included.
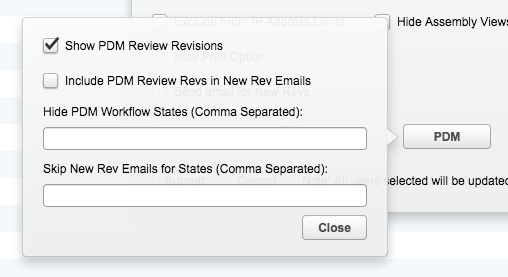
Flatter Files includes the ability to upload PDM revisions from different states. For example, you might upload a revision created in Prototype state and then another revision created in Production state. To upload both, you simply enter both states as a final workflow state to upload. The problem with this is that if you upload Prototype revisions, you would not want to provide access to those specific revisions to many of your viewers or external vendors. But if that same item contains Production revisions, the users that have Prototype revisions hidden should still be able to see the Production revisions and not the Prototype revisions. Flatter Files supports the ability to do this by allowing you to hide specific PDM state revisions from specific users.
Hiding PDM states from specific users can be accomplished by simply entering the PDM states that should be hidden from the user in PDM user settings shown above. Details on how to hide specific states from the external shared links can be found in the Company Settings documentation.
In addition to hiding specific states, the last option allows you to specify specific states that should not result in a new rev email being sent.
Your content can be organized into Libraries. Please see the Libraries sections for details. Although browsing through Libraries to locate a drawing isn’t as efficient as using Search, Libraries do allow you to control the content that the individual users can access. To control which Libraries a User can access, click the blue Select link for the specific User. This will display the current list of libraries.
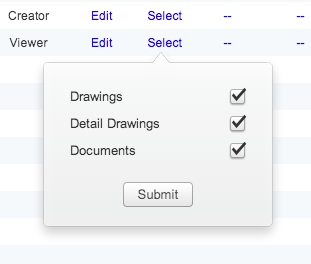
Enable or disable the Library access you would like to change and then click submit to save the changes. The Assembly Views Library can not be blocked. Instead, only Assembly Views will be shown that the user can access based on being able to access the top level drawing contained within the Assembly View.
The user type, options and the Library Access settings can be edited for multiple users at once. Simply select the appropriate users, right click the selection, and select Edit from the menu. This will display the window shown below.
The first option allows you to change the user type for the selected users. If the selected users currently consist of multiple user types then the type will be denoted as “Varies.” If you leave the type as “Varies” then the type will not be modified for any of the selected users. When finished editing the settings for the user, click Submit and the changes will be saved. Keep in mind that all users that were initially selected will now have these matching settings no matter what the setting was for each user originally.
The initial settings that are displayed in the multi user edit window are equal to the current settings of the actual user that was right clicked from within the selection. So if you select multiple users and each have different settings, the settings shown are equal to the user that was actually right clicked. If you then click Submit without changing anything else, the settings for all of the users originally selected will now match the user that was right clicked. Also note that the library settings do not apply to Administrator user types. Thus, if an admin user is included in the multi user edit and the user type is not changed the library settings are ignored for that user.
To delete a user from your account, right-click on the user and select the “Delete” option. You will then be prompted to confirm the deletion. Confirm the deletion to proceed or cancel if you decide not to delete the user.
Users need the ability to change their password and control a few other settings. At the top right of the web application, just to the right of the search box, is an icon that looks like a gear. Click this button and a view will appear that contains the settings that a user can change that effect their own account.
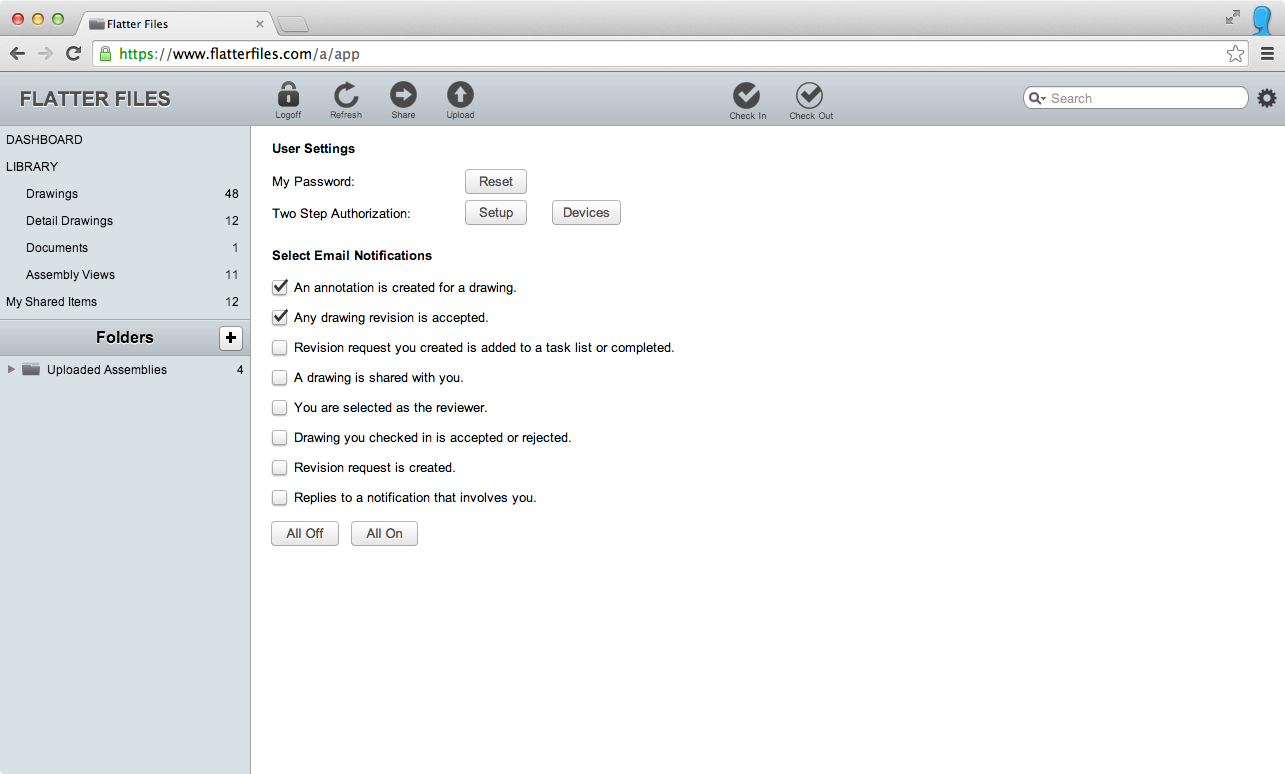
The first setting is the ability to reset your password. To change your password, click the Reset button and then enter your new password.
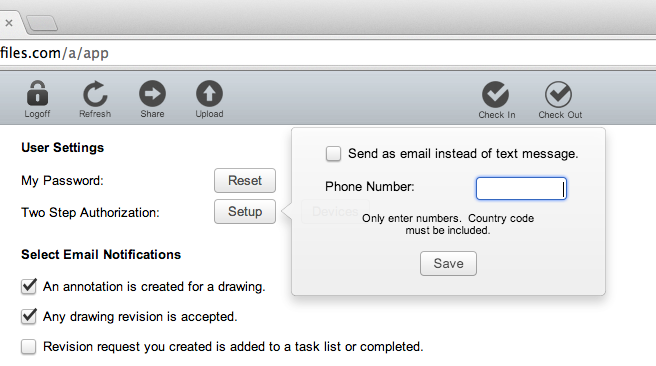
The next two settings only apply if the company has enabled two step authentication. Two step authentication requires devices to be authenticated the first time you login to each new device. Each existing device must also be authenticated every 30 days. Authenticating a device consists of entering a random code that is sent to you after you successfully enter your email address and password. You must enter this random code before you can access your account. To setup how the authenticating of new devices is handled, click the setup button. The setup button will display the dialog shown in the image below. You must select how you want to receive the authentication codes. If this hasn’t been setup when the user tries to login for the first time, then they will automatically be required to setup the code delivery.
To see a list of all of the devices that have been authenticated, click the Devices button. This list contains details regarding each device that has been authenticated. To remove a device from being authenticated, right-click the device and click Delete. For details on how to enable two step authentication, check out the two step authentication section on the Company Settings page.

The Users within your account can be organized into User Groups. By default, Users are part of the “All” user group, which is the only group that exists when your account is initially created.
The purpose of User Groups is to allow Users to share the Share Links that they create with other users so multiple people can edit the link. For example, the purchasing department might create a Shared Link for each vendor. This link contains the drawings for that vendor and it is possible that multiple email addresses are included on the link. Both the drawing contained and the email addresses might change for that vendor over time. Thus, it is important to be able to keep the link up to date. Instead of the initial person that created the link being the only User that can edit it, User Groups allow the originator to add it to the group such that everyone in the group has full editing capabilities. In this case, the purchasing agent that created the link would add it to the Purchasing User Group so everyone within that group will see the link in their “My Shared Items” library and be able to edit the link.
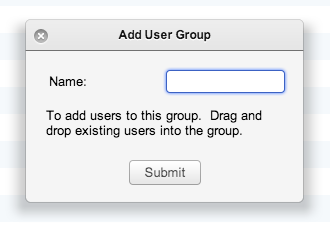
When viewing the list of users in the Dashboard > Settings > Users view, click the “Add Group” button. The window shown below will appear. Enter the User Group name and click Submit to add the user group.
Users can be added to multiple groups. To add a User to a new group, click and drag the User from the All User Group and drop the User onto the User Group that you would like to add the User too. The image below shows the User being dragged onto the new User Group before being dropped into the new User Group.
When you add a User to a User Group, a dialog will appear asking if you would like to apply the User Group Profile Settings to this User. If you select yes, then the User settings will be updated to match that groups profile settings. Details regarding how to edit the User Group Profile Settings can be found in the next section.
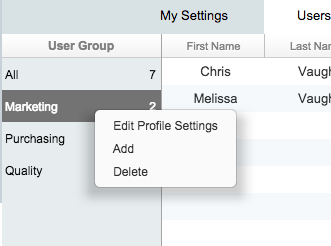
Each User Group has an associated set of user settings defined. This is known as the User Group Profile Settings. The user settings can be applied to any User, even Users that are not part of the User Group. To edit the User Group Profile Settings, right click on the User Group and select Edit Profile Settings. This will display a dialog that contains an Options button and a Libraries button. The right click menu and the dialog are shown in the images below.
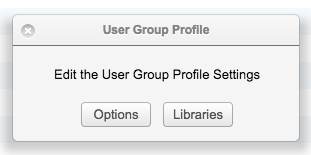
Click the Options button to display the User Options for the profile. Details regarding the various settings can be found in the earlier User Options section. Click the Libraries button to display the list of Libraries such that you can select which Libraries are accessible.