The first objective when implementing Flatter Files is to improve access to the drawing content users need to become more efficient. This section of the documentation will talk about specific details for accessing drawing content.
The properties contained within your drawings and documents are automatically uploaded to Flatter Files based on your account configuration. These properties can be viewed for any item by simply right-clicking on the item and selecting “Properties”. This will display a dialog with the property data for that specific. Properties for multiple items can be displayed similarly by simply first selecting multiple items and then right-clicking on one of the items.
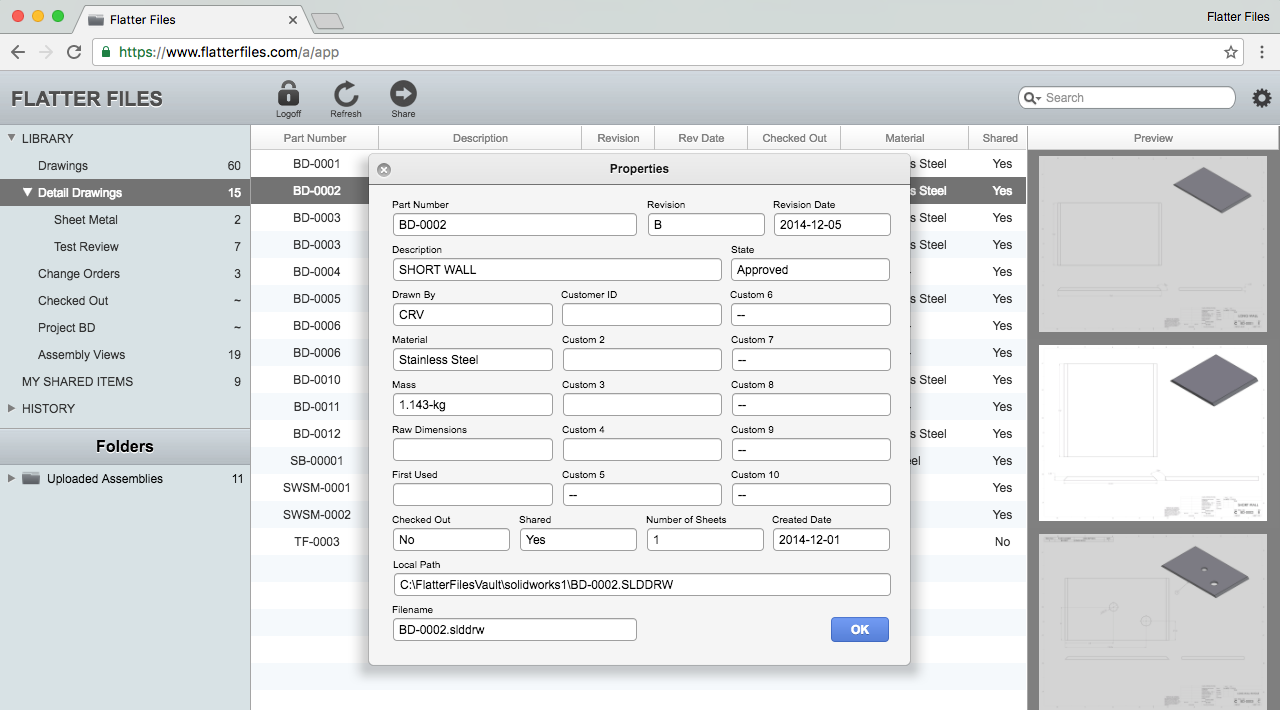
If your user account is an Administrator or Creator account, then you can also edit the property values. When viewing the properties, simply enter a new value and then click “OK” to submit the changes or cancel to discard the changes. Some of the properties that are displayed are not modifiable. For example, the date the drawing was created or if the drawing is checked out or checked in. These values are displayed, but the input box is not modifiable.
Modified properties on Flatter Files are not synced back to the native drawing or document file that was used to create the PDF. In addition, if you manually modify the property on Flatter Files, changes to that specific property value in the local native file will be ignored by the Uploader moving forward. Thus, it is highly recommended to modify the property values directly within the native file and then the Uploader will automatically update the file.
All of the property data that is uploaded for each item is searchable. If you know the part number, then finding a drawing is simple. Just type the part number in the search box, hit enter and the drawing will appear in the result. Often though you don’t know the part number and need to find the drawing in another manner. Flatter Files offers many options to help you find what you are looking. These features are listed below.
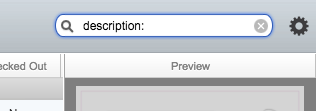
Searching by a specific property is often useful to reduce the number of items returned in a search. To make it easer to search by a specific property you can right click on any column name and the first option is “Search Property.” If you click this option the search box at the top right of the web application will be auto-filled with the query language necessary to search just this particular property. The cursor is also automatically placed such that you can just start typing the value you want to search that property by.
All search results are sortable by simply clicking on the column name that you want to sort by. If you click again the opposite sort will occur. Each time you sort a new search is actually occurring in the background.
If you would like to only search for items in a particular Library then simply navigate to the appropriate Library, enter your query in the normal search box and then instead of hitting enter on your keyboard, hold Ctrl while hitting enter. In addition, you can click the magnifying glass in the search box and select Search Library. Both options will search only the currently viewed library instead of all libraries.
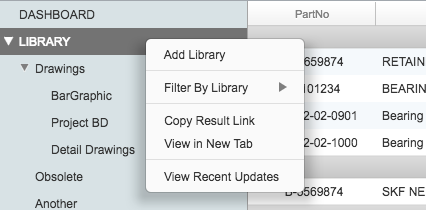
Sometimes you will search for an item and there will be items from multiple libraries. Flatter Files groups the items based on the library or libraries that contain them. To update the search to only include one of the groups, double click the grey library group bar as shown in the image below. This will perform a new search result that only includes items that matche the library entry. To undo the filtering, simply double click the grey library group bar again. In addition to double clicking, you can right click the library group bar and select Filter by Library or Clear Filter.

When a user first logs into Flatter Files, recently uploaded items are displayed. If at any point you would like to return to this search result, simply right click on “Library” in the left navigation table and select the last option “View Recent Updates.”
A descriptive search will typically result in quality results, but Flatter Files does support advanced search methods that should make finding your content even easier. The following are few of the advanced search features supported.
The part number field is indexed such that you do not have to match the entire value. If you know a portion of the part number, then the item will still be returned. For example, you may have a group of items with a part number that has a specific prefix. You can find all of those items by searching for that specific prefix.
Searches with multiple words require that the item contains both words to be returned. Add the keyword OR between each word if you want the results to contain any of the words. For example if you want the results to include any items that contain either plate or full, then the query would be the following:
plate OR full
Using the keyword NOT will limit the search results to only include items that don’t include a particular word. For example, if you want the items that contain plate, but don’t include any items that also contain the word steel, the query would be entered as:
plate NOT steel
Quotes force the search to only return items that match the words exactly as phrased in the query.
Limit the search to only match values in a specific field by entering the field name and then enter a colon followed by the value. For example, to search the description field for the value plate, enter the query:
description:plate
To search for all checked out items enter:
checkedout:yes
You can also abbreviate the field values to typical abbreviations. For example, description can be abbreviated to desc.
To search for a description that contains the word plate and is also checked out, the search would be entered as following:
desc:plate checkedout:yes
To return any items that have a revision since a specific date enter the following:
date > 2013-1-1
This will result in any items that have a revision date newer than January 1st, 2013. If you would like to search for any items that have a revision older than a specific date then the query would be:
date < 2013-1-1
The query above will return all items that have a date older than January 1st, 2013.
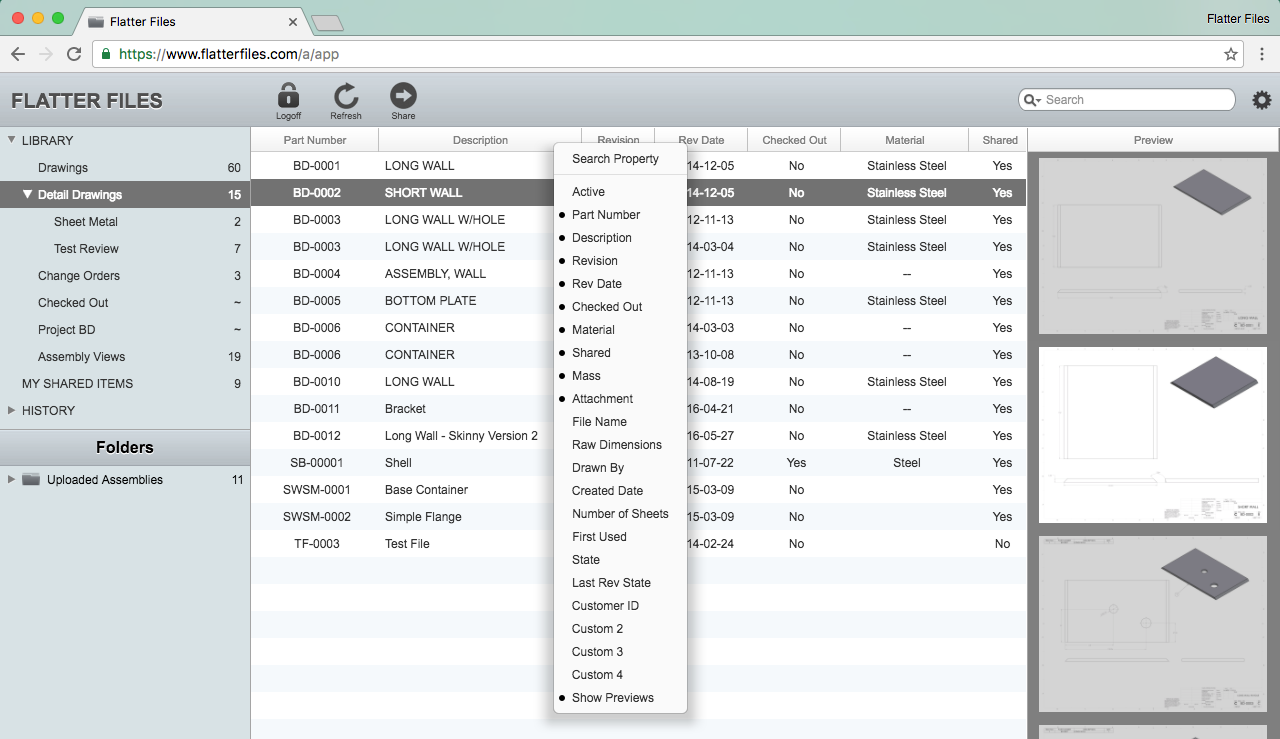
When viewing a list of items either in the search results or within the Library views, columns displaying specific properties for each item are displayed. The columns can be customized. Right-click in the header and then toggle any of the properties on or off to change which columns are displayed. The columns currently displayed are noted with a solid circle next to the name. The columns can also be reordered by dragging the column header. For each user, customized columns are maintained moving forward.
Sometimes you may want to view multiple drawings at the same time or view an item for an extended period of time while using the web application to do something else. For this scenario, you can easily open the item in a new tab. Right-click the item and select the option “Open in New Tab”. This will create a new tab in your browser and load the item. It will require you to manually login using your user account. Once you login instead of viewing the full web application the drawing will be displayed in the Flatter Files Viewer only. Thus, you still have full access to view previous revisions, upload annotations, view the highlighted version, etc.
The link that is used to load only the specific item in the Viewer can also be copied for the purpose of placing in another program or spreadsheet. To do this, right click on the item and select the option “Copy Link.” A dialog will appear that contains the link select such that you can simply press Ctrl+C on your keyboard to copy it. Optionally, you can right-click on the highlighted text and click the “Copy” option.
Depending on your account settings, you may have the option to download the PDF, the native files and/or the generic CAD formats that the item might include. For Assembly Views, you also can download the Bill of Materials as a CSV file. All of these can be downloaded via two methods. The first method is when viewing an item, the top right of the viewer includes a download button that consists of a down arrow.
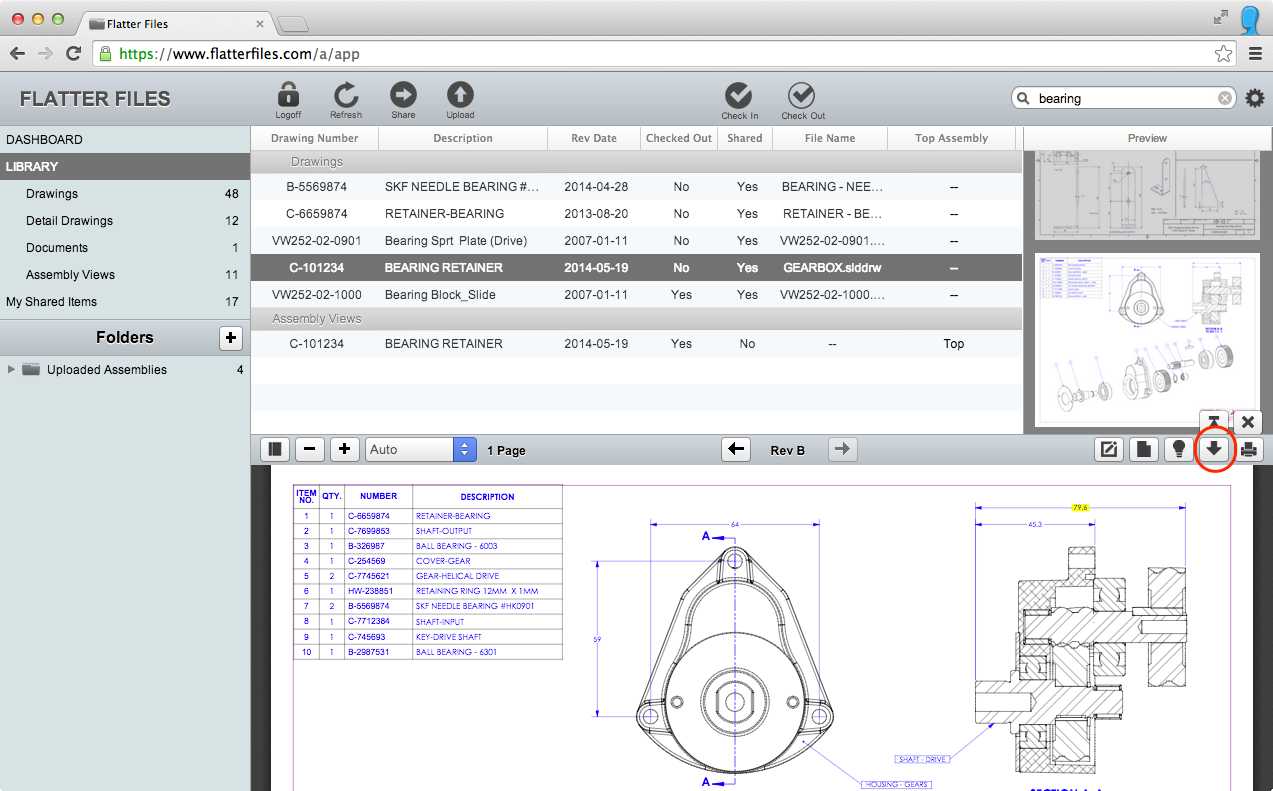
Clicking the download button will display a list of the items that can be downloaded for the item that is being viewed. Click the option and your download will begin.
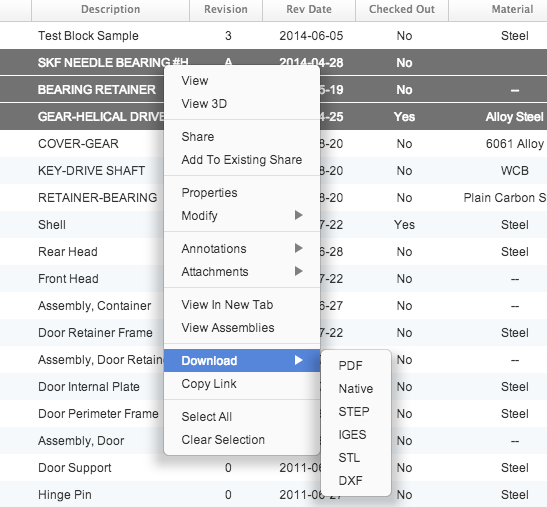
If you just need to download the item and not view it, right-click the item and select the “Download” option. The “Download” option displays a submenu with all of the items that can be downloaded for the right-clicked item. Click the item that you want to download.
Drawings for multiple items can be downloaded at once. You simply select multiple items by using either the shift or CTRL key and then right click on the selection to display the right click menu. Under the “Download” option, select the file type you would like to download. The file types shown correspond to the content that has been uploaded and the content the user can access. Once the file type is selected, the server will generate a zip file containing all of the items. The zip file is then automatically downloaded to your computer.
Attachments allow you to create a connection between two items. Any drawing or document can be attached to any other drawing or document. It is not a requirement that a document be attached to a drawing. For example, a drawing can be attached to a drawing. However, this is typically used when you have some type of specification or details that should be associated with a drawing and you would like to connect the two items together.
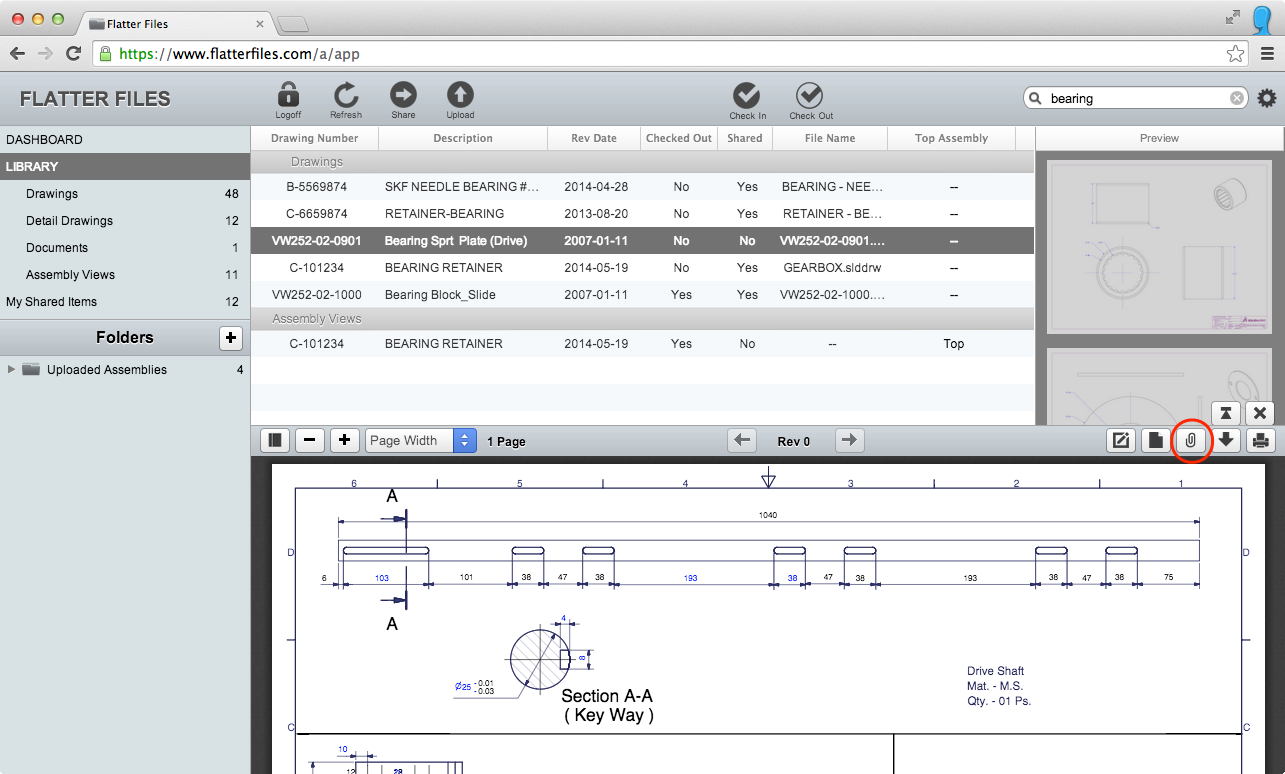
If an item that you are currently viewing contains an attachment, then the PDF Viewer will include a button that has a paper clip icon on it. This is shown in the image below. If you click the attachment button, a list of all of the attachments for the item being viewed will be displayed. Click the attachment if you would like to view it.
Administrator and Creator user accounts can create attachments. Right-click the item that you would like to add an attachment to. The “Attachment” option will display a submenu at which point you can select the “Add Attachment” option. This will display a message asking you to select the item that you would like to attach. The next item you click will automatically be added as an attachment unless you click the “Cancel” option next to the “Select Attachment” option. Once the attachment has been added, it can be deleted using the same right-click Attachment option.
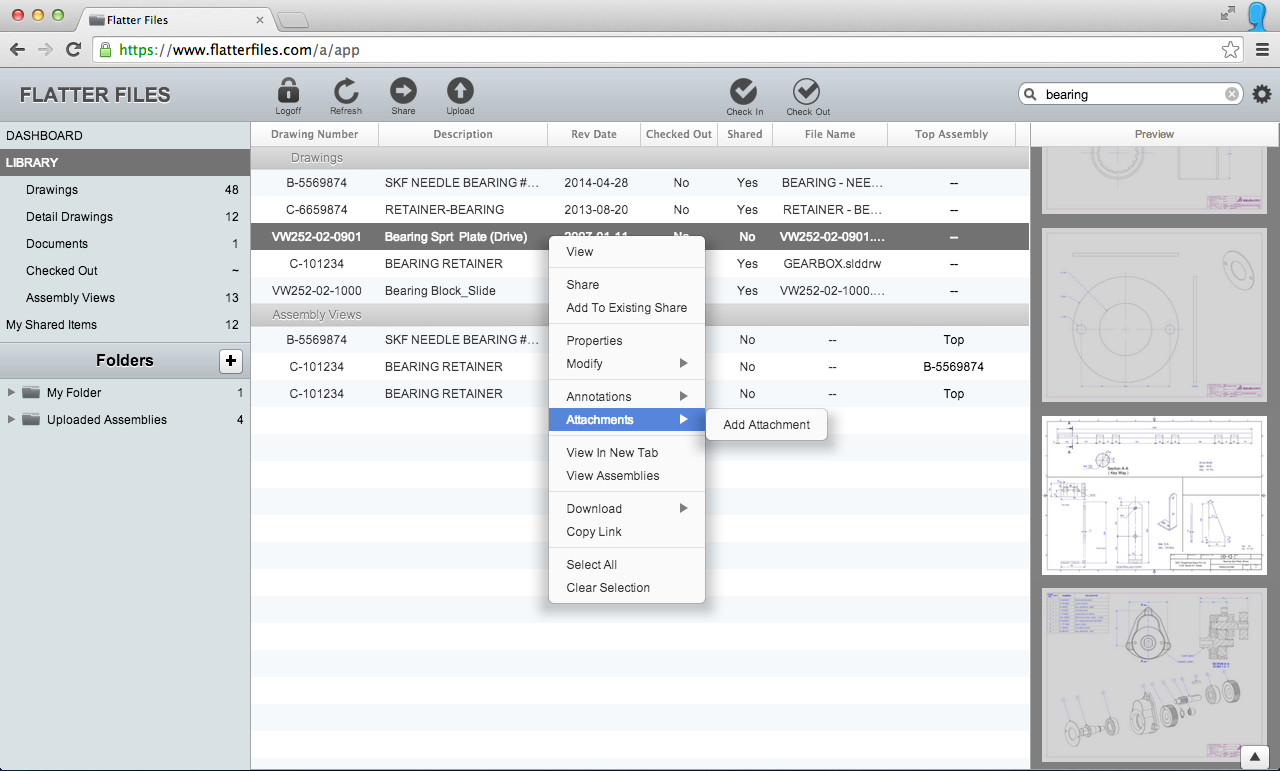
Flatter Files enables simple, frictionless digital access on all of your devices. That being said, often you still need to print the drawing or documentation. Initially, Flatter Files always simply used your browser to handle the printing of the PDF that is created and displayed by Flatter Files. Unfortunately, both Google Chrome and Mozilla Firefox have been found to not always accurately print the PDF that is displayed. For example, often times hidden lines (dashed lines) are not included in the resulting printed document when using Chrome. When using Firefox, layout issues are common. To remedy this issue, Flatter Files now allows you to use Adobe Reader to print when using Chrome or Firefox on Windows.
To add support for printing with Adobe Reader, a browser extension and lightweight application is required. Thus, when you click print in Flatter Files, the dialog below is shown asking if you would like to use Adobe Reader for printing.
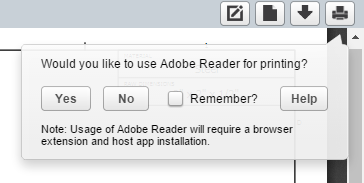
This dialog is only shown if you are using Chrome or Firefox on Windows. In addition, it is only shown if your company administrator has not required the usage of Adobe Reader for printing. If Adobe Reader is required then this dialog is skipped. If you click No in the dialog above then printing will continue to occur via the browser. The first time you click Yes the web application attempts to connect to the Flatter Files Extension. If the extension does not exist then a dialog will appear prompting you to download an installer. The dialog is shown below.
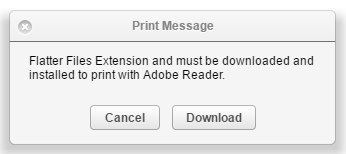
Once the installer has been downloaded. Simply run the installer and follow the instructions. After the installation is complete, return to Google Chrome at which point you should be prompted to enable the Flatter Files Extension by Chrome. If you are using Firefox then you must restart Firefox. Once Firefox is restarted you will be prompted to enable the extension. After enabling the extension, repeat the process of clicking Print in Flatter Files and telling the application to use Adobe Reader. Notice that you can have the web application remember your preference on whether or not to use Adobe Reader for Printing. Now that the extension is enabled the PDF will be opened in Adobe Reader with the Print dialog automatically shown.
The installer installs the Flatter Files Extension as well as a lightweight host application called Flatter Files Printer. Once installed, when you click Print the web application will communicate the item information to the extension which will then send that information to the host application. The host application will then download the PDF file locally into a temporary directory. The downloaded PDF is then automatically opened in Adobe Reader with the print dialog shown. Once the print dialog is completed the PDF will automatically be closed and deleted.
Currently, printing with Adobe Reader is only available for Chrome and Firefox on Windows. Microsoft Edge is in the process of implementing support for the Chrome Extension programming interface. Therefore, we do expect to offer this solution for Edge moving forward.
A history of everything the logged in user has searched for and viewed is available. Simply click the History option in the left side navigation table. This will display the search history shown below. The search history lists all of your recent searches with the most recent listed first. To perform the search again, simply double click the entry.
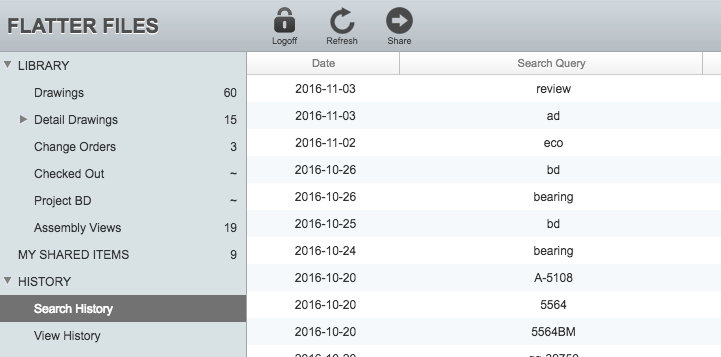
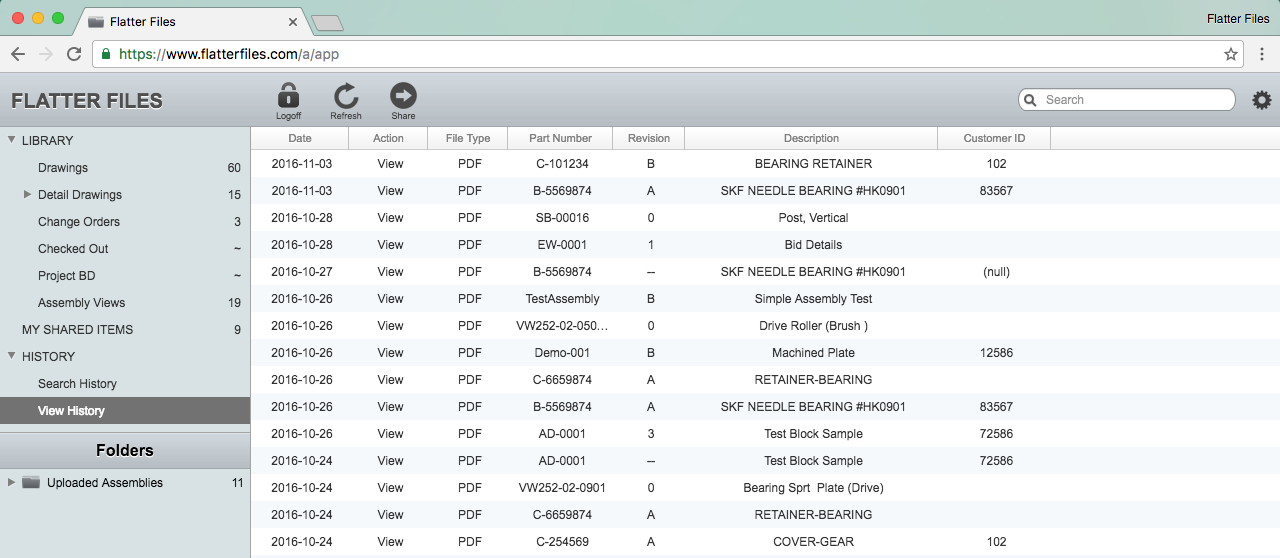
In addition to the search history, the view history for the logged in user is available as shown in the image below. This view history displays every item and revision you have recently viewed as well as files you have downloaded. To view the item in the corresponding Library, simply double click on the entry. This view history is also fully searchable using the normal search entry at the top right of the web application.
