Office 365 Single Sign On Tutorial
Flatter Files can be integrated with Office 365 such that users will login to Flatter Files by logging into their Office 365 account. This simplifies the management of passwords for users, improves security, and allows you to give bulk access to user groups in your Office 365 directory without having to manually create each individual user account in Flatter Files. When a new user logs into Flatter Files for the first time using Office 365, all existing Flatter Files Admin accounts will receive an email at which point the Admin can update the users settings as appropriate. If a user is removed from your Office 365 directory they will also automatically no longer be able to access Flatter Files.
In addition to Single Sign On integration, Office 365 can be used for sending emails such that the resulting emails come directly from the user’s Office 365 account which improves delivery of the emails and improves company branding. For details on how to send emails using Office 365 please visit this link.
Prerequisites:
- Administrator access to your Flatter Files account.
- Administrator access to your companies Office 365 account.
- An Administrator account that uses an email address for the login that is different from your companies email domain. Once your account is configured for Single Sign On through Office 365 you must login using this method if the user’s email matches the domain configured. Thus, if a mistake occurs then it is easy to get locked out of your account. To prevent this, manually add a gmail or other generic email address to your account as a admin until the process is completed and verified to work correctly.
- Send an email to [email protected] to let us know the domain you plan to use for your account. We must approve the domain usage by manually adding it to a list of acceptable domains that will be used for single sign on for the configuration to work.
1. Login to Office 365 and access the Office Admin Center
The first step is to sign in to Office 365 as an administrator such that you can enable Office 365 to work with Flatter Files. The steps below show you how to sign in and access the Office Admin Center.
- Go to office.com and click sign in.
- Login to access your Office 365 account with an Administrator user account.
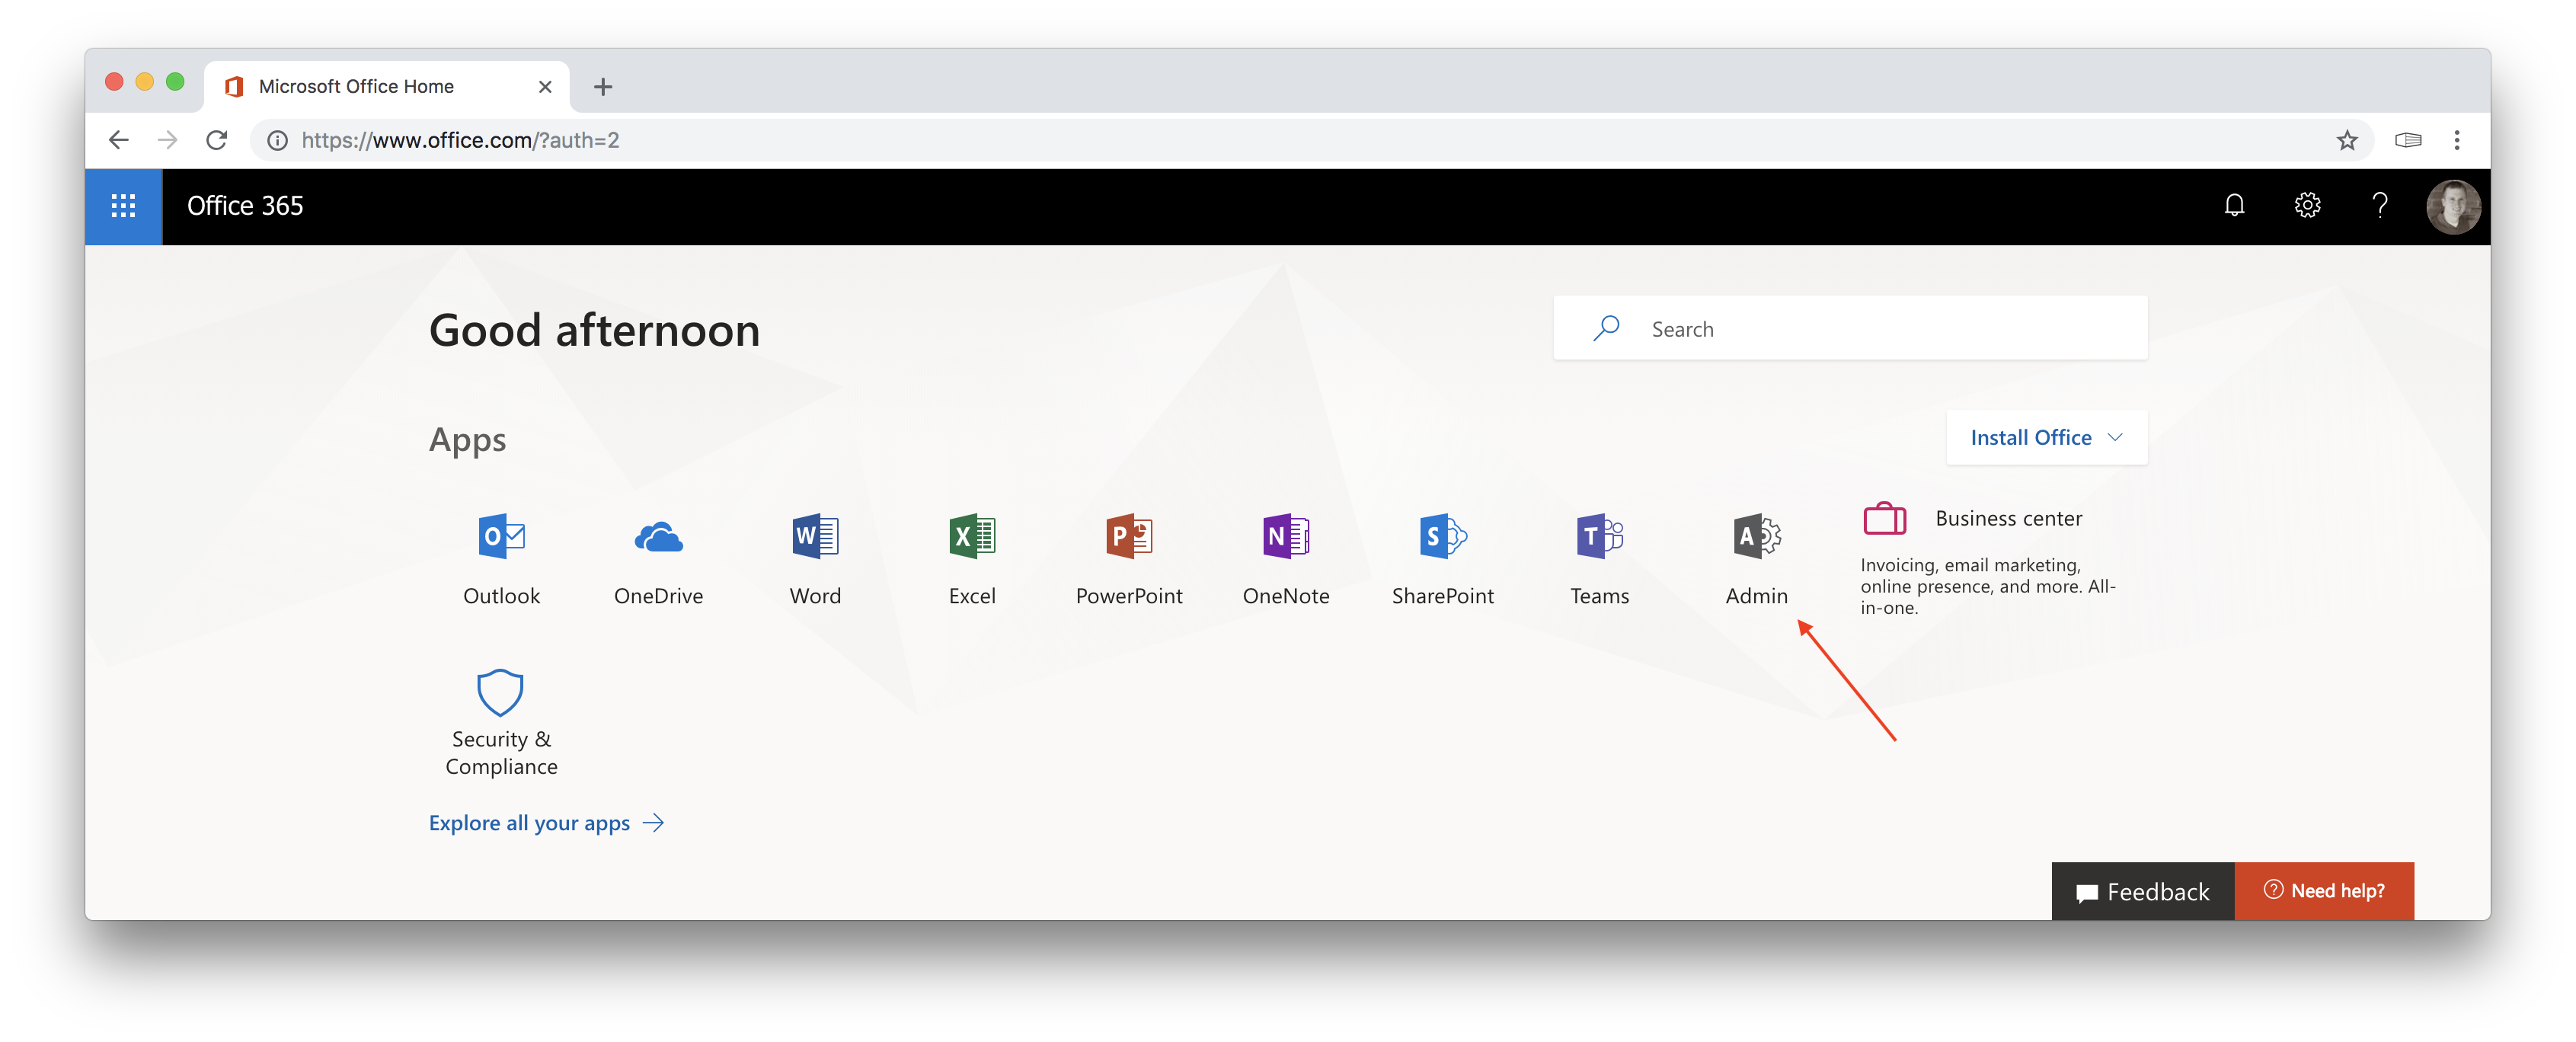
- Once logged in as an Administrator you should see something similar to the image below.
- Click the Admin tile which will take you to the Office Admin Center as shown below.
2. Access the Azure AD Admin Center
The Azure Active Directory Admin Center is where you will configure your online directory to be used by Flatter Files. Access this directory by following the instructions below.
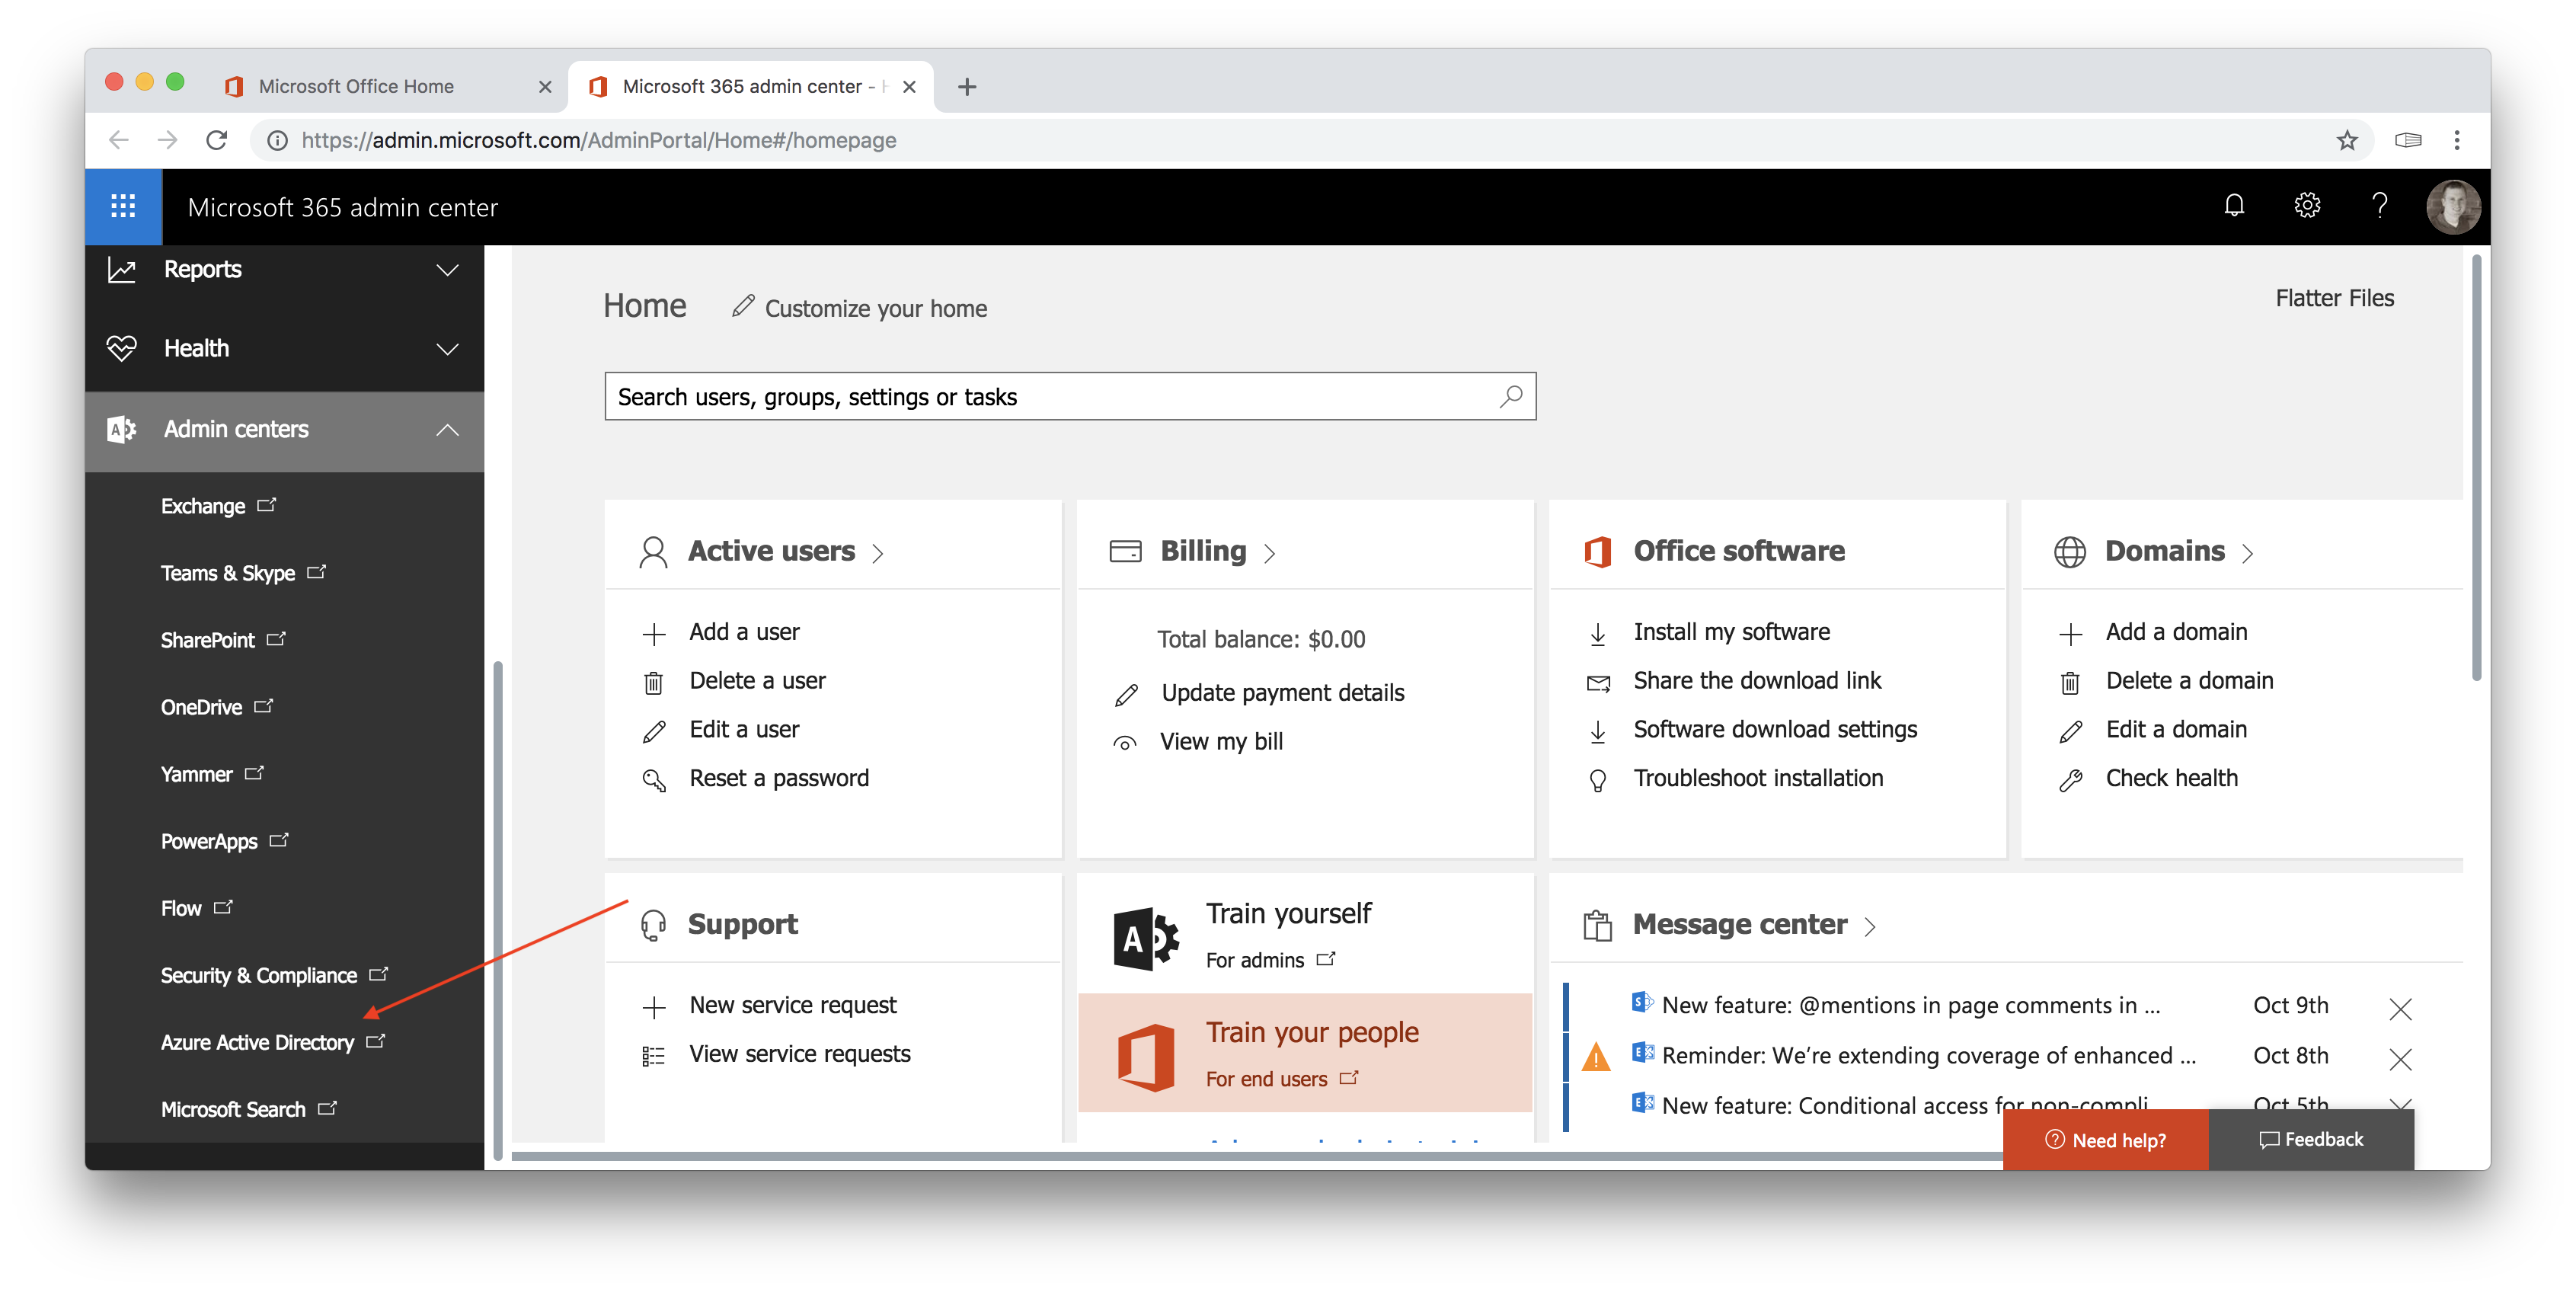
- From the Office Admin Center, expand the Admin Centers option on the left navigation menu.
- This will list all of the specific Admin Centers for the various Office 365 products.
- Click to navigate to the Azure AD Admin Center (as shown in the image above).
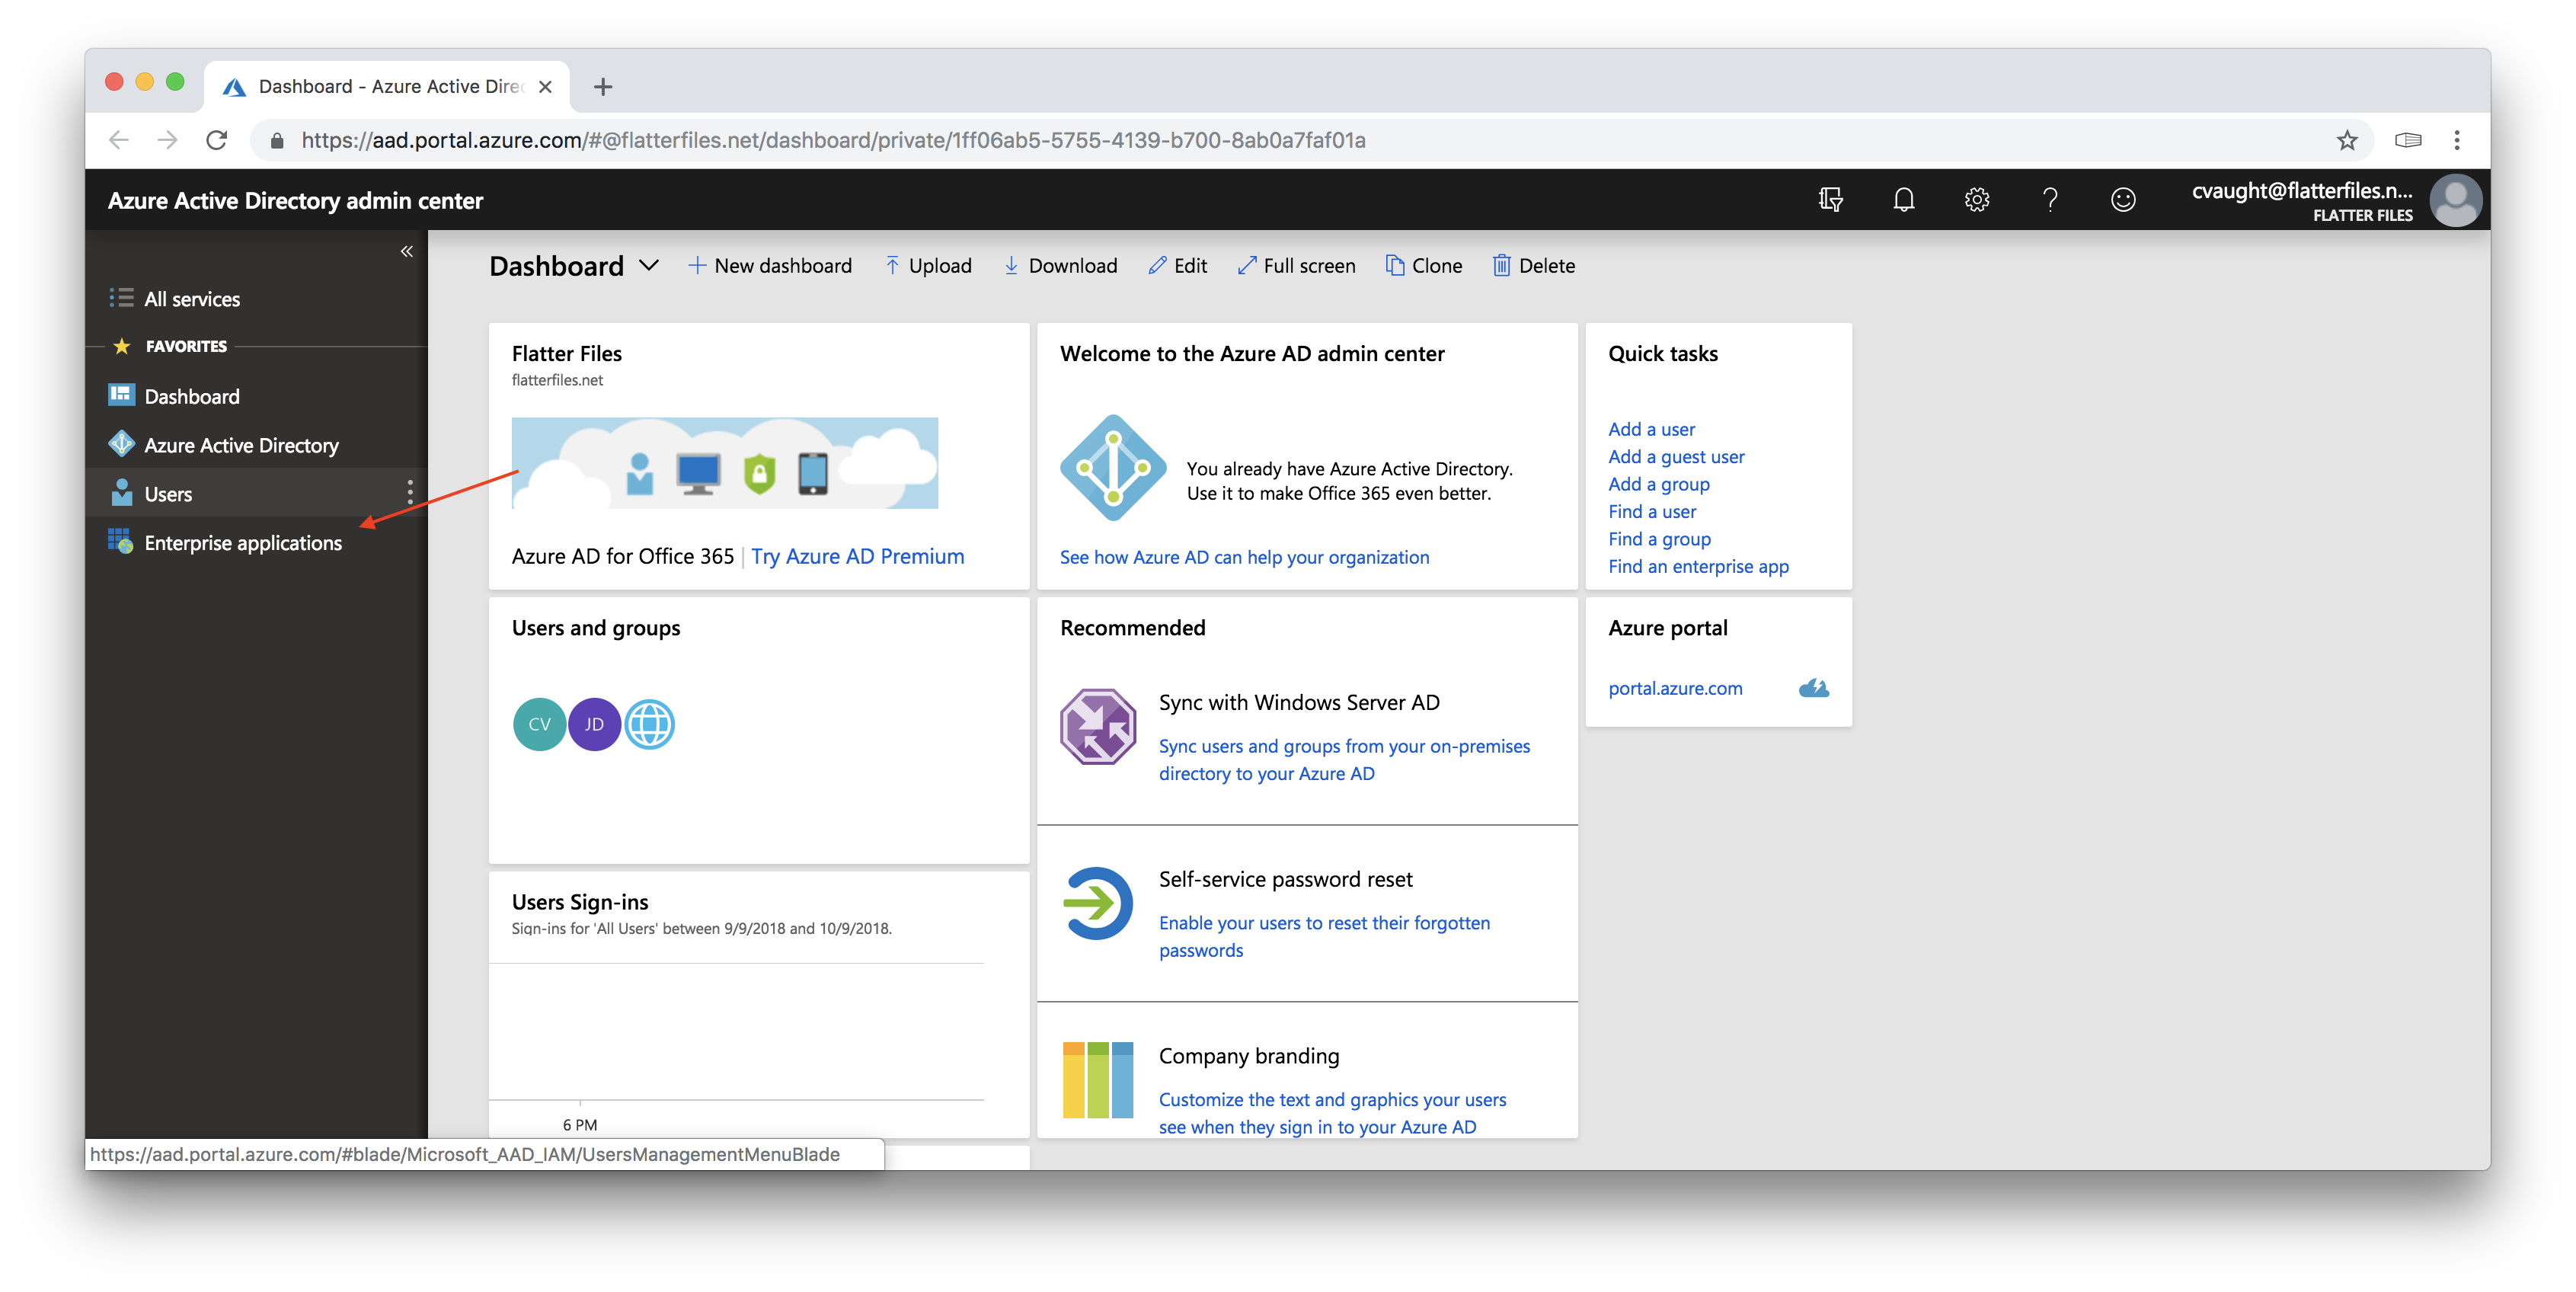
- The resulting Azure AD Admin center is shown below.
3. Add Flatter Files as an application for your directory
When you login using Single Sign On, Flatter Files will request the appropriate authentication from Azure Active Directory. For this to work, you must add Flatter Files as an application that your directory is authorized to communicate with.
- Click on “Enterprise Applications” in the left navigation menu shown by a red arrow in the image above.
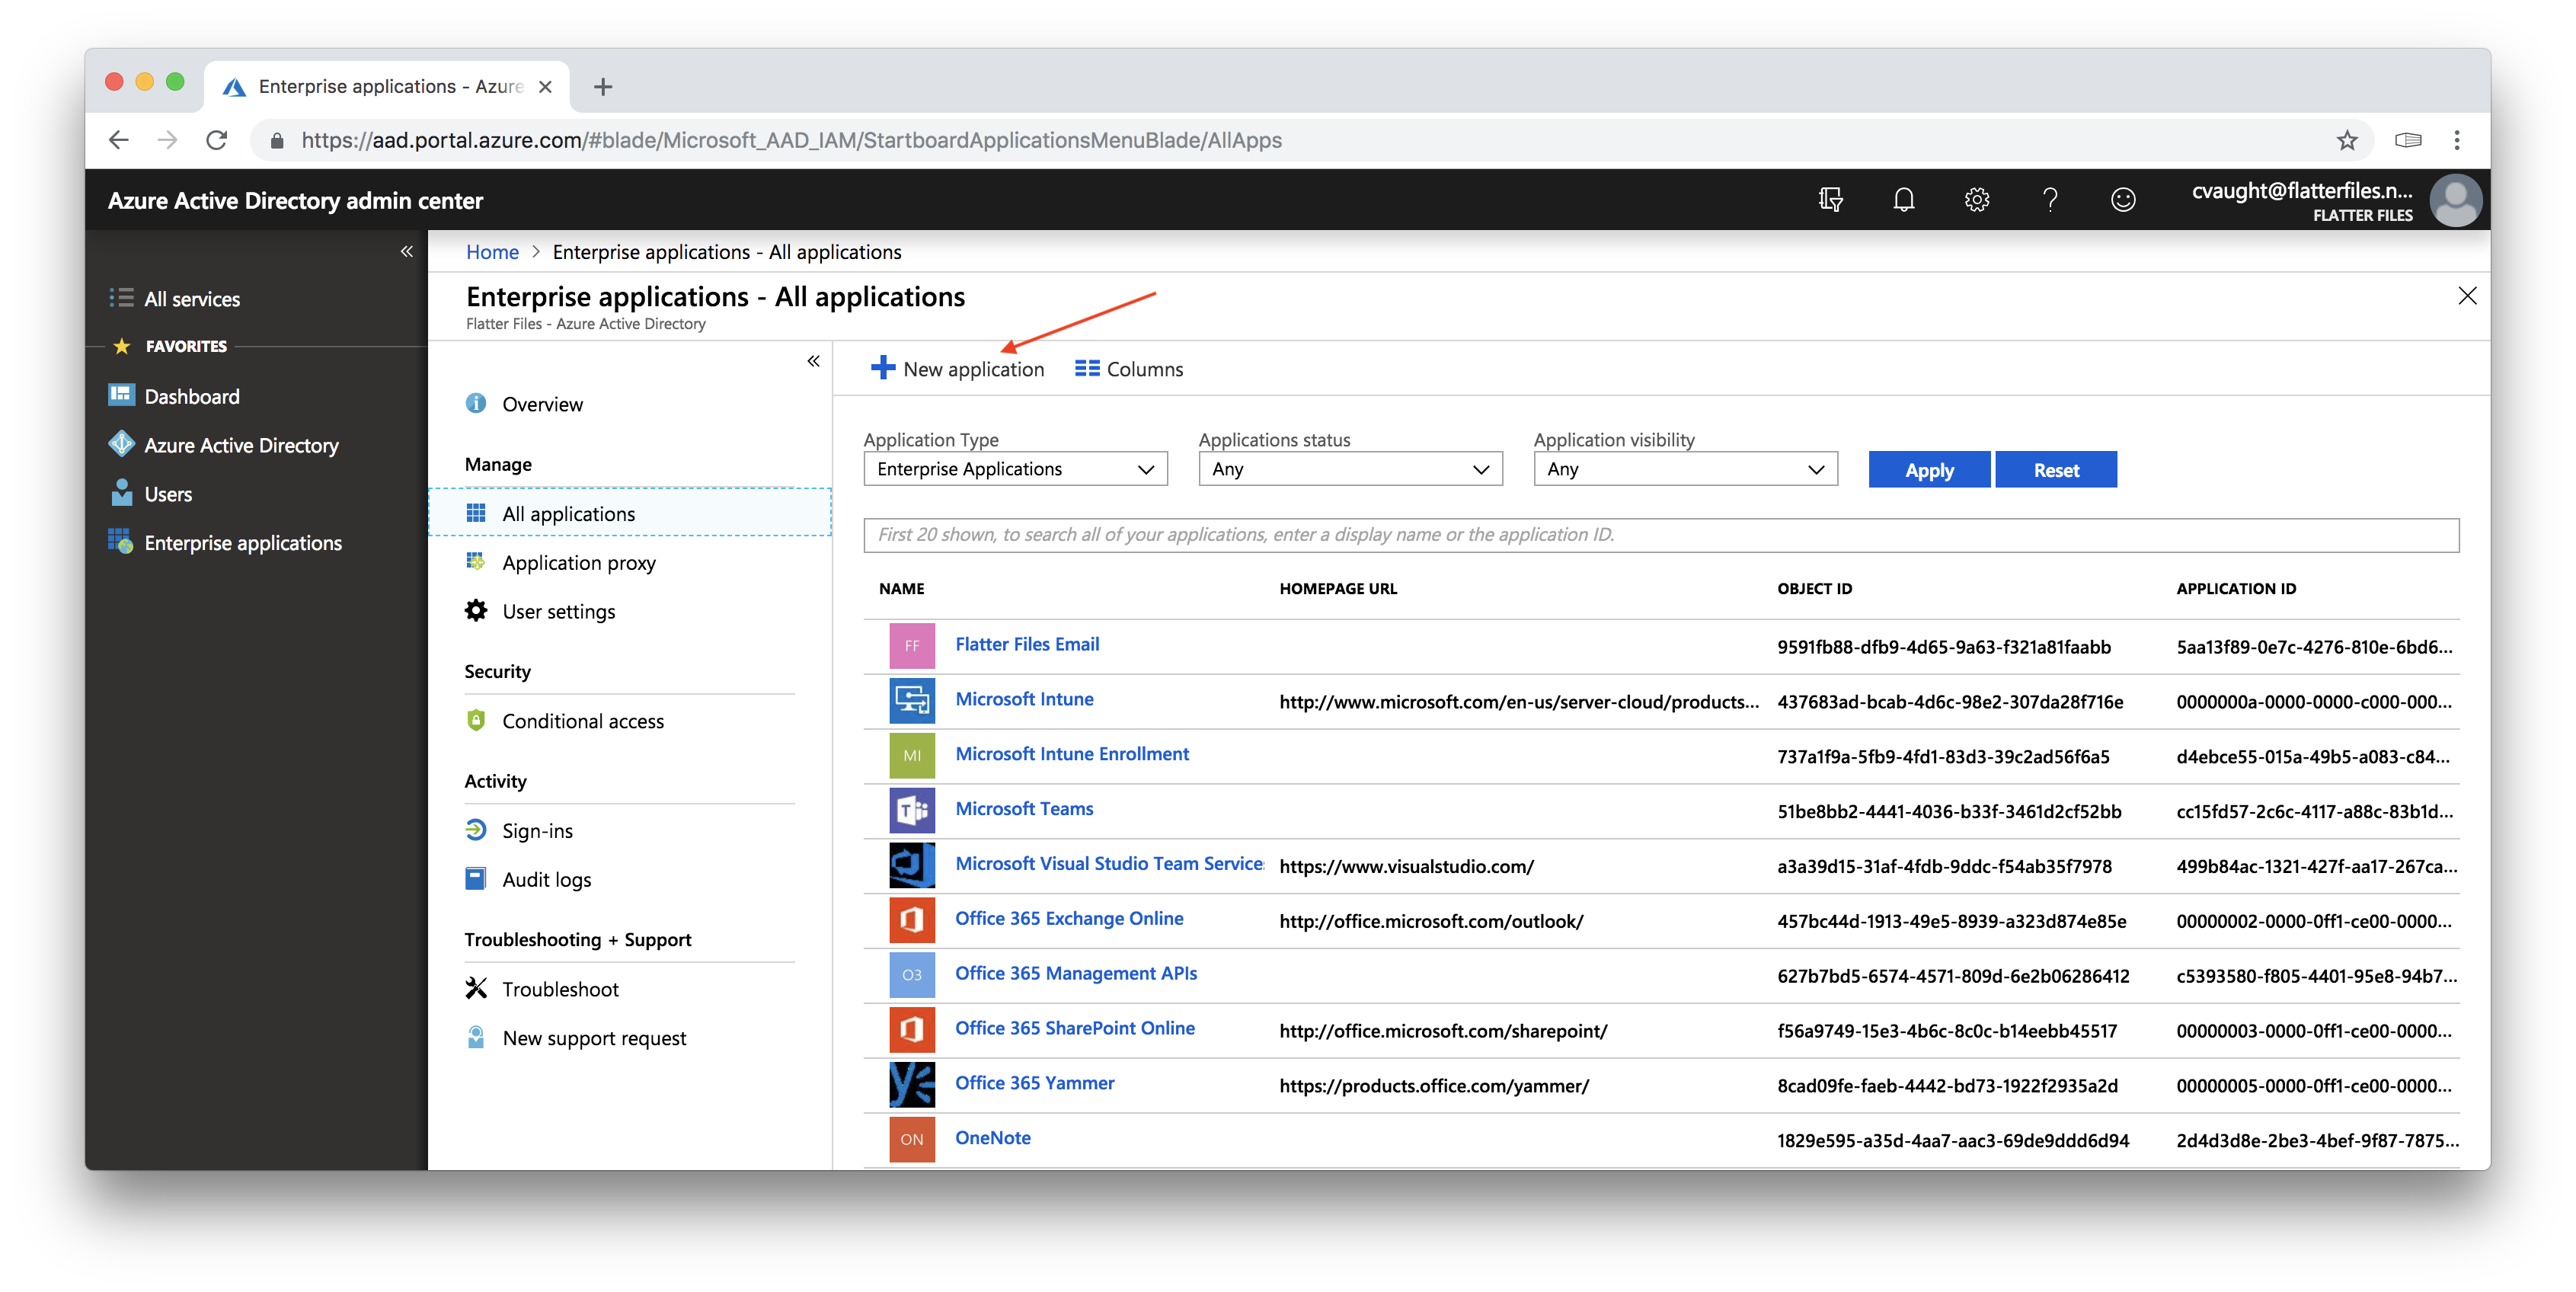
- Click the “New Application” option as shown below.
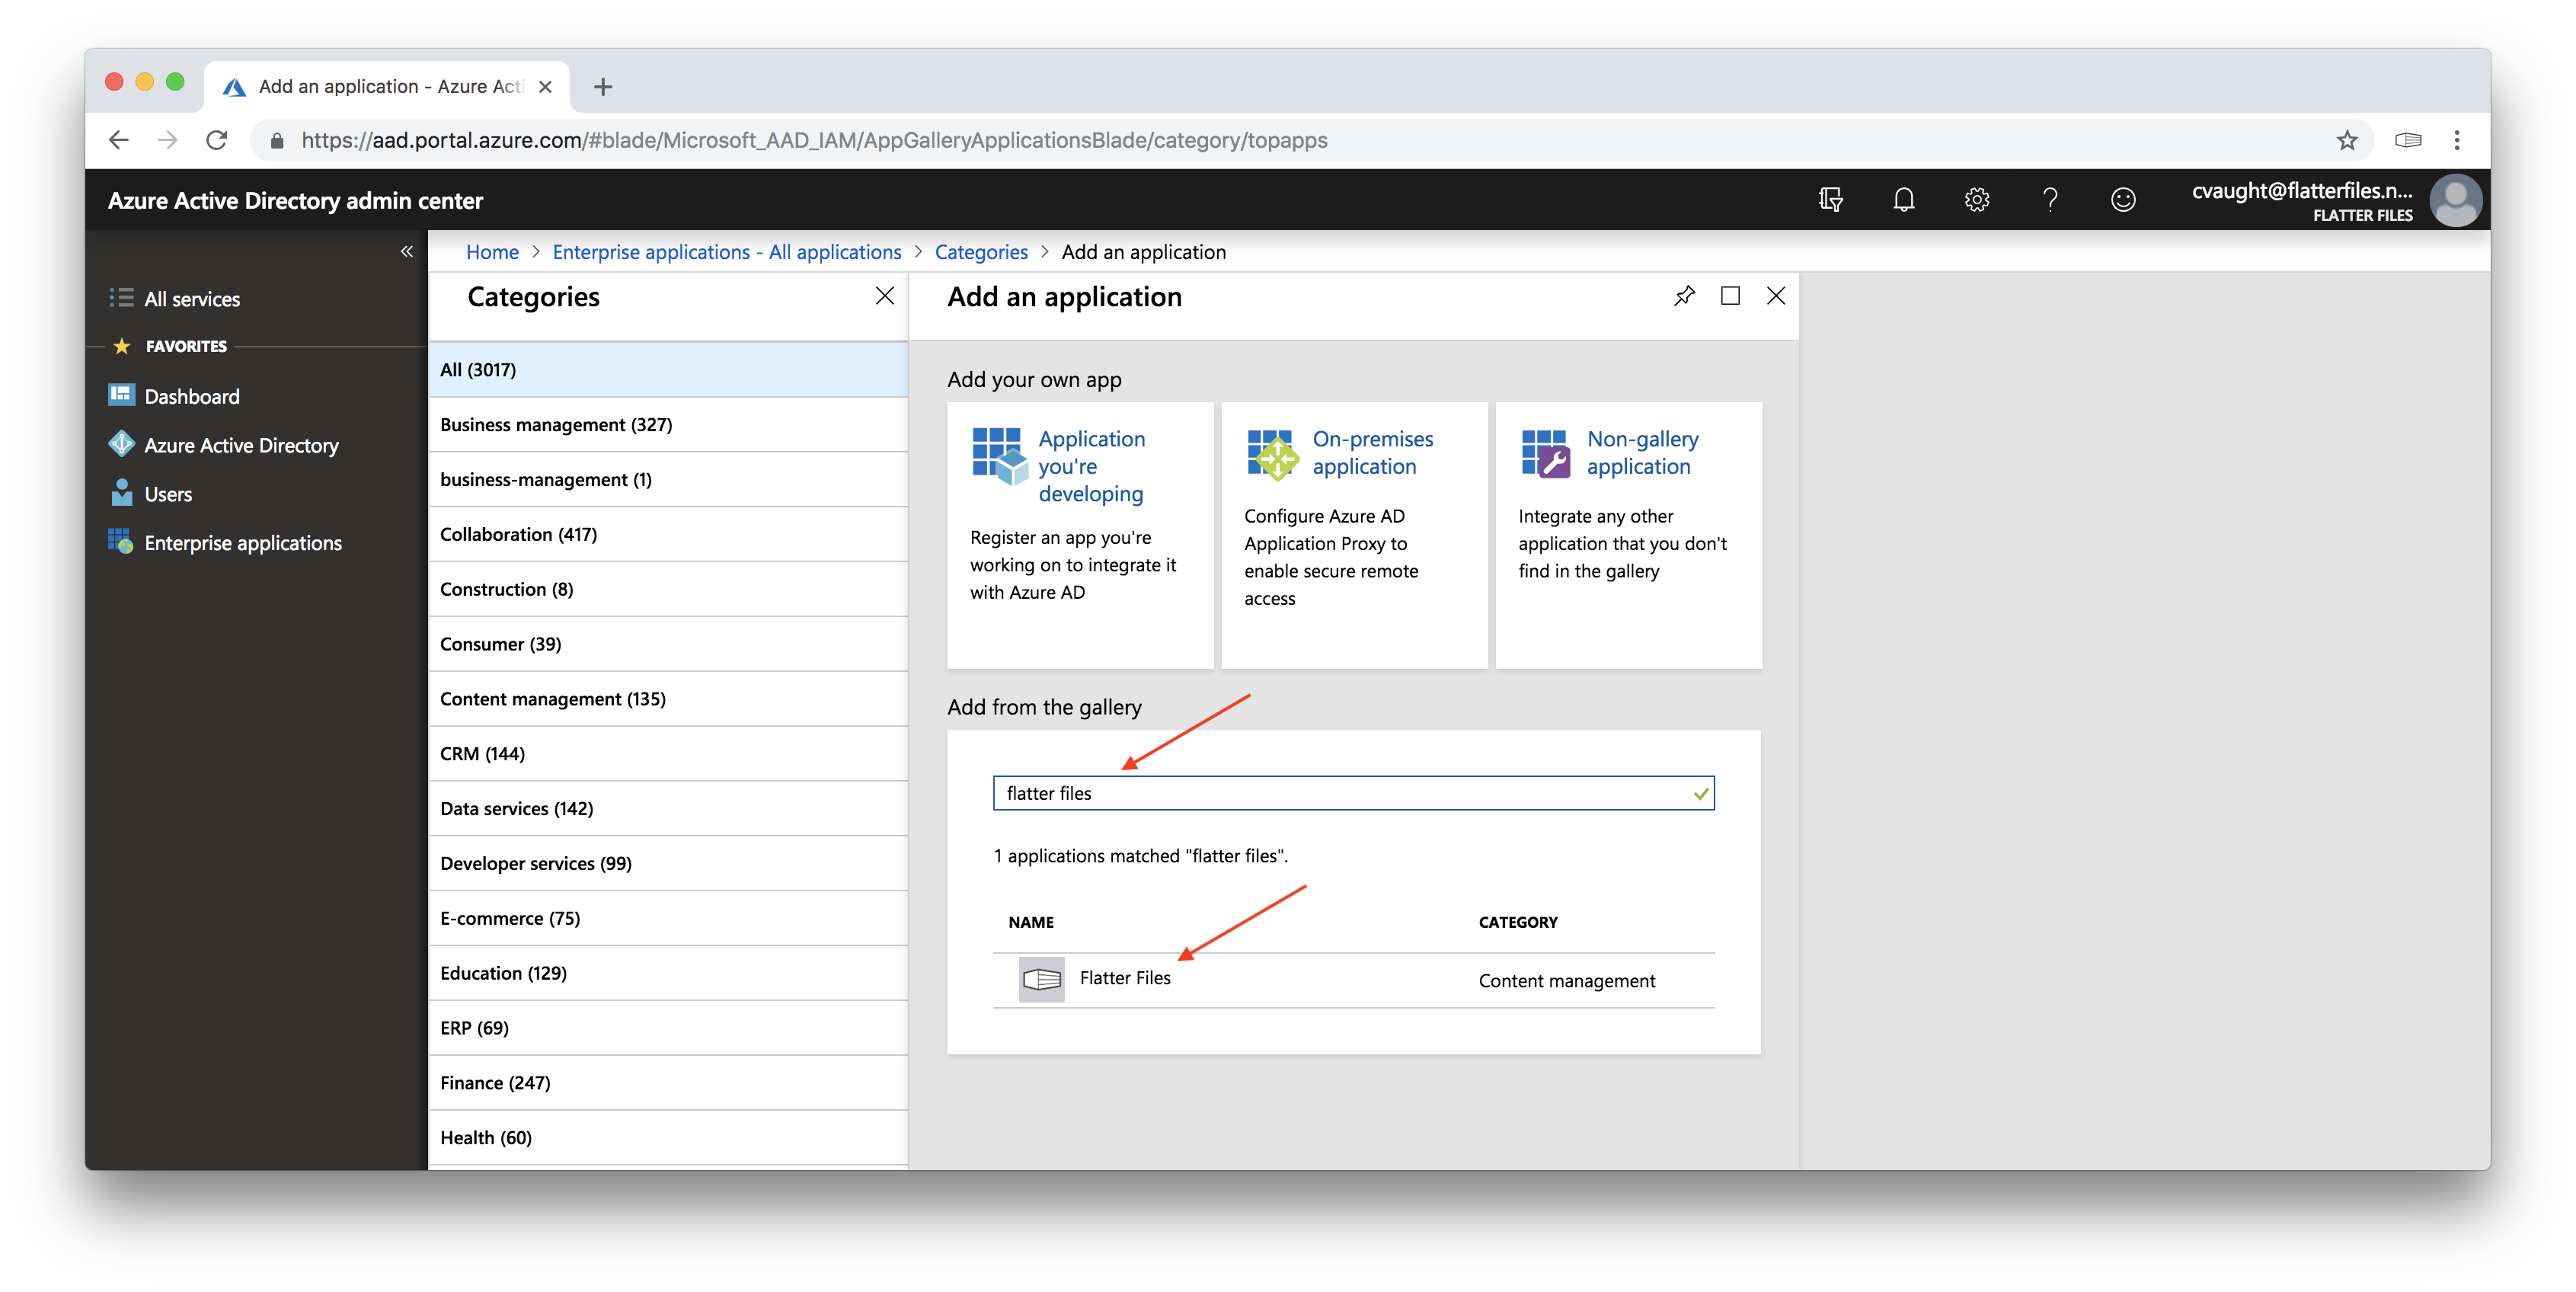
- Under “Add from the gallery”, enter “Flatter Files” into the search box and click enter as shown below.
- Click on the “Flatter Files” application listing.
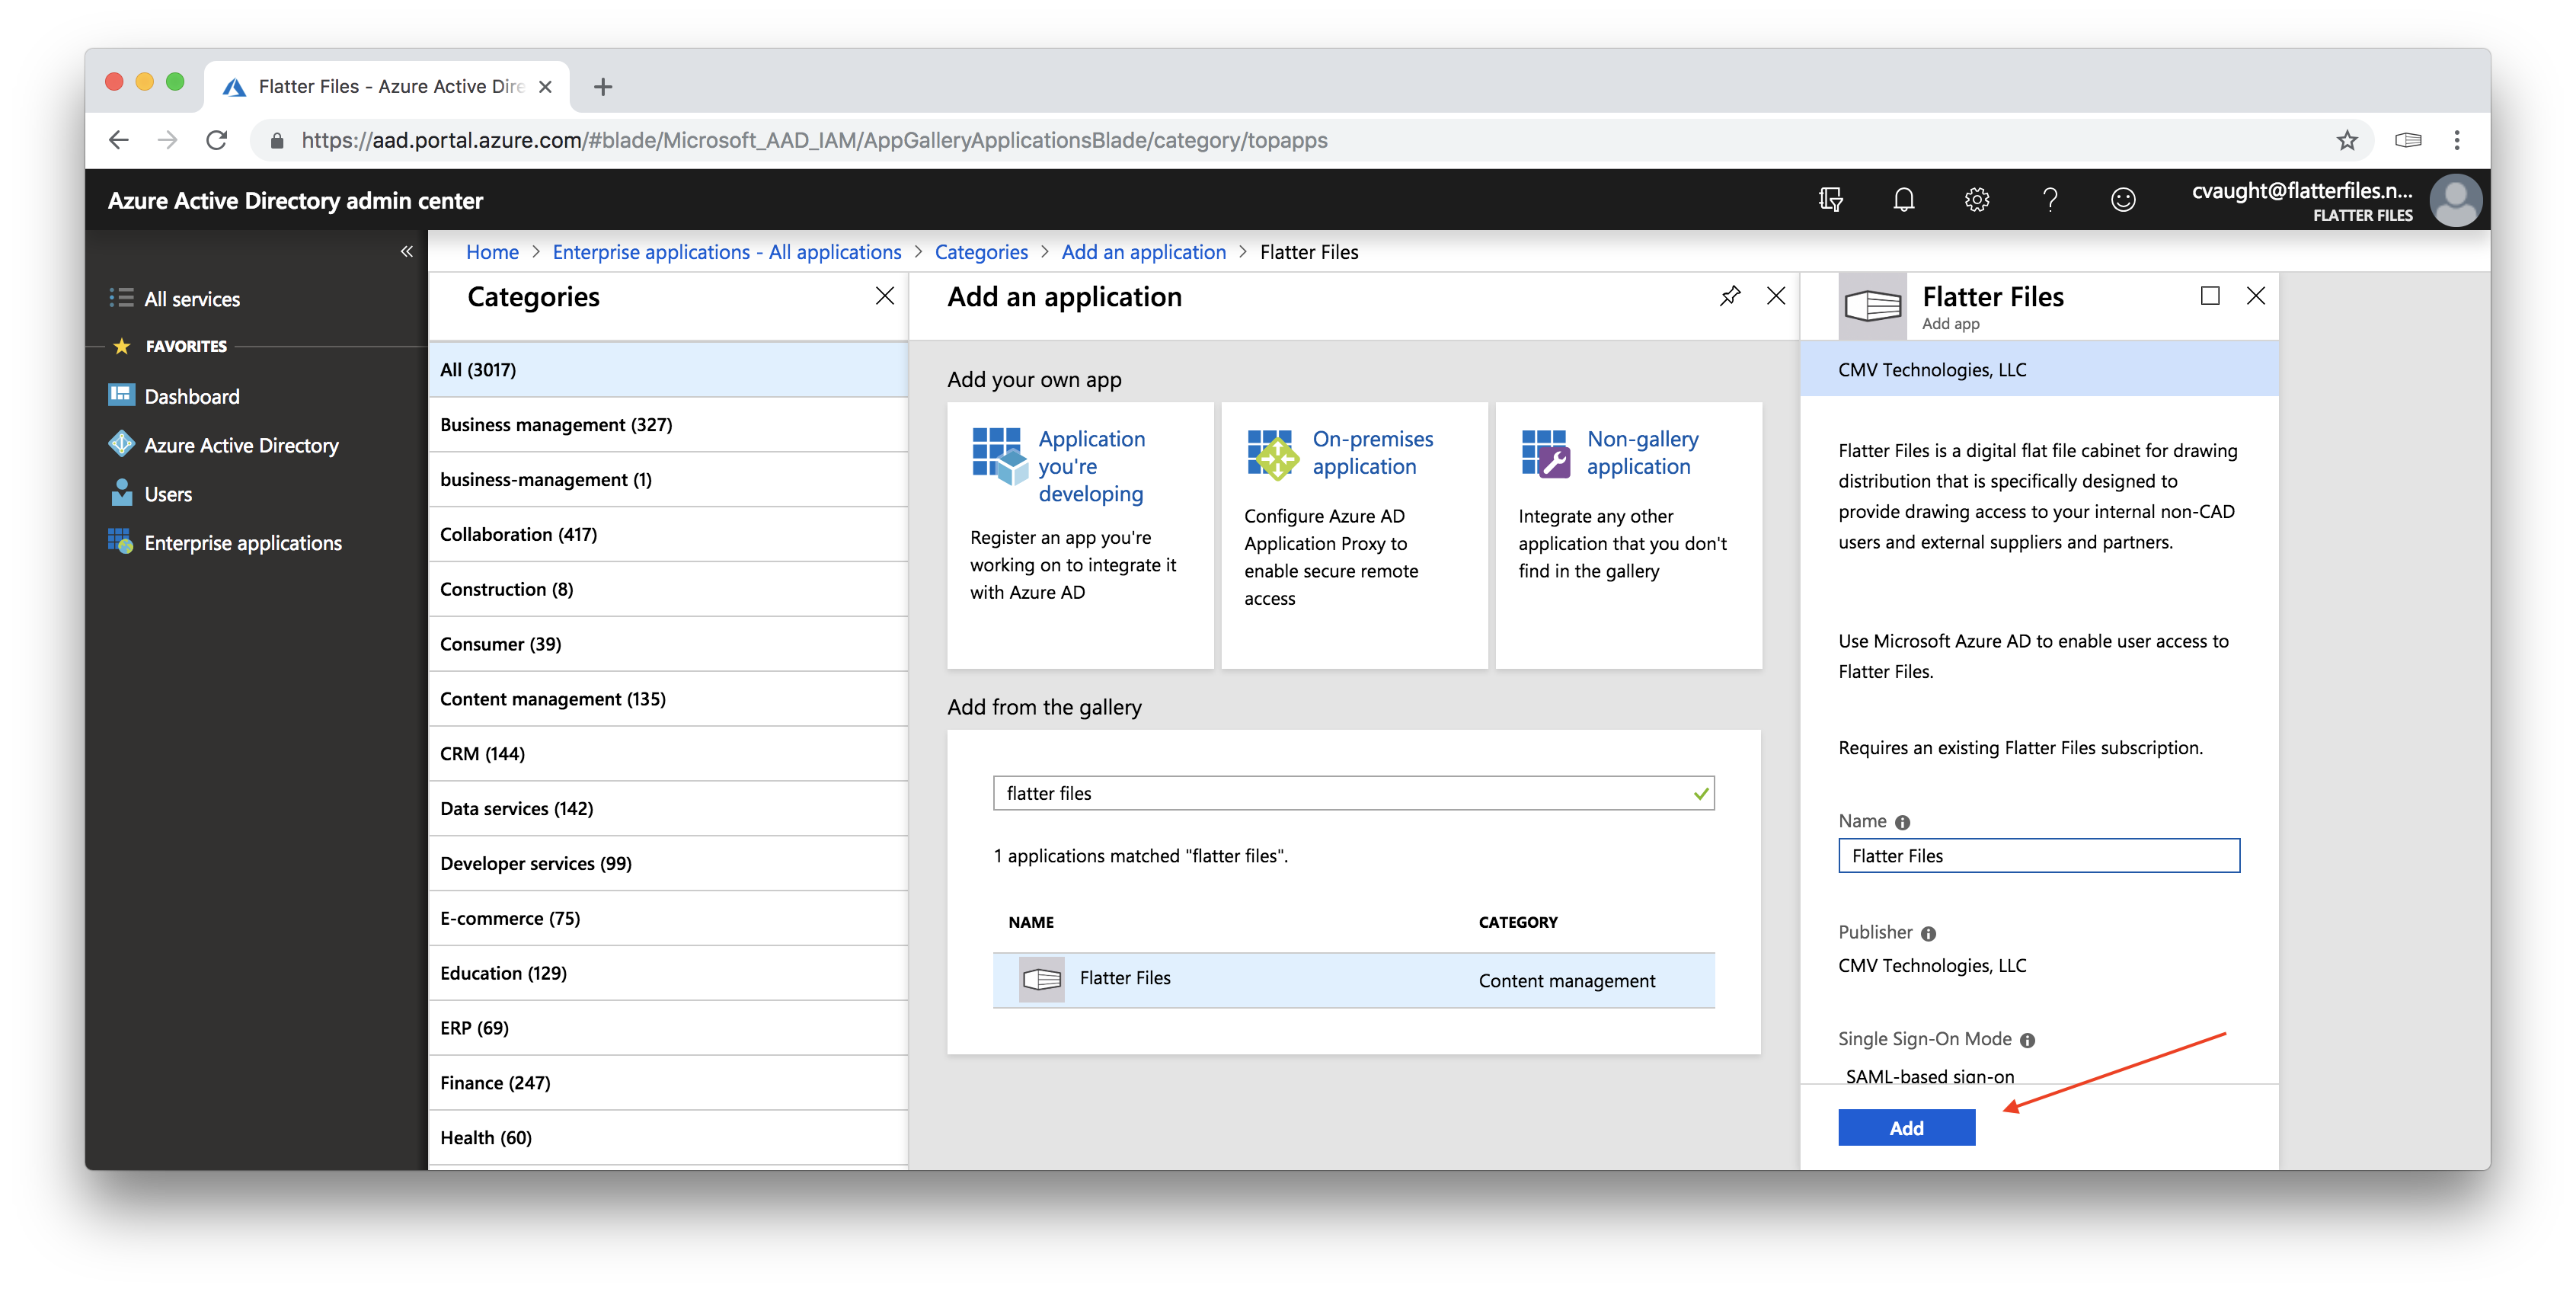
- The image below should now be shown which displays information regarding the directory listing of Flatter Files.
- Click the blue “Add” button to add Flatter Files to your directory.
4. Configure Single Sign On
Flatter Files has now been added as an application to your directory. You will now obtain the SSO settings that will be used to configure Flatter Files to connect correctly to your Azure Active Directory account.
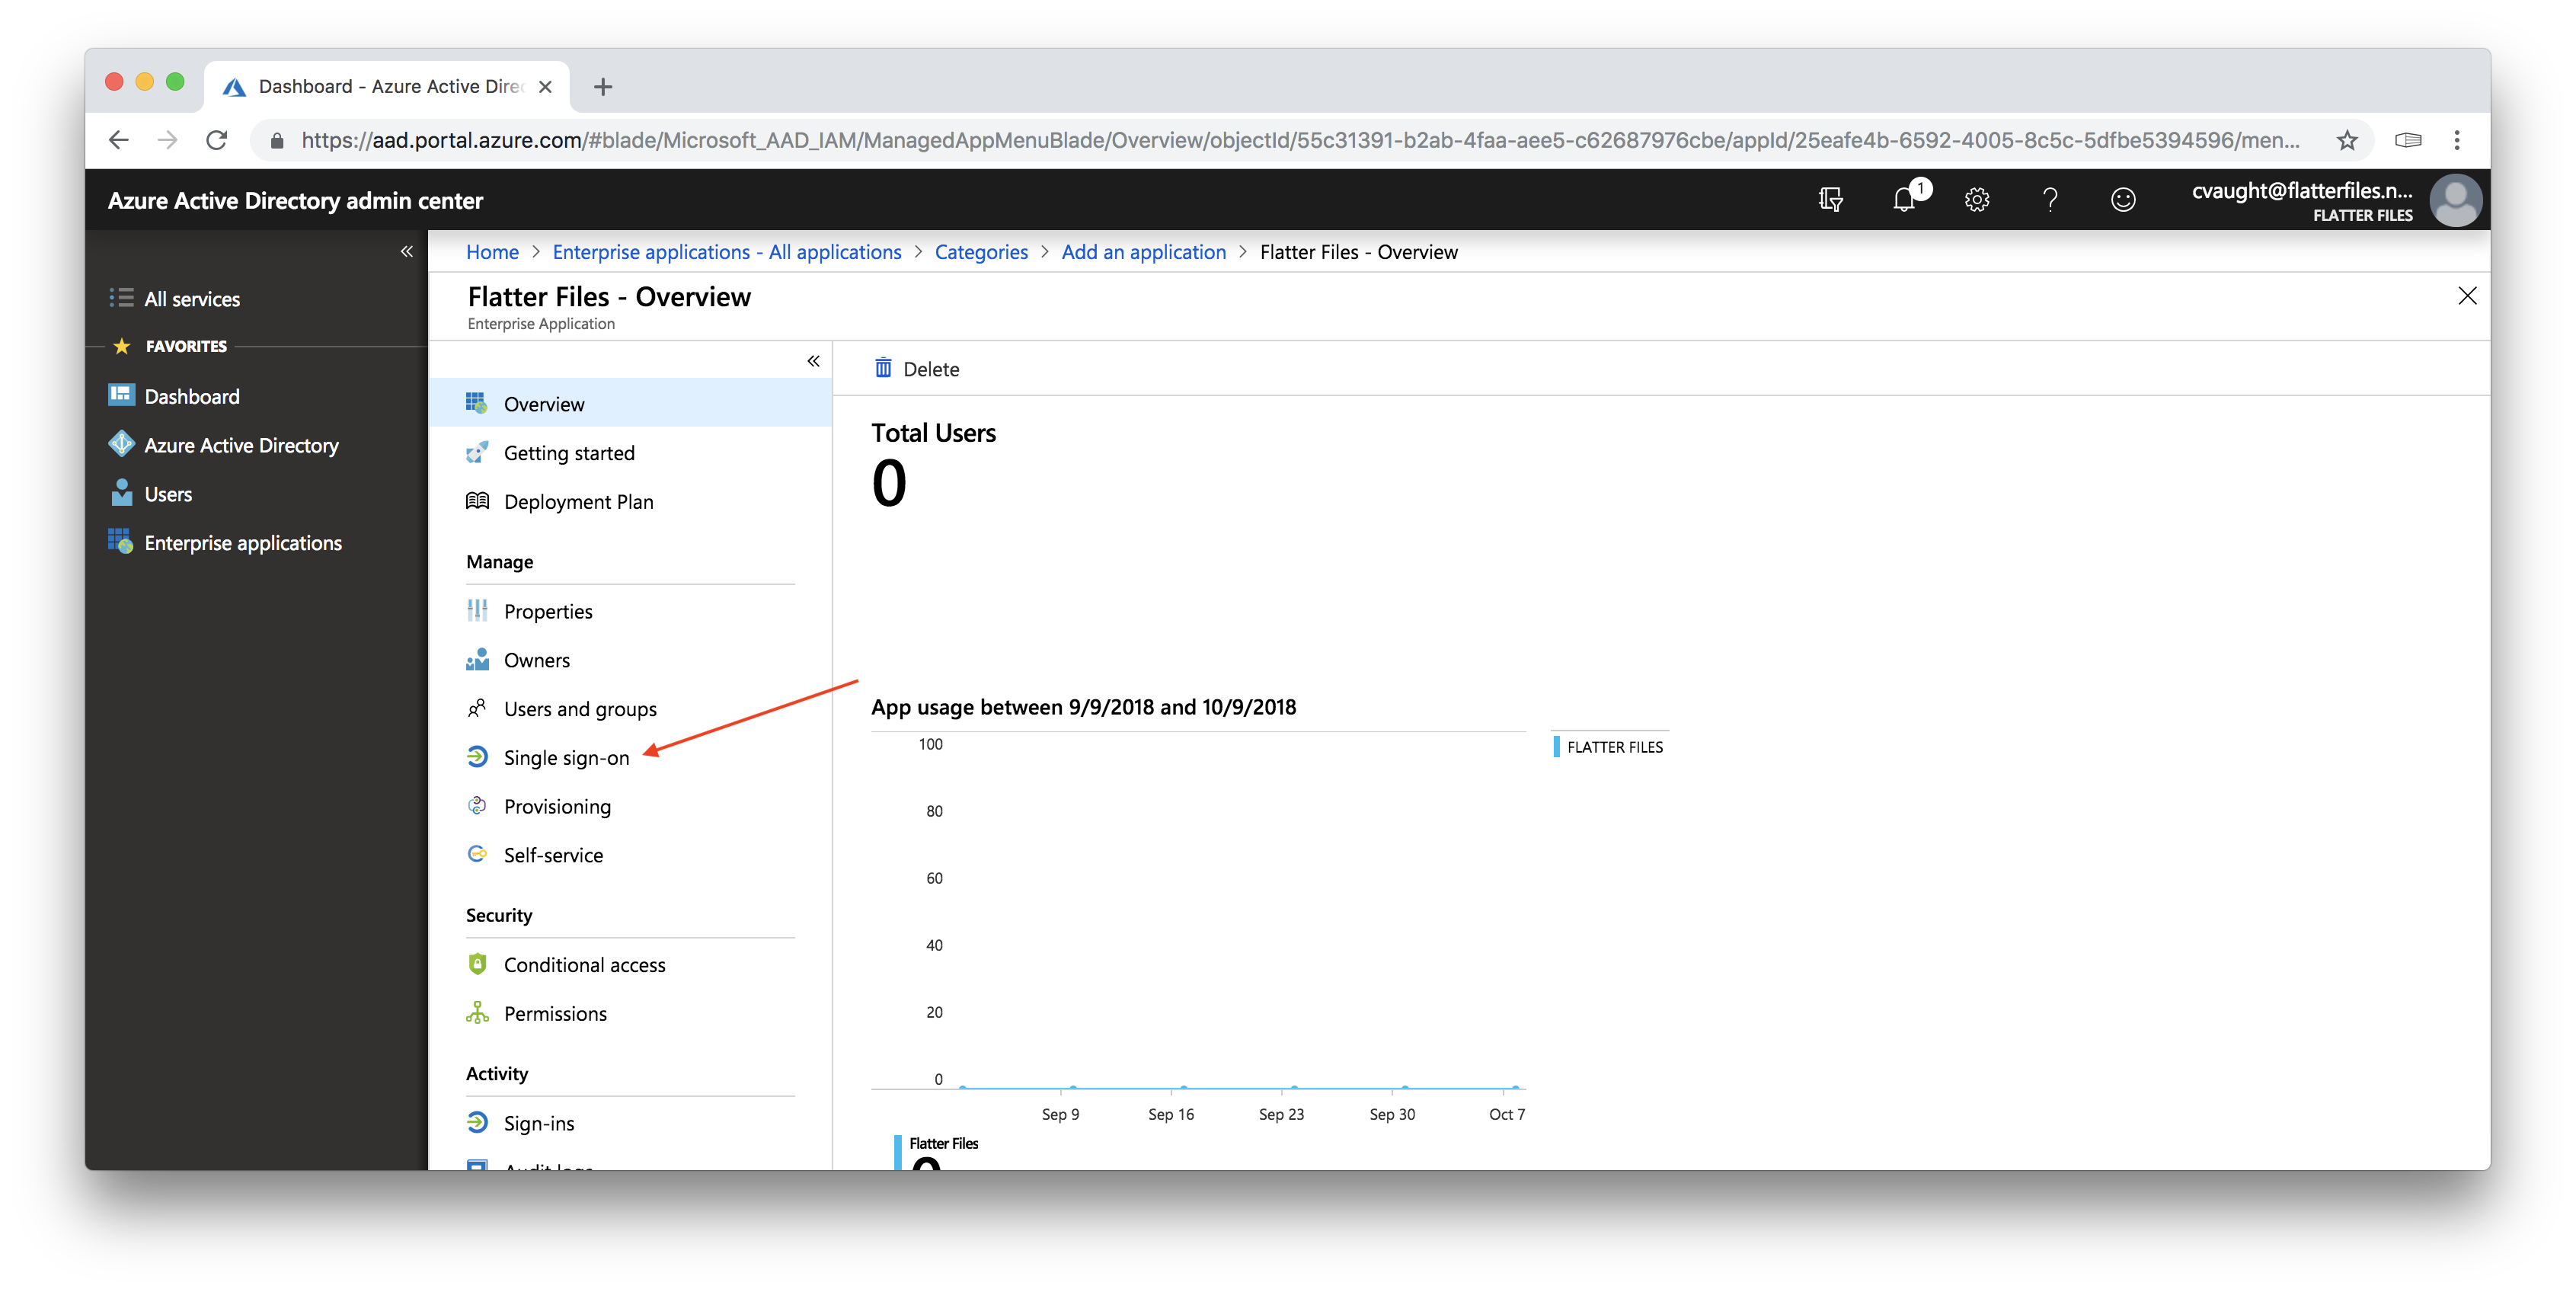
- The image shown below should now be shown which is the Application page for Flatter Files in your Azure Active Directory.
- Click the “Single sign-on” option as shown in the image above.
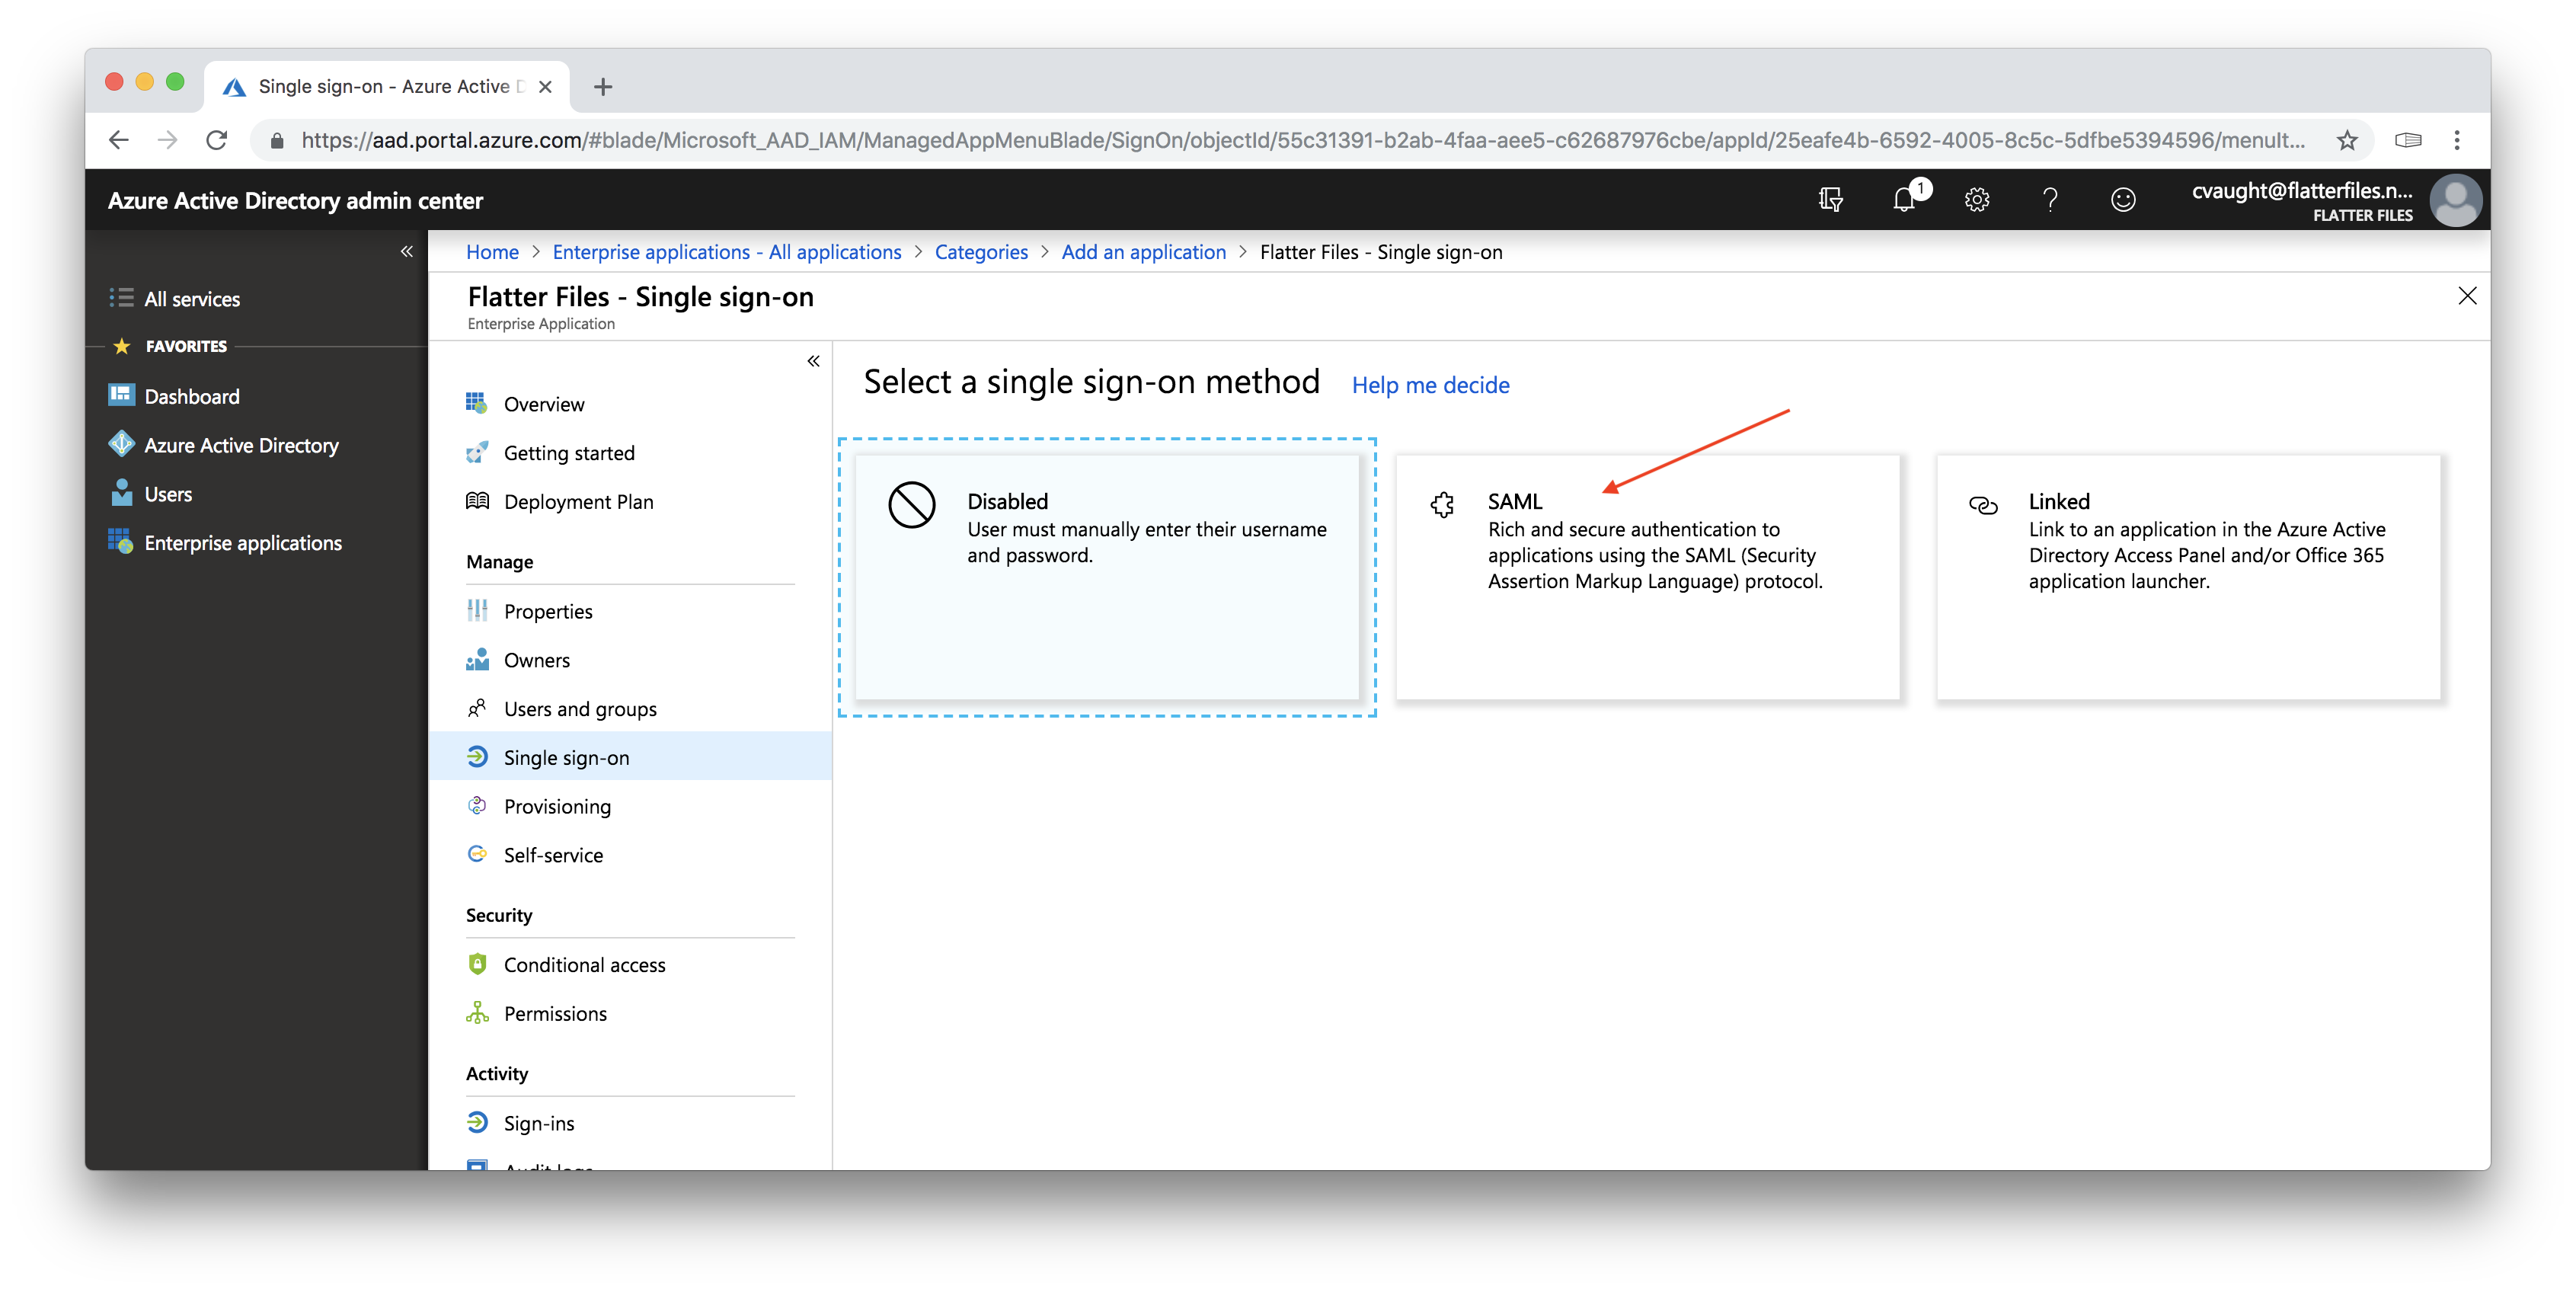
- The image below will be displayed. Click the option to use SAML.
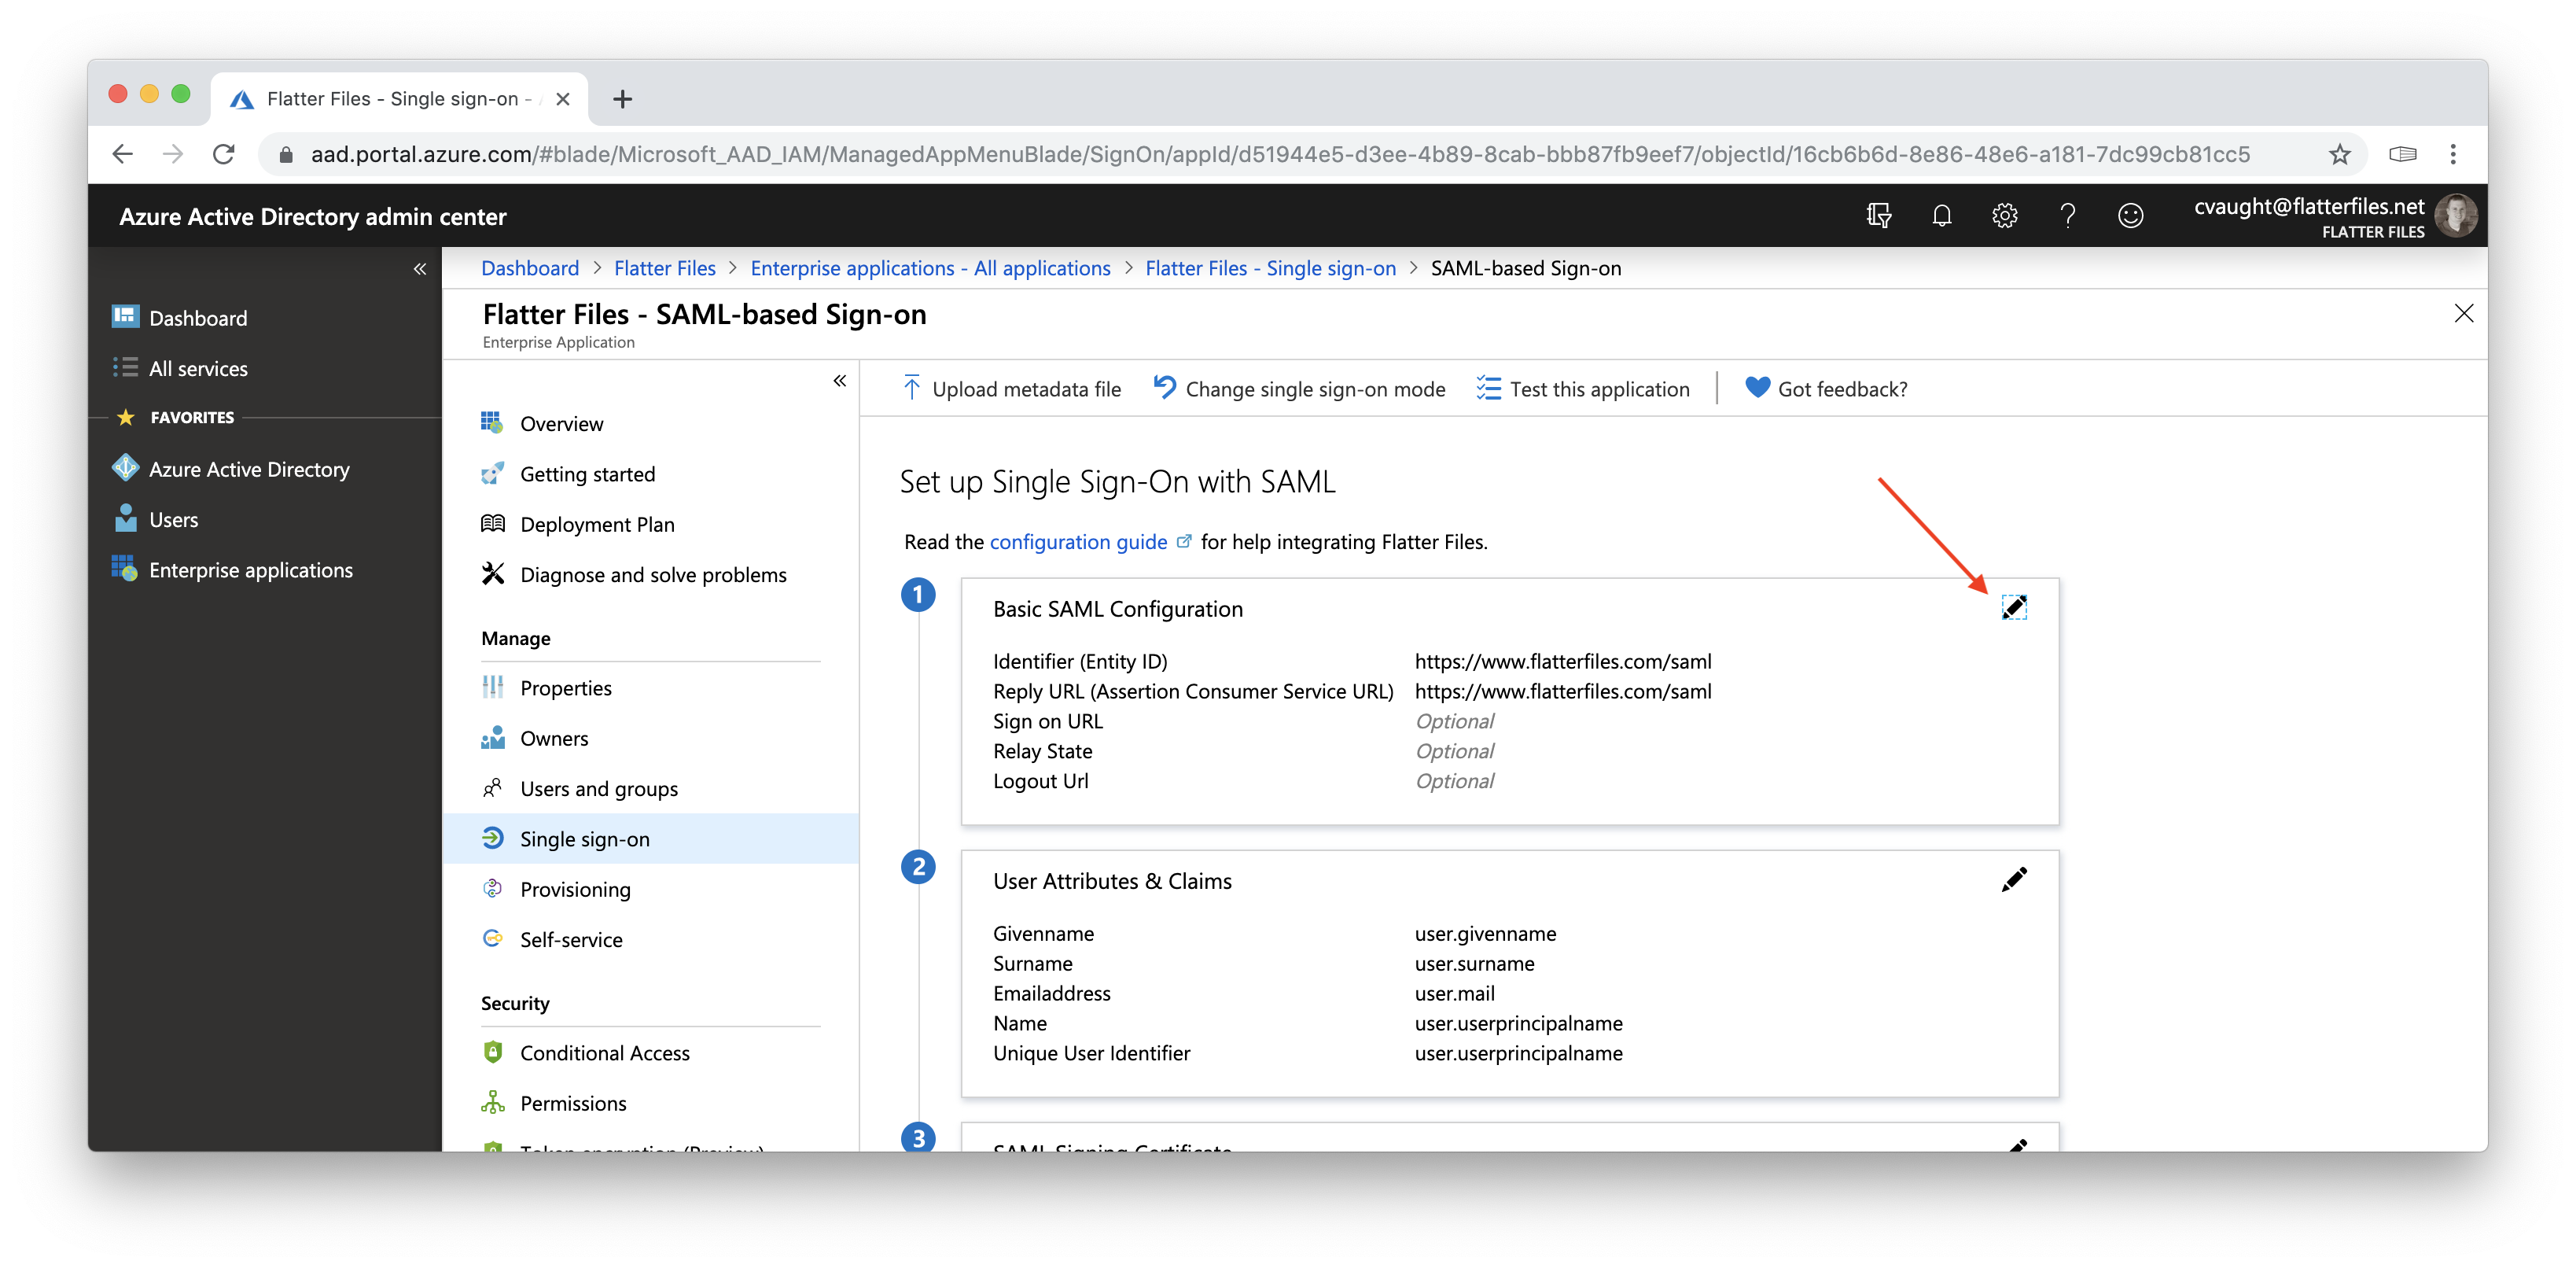
- This should display the image below.
- Click the edit button in the Basic SAML Configuration as shown with the red arrow in the image above. This will display the image below.
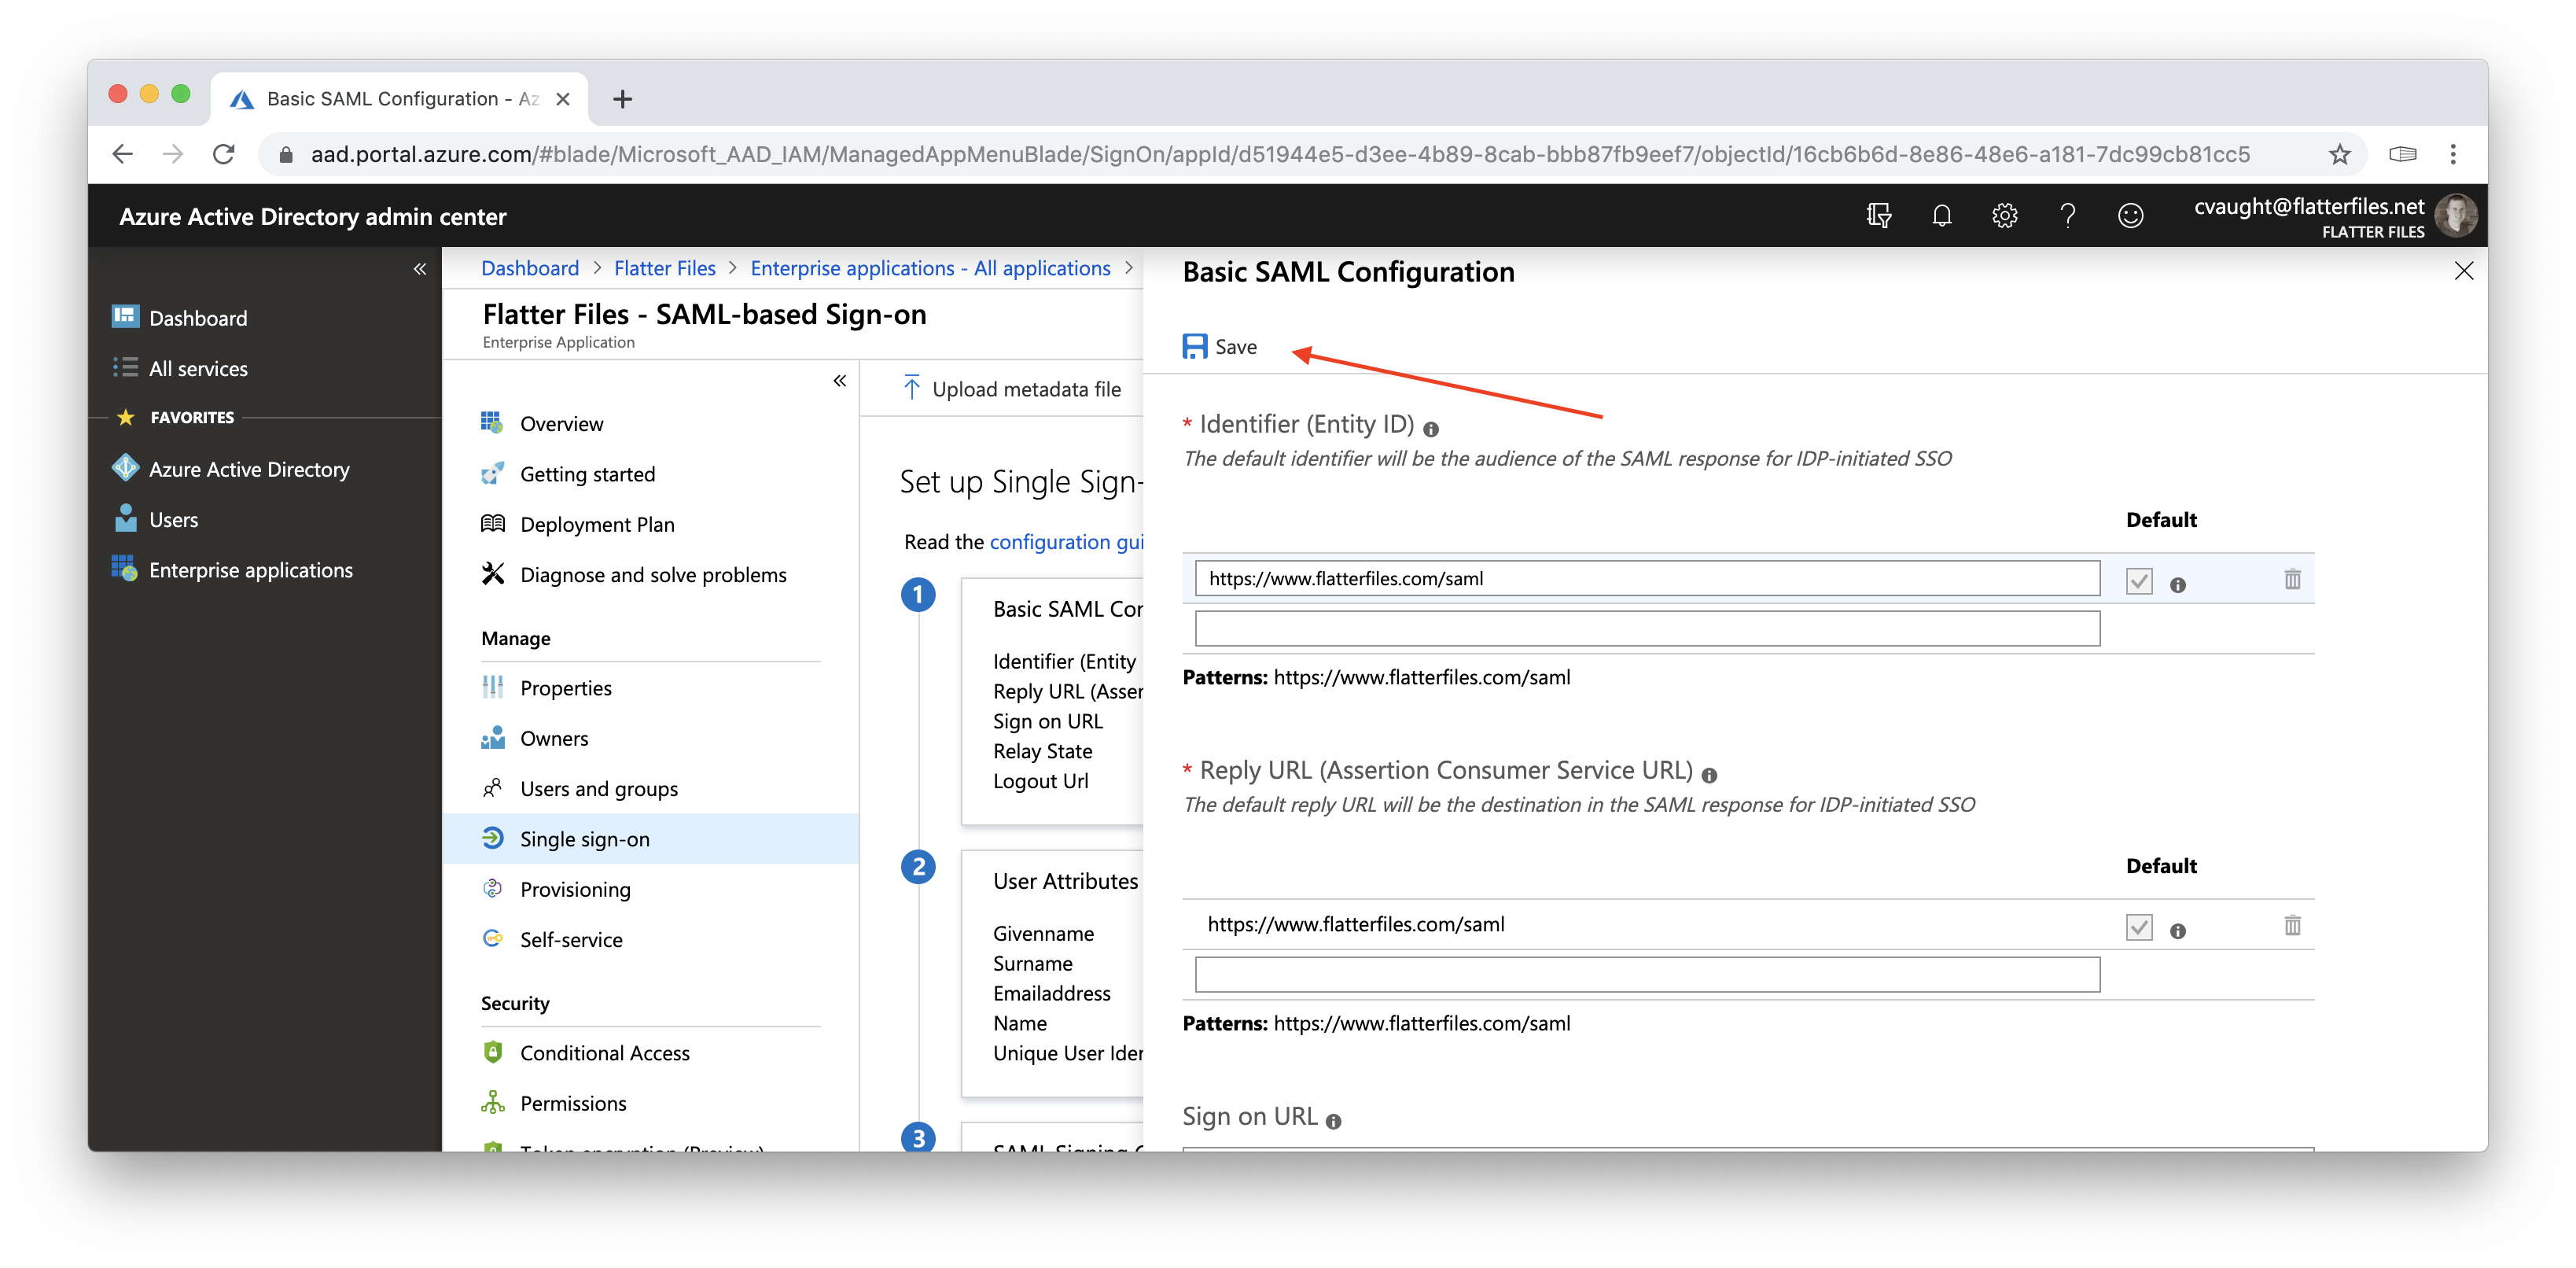
-
Click the Save button shown by the arrow. The basic saml configuration for Flatter Files has now been saved and you can close that configuration dialog.
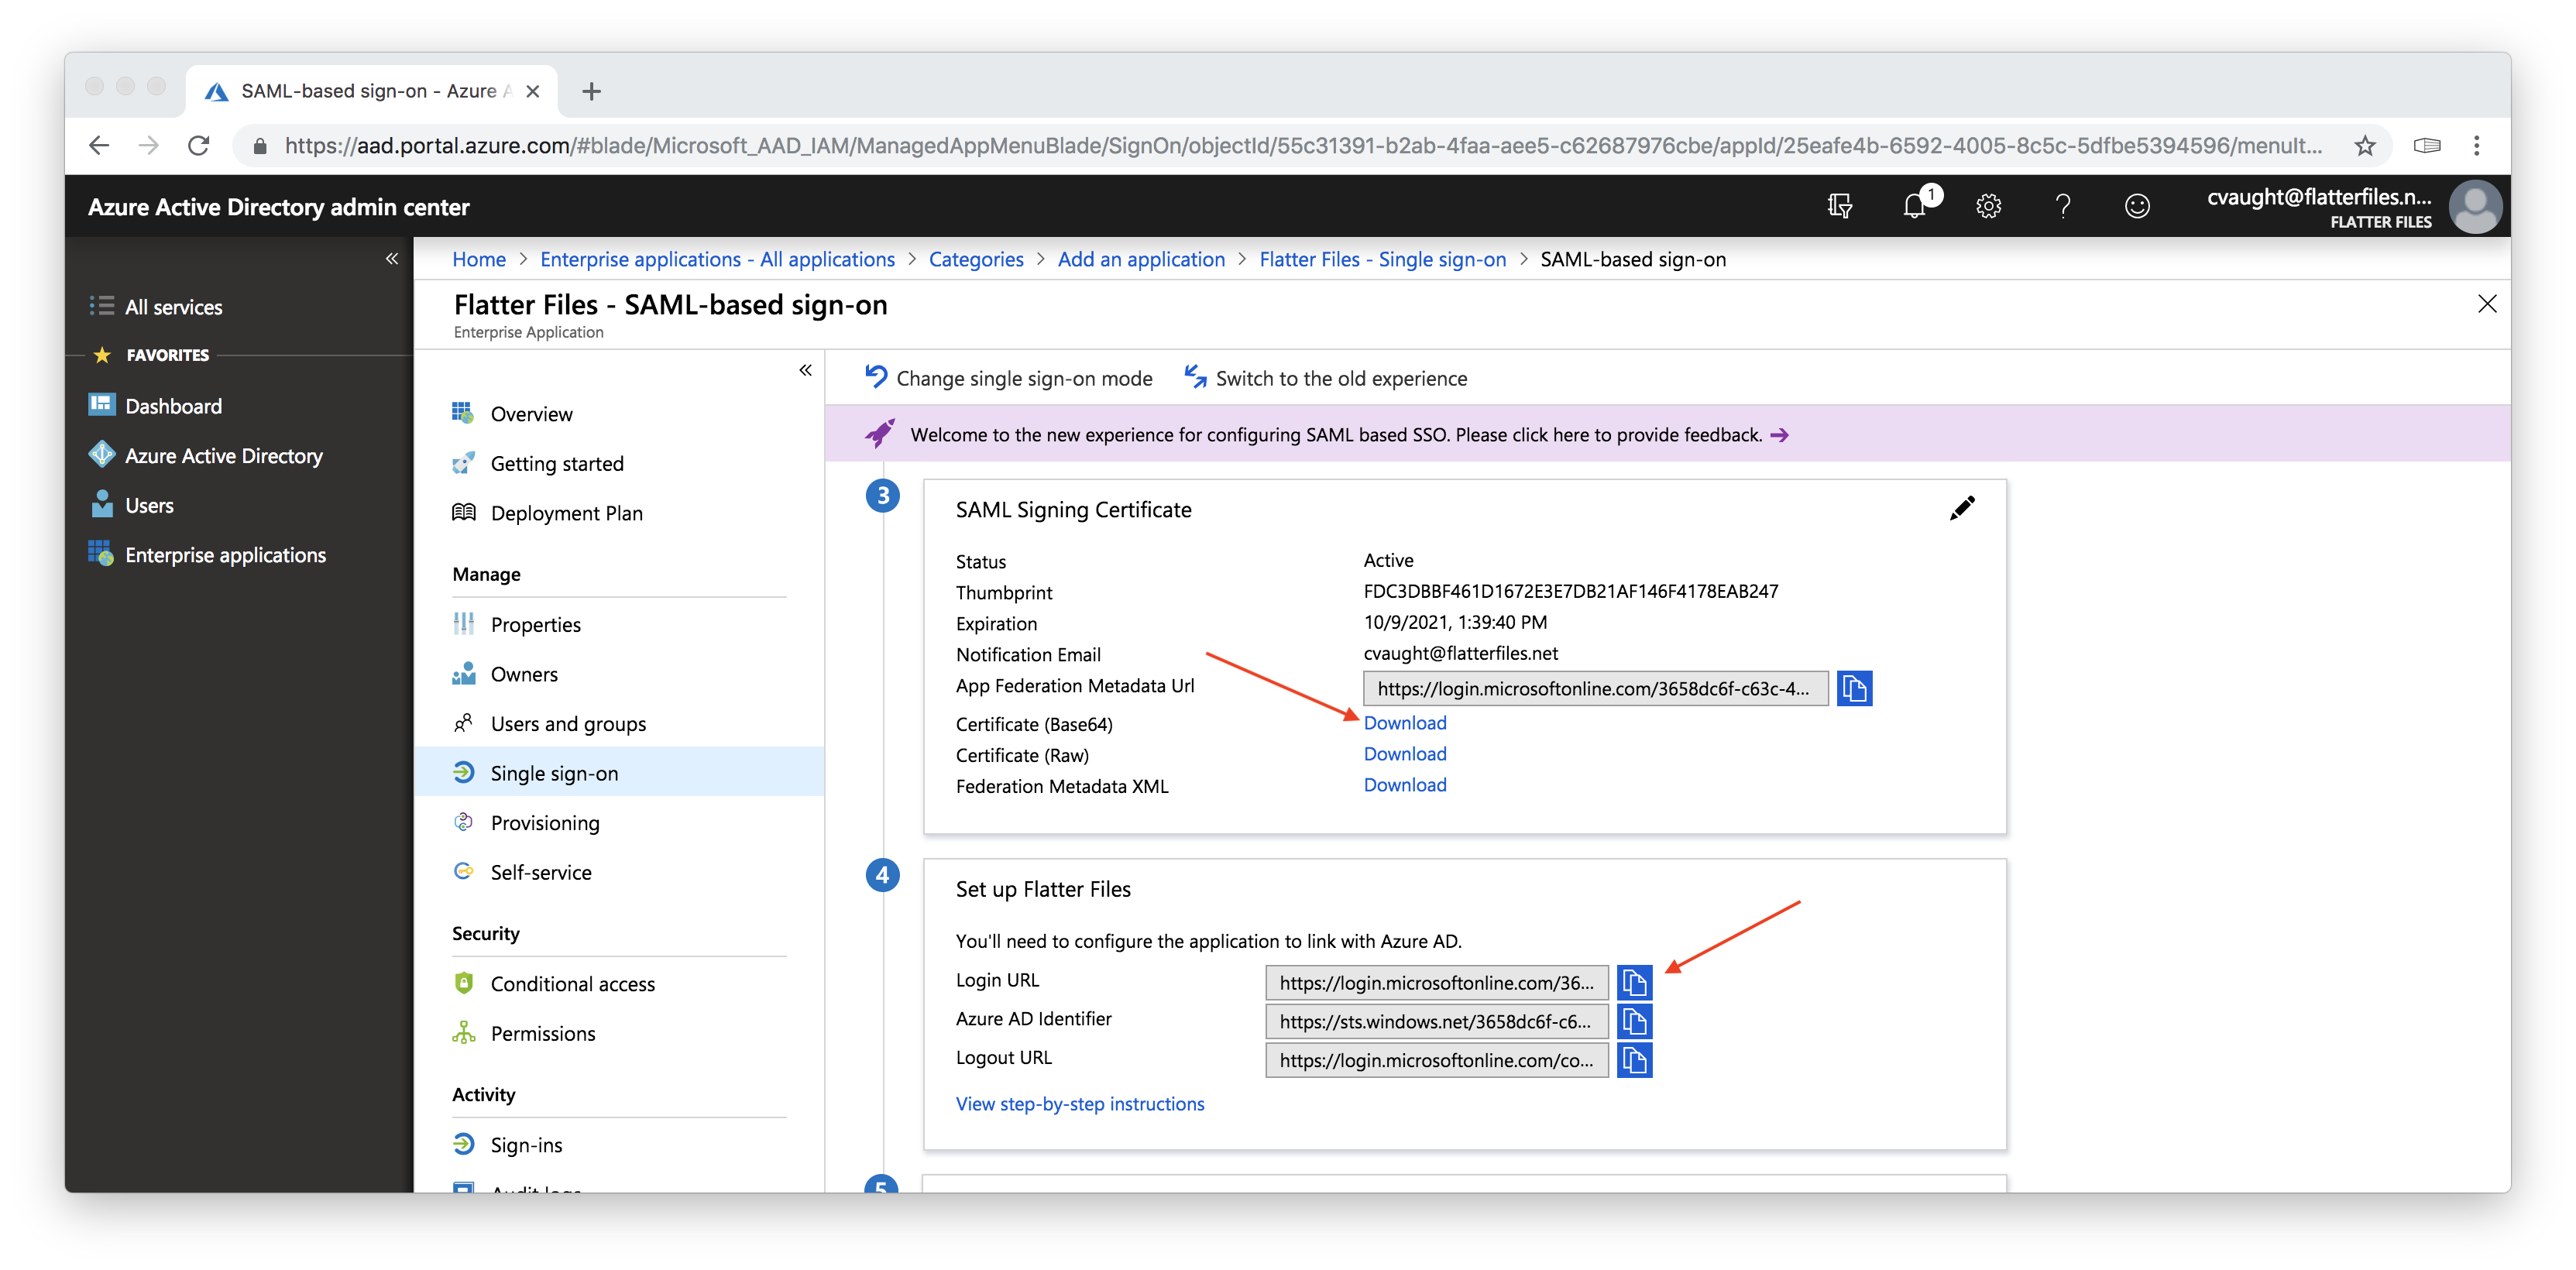
-
Scroll down if needed and then click “Download” next to “Certificate (Base 64)” as shown in the image below. This will download a .cer file that is actually simply a text file and you should be able to open this file with a text editor. Note that you might need to first manually change the .cer extension to a .txt extension. You will need this text file in Step 5.
- Click the blue copy button next to Login URL as shown in the image above. This will copy the URL to your clipboard. The URL will be used as an input in Step 5.
5. Login to Flatter Files and input SAML Settings
Now that you have added Flatter Files to your Azure Active Directory (Step 3) and obtained the Single Sign-On URL (Step 4), it is time to enter this information into Flatter Files.
- Login into Flatter Files using an Administrator user account.
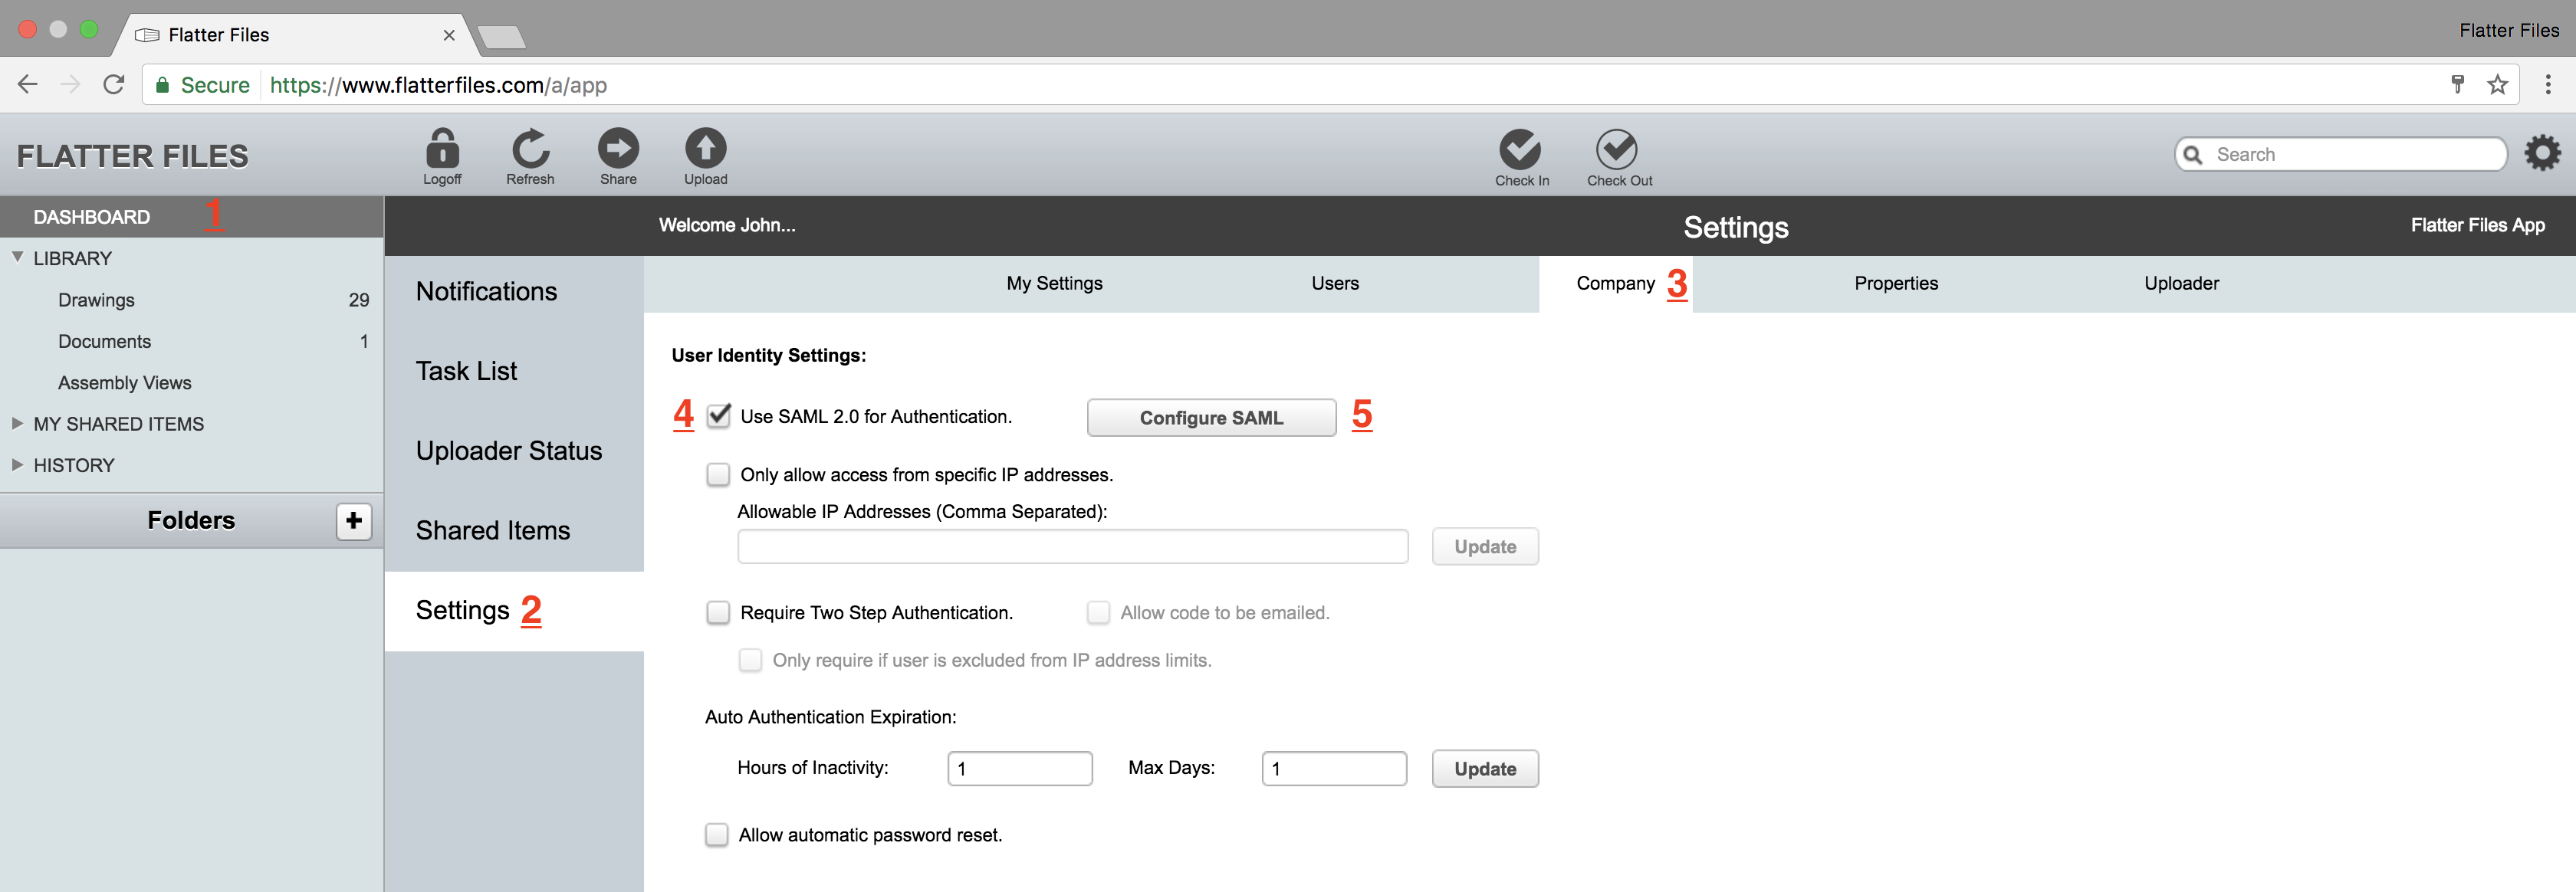
- Navigate to Dashboard (1) > Settings (2) > Company Settings (3) as shown below.
- Enable the option “Use SAML 2.0 for Authentication” (4).
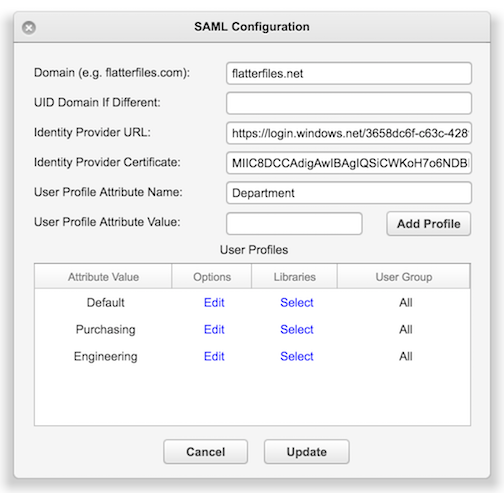
- Click the button “Configure SAML” (5) which will display the window shown below.
- Enter your companies email domain, in the example above I am using flatterfiles.net
The domain entered must be sent to [email protected] for approval. If it has not been added to the approval list then when you click Submit below to update your settings an error message indicating this issue will be shown.
- Copy and paste the Login URL from Step 4 into the input named Identify Provider URL.
- Open the certificate downloaded in Step 4 in Notepad or other plain text editor.
- Copy the text in the certificate between “—–BEGIN CERTIFICATE—–” and “—–END CERTIFICATE—–”
- Paste the text value into the input named Identity Provider Certificate.
- Click Update to save the SAML settings.
Flatter Files will now redirect all email addresses that use the specified domain to Office 365 for authentication. Existing users Flatter Files passwords will no longer be useful since it is no longer possible to login directly to Flatter Files using those credentials. Although everything is now configured, you must on a per user basis assign the user to having access to Flatter Files which is detailed in the next step.
6. Assign Users to the Flatter Files Application in Azure
For a user to be able to access Flatter Files when using Office 365 credentials, you must assign Flatter Files as an application that they are allowed to access from within the Azure portal or you can remove assignment requirement as shown in Step 7. The process for assigning a single user is shown below.
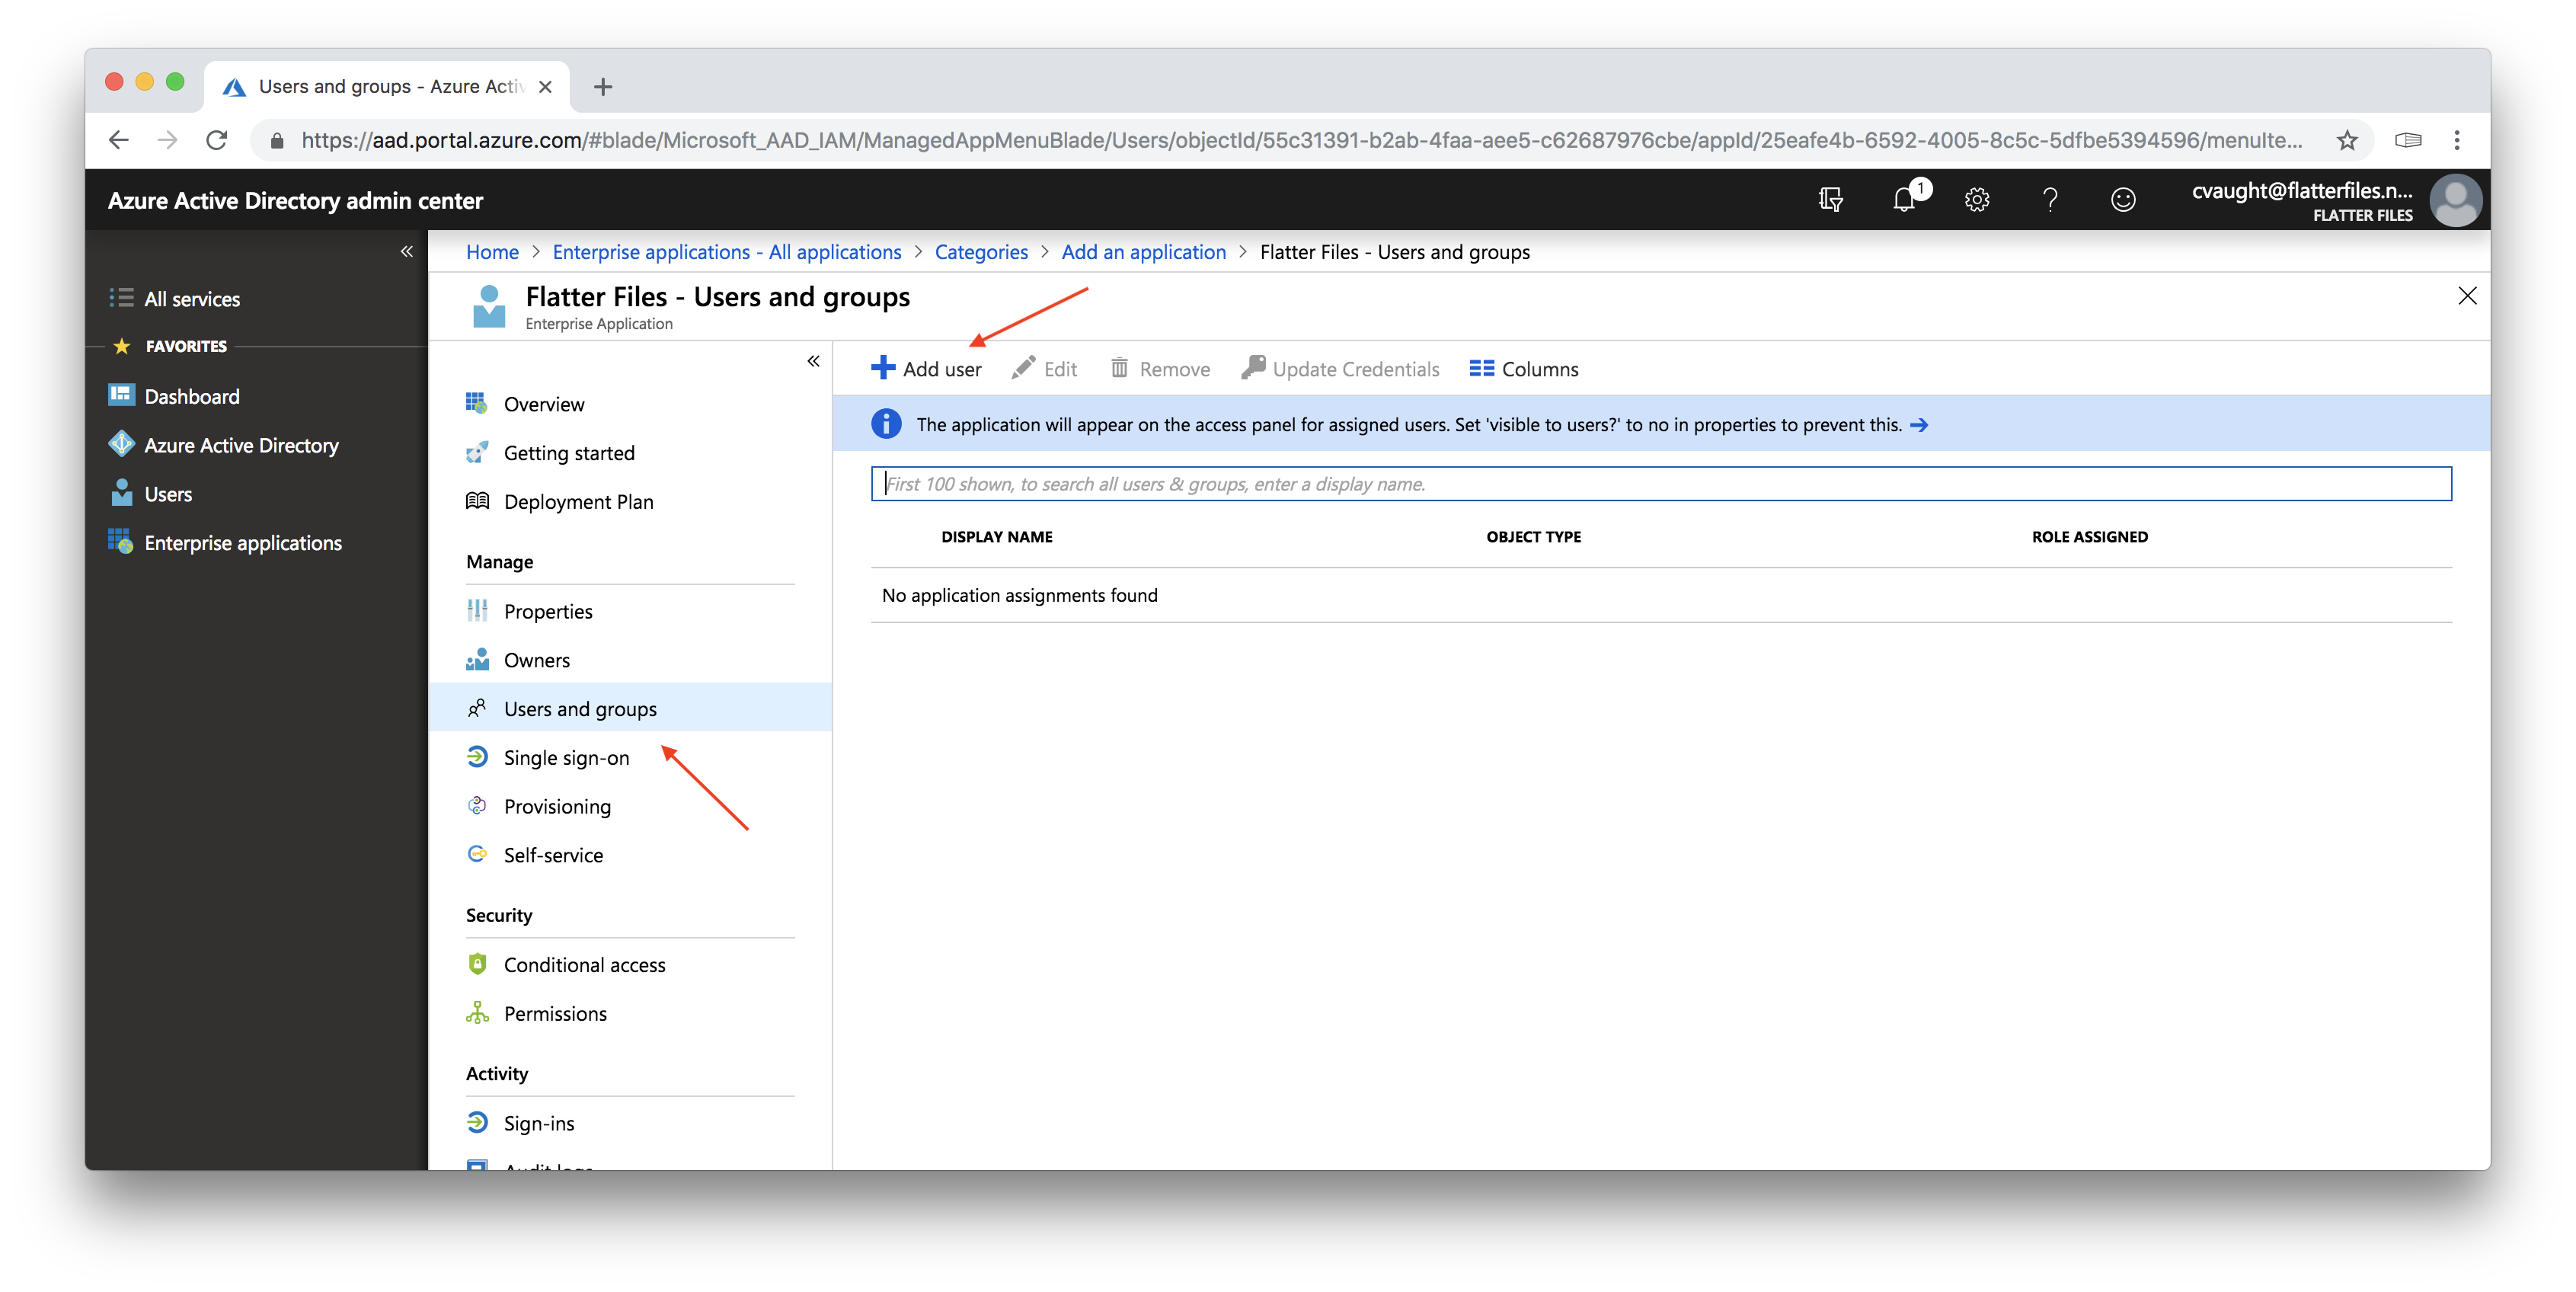
- Return to Azure Portal where you left off in Step 4. Click the option “Users and groups” as shown in the image below.
- Click the “Add User” plus button.
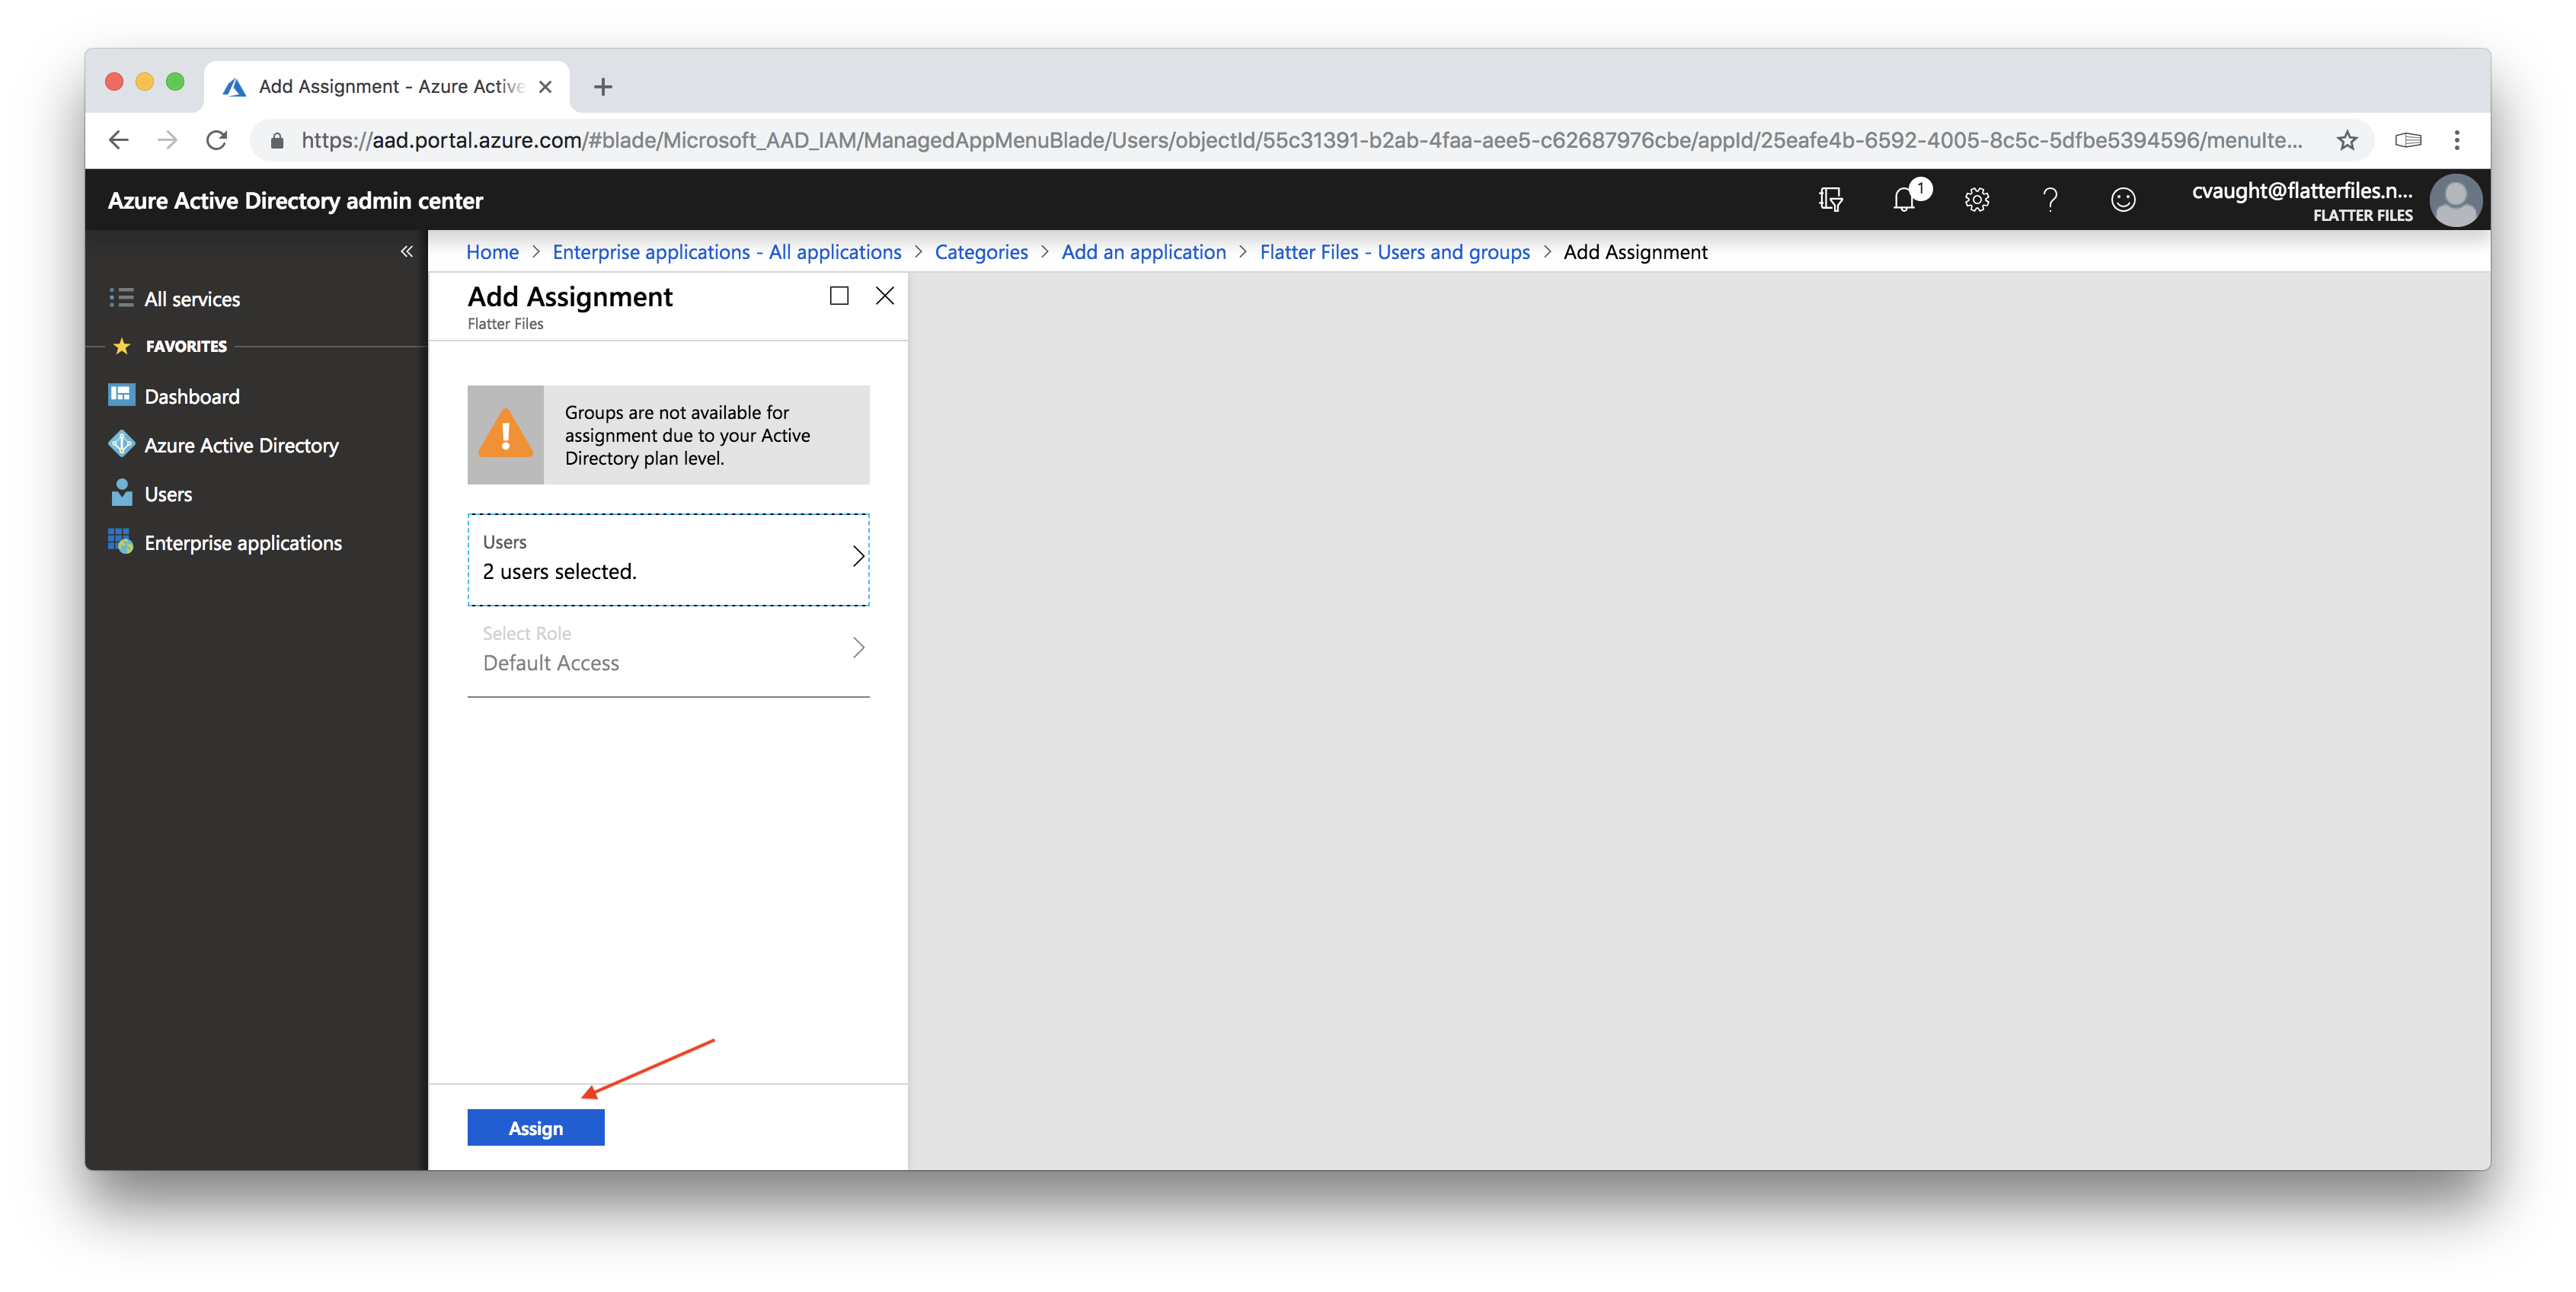
- The image below should now be displayed.
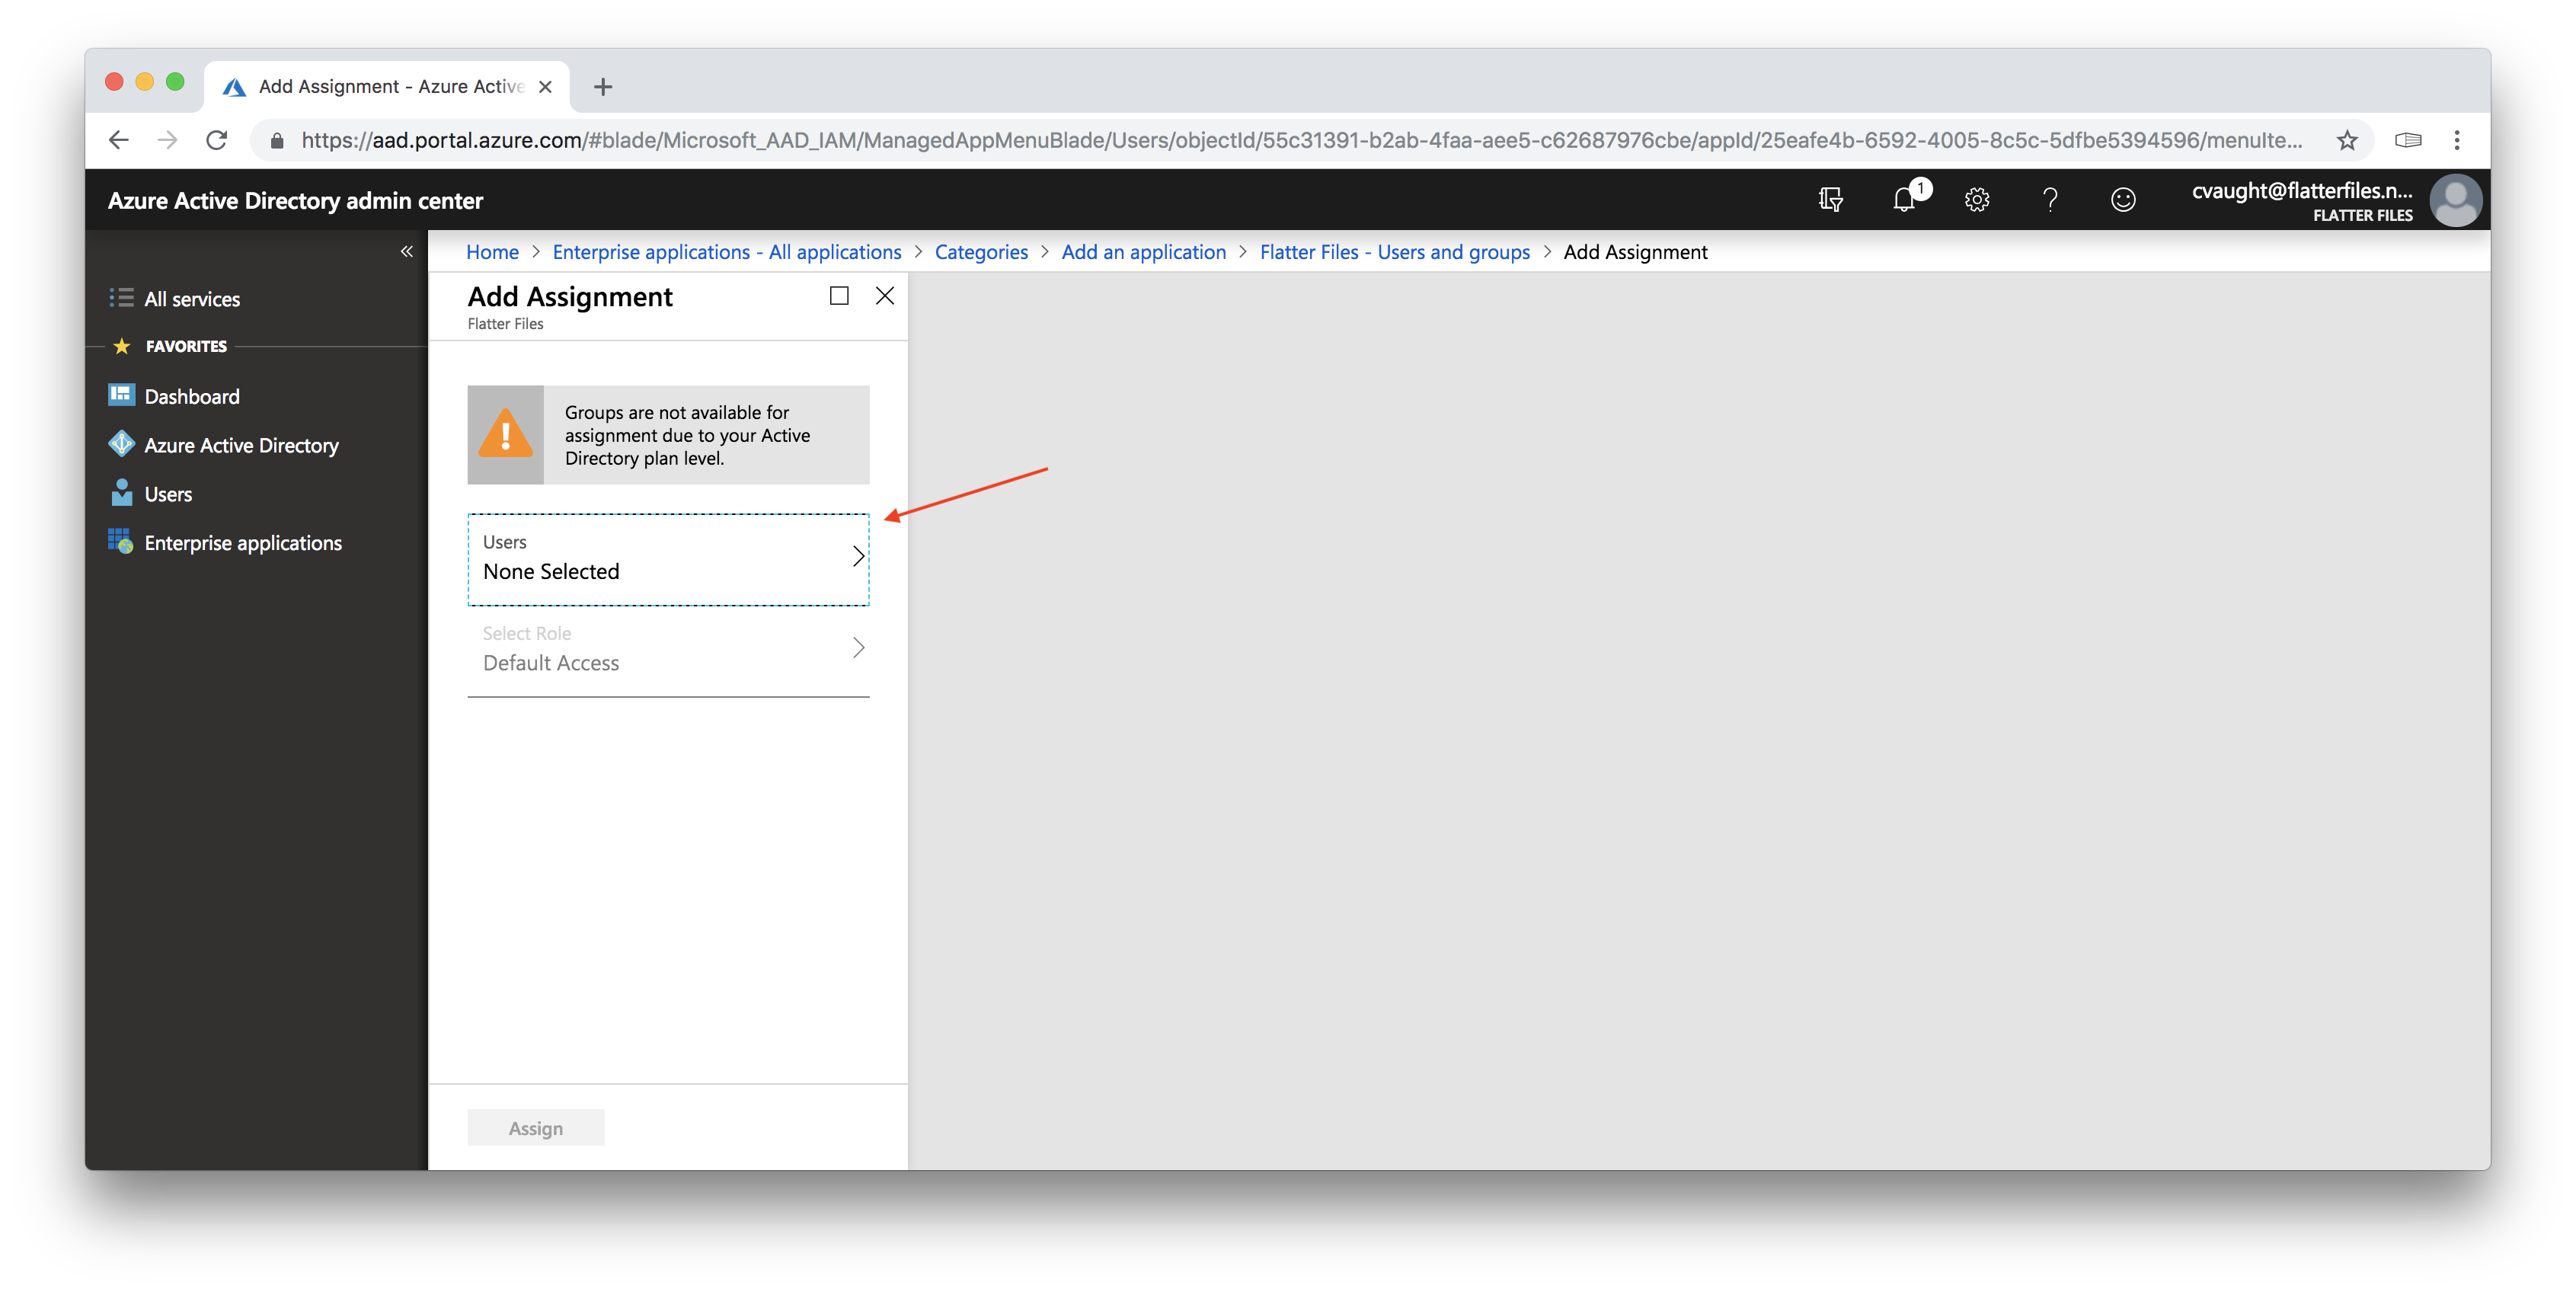
- Depending on your Azure account you may or may not be able to assign groups. The account shown only allows assignment of users.
- Click the “Users” option as shown below.
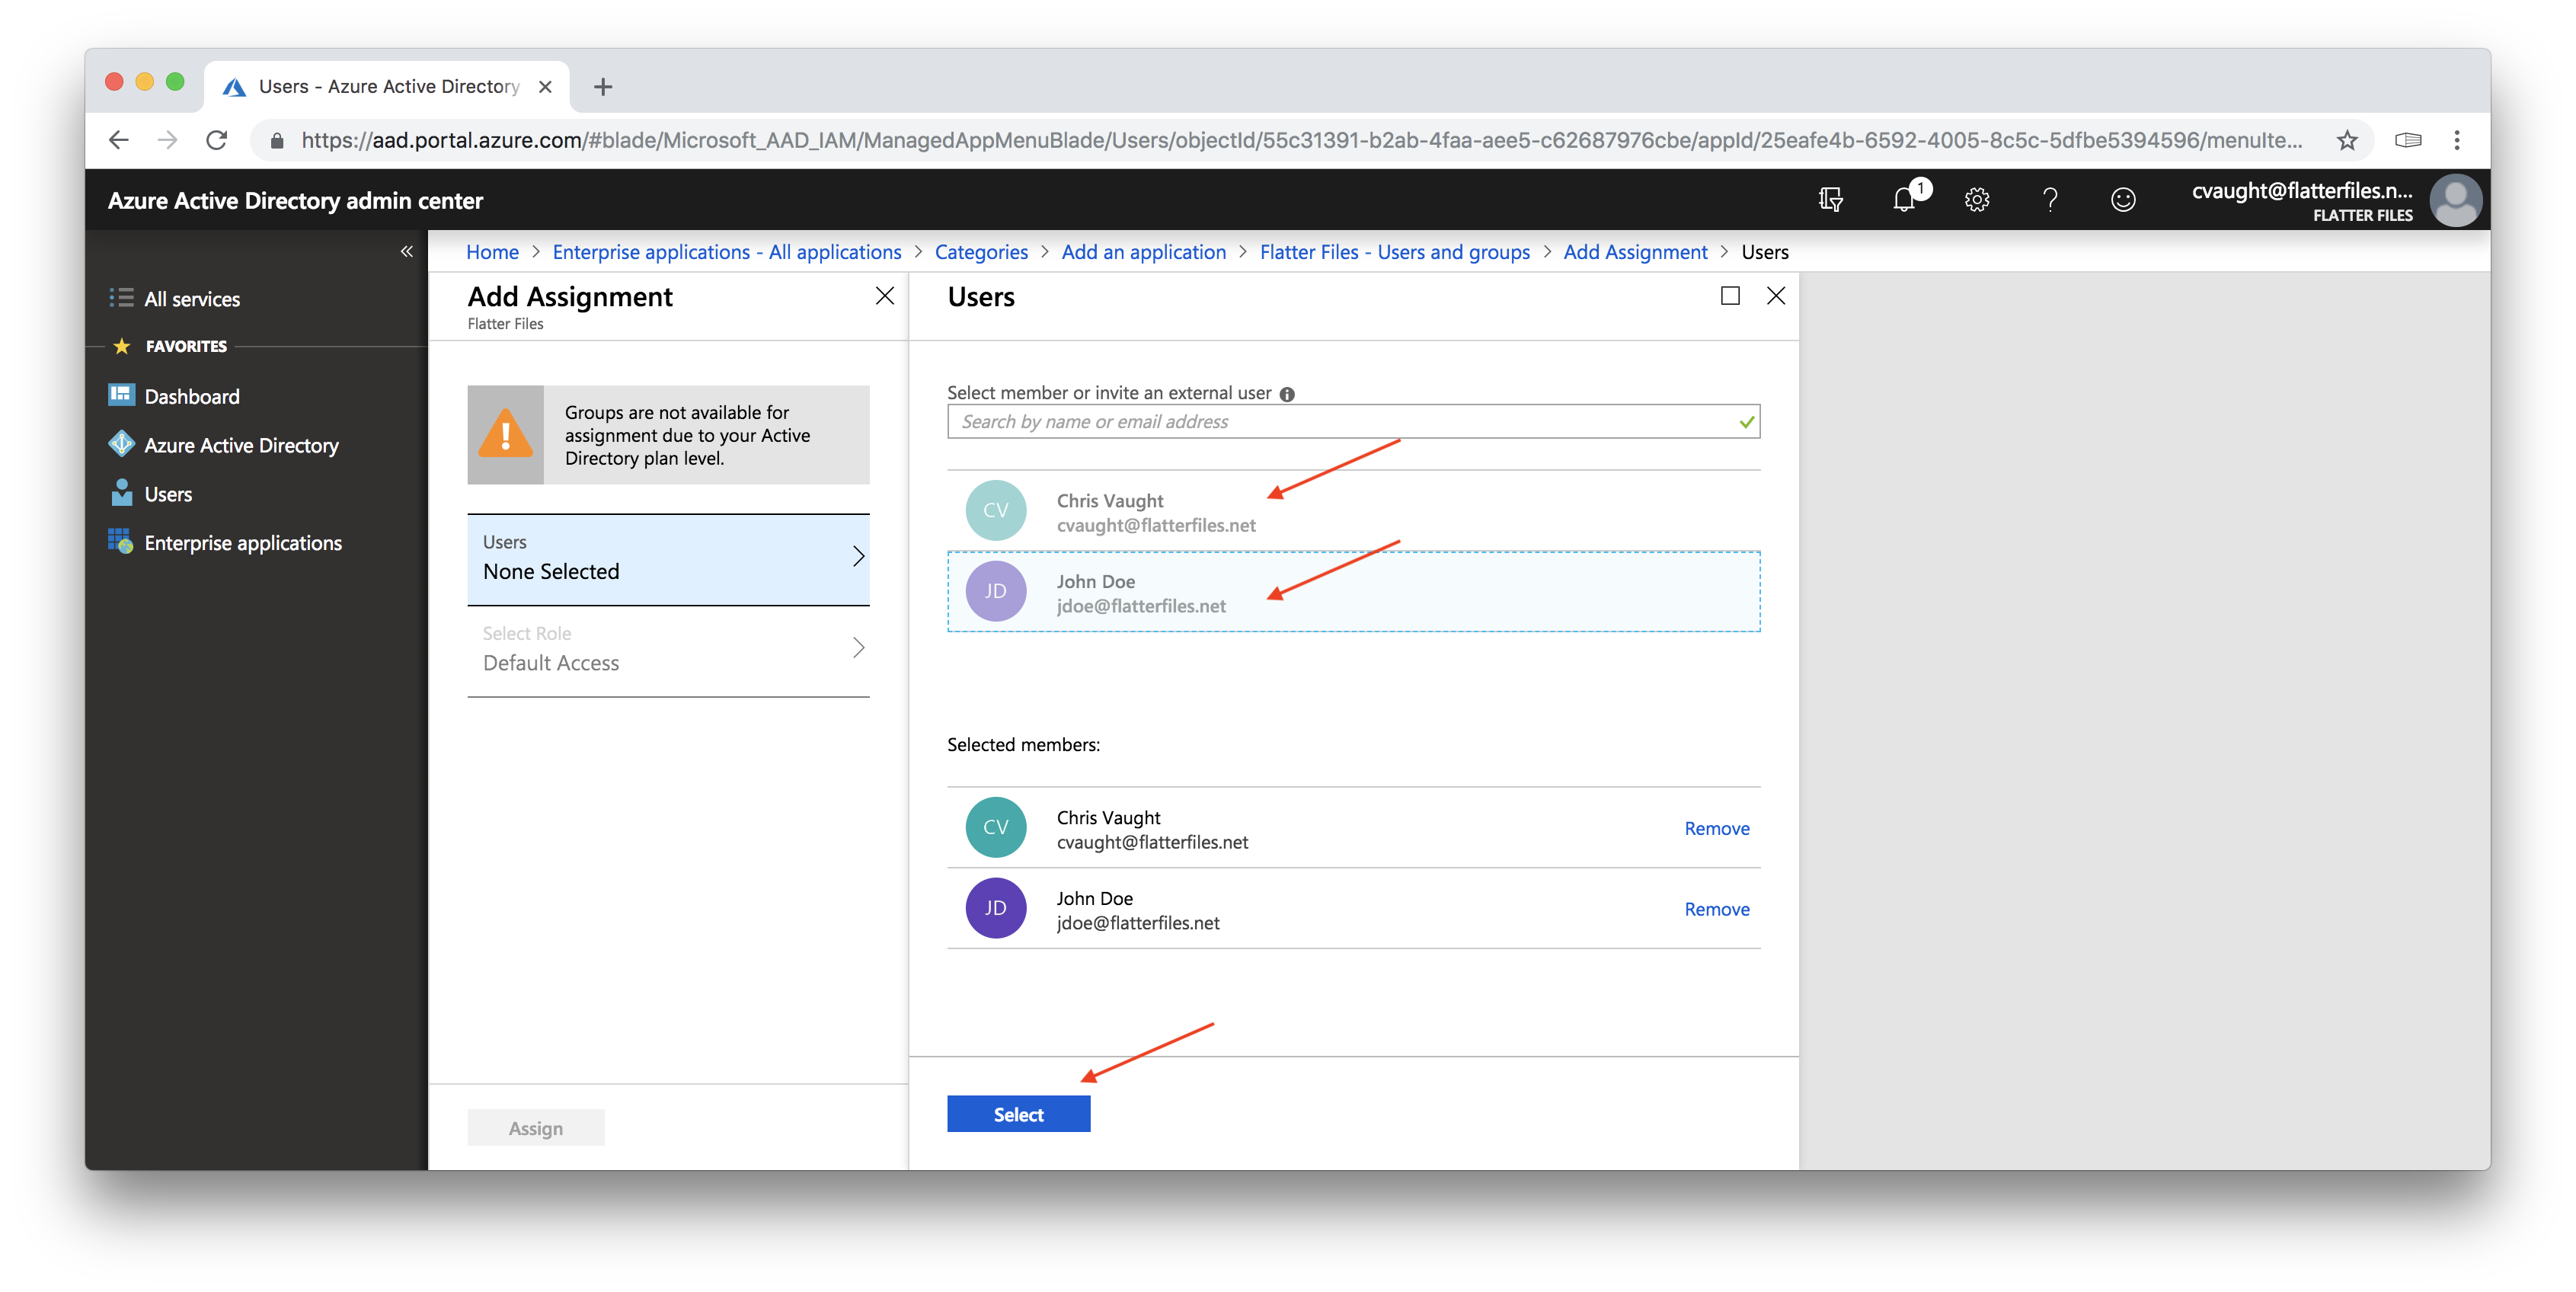
- Simply click each user you could like to assign.
- The image below shows the view after both users were clicked. If you have lots of users you can use the search box to filter for specific users or user groups.
- Once all of the users have been clicked, click the blue “Select” button.
- Click the blue “Assign” button as shown in the image below.
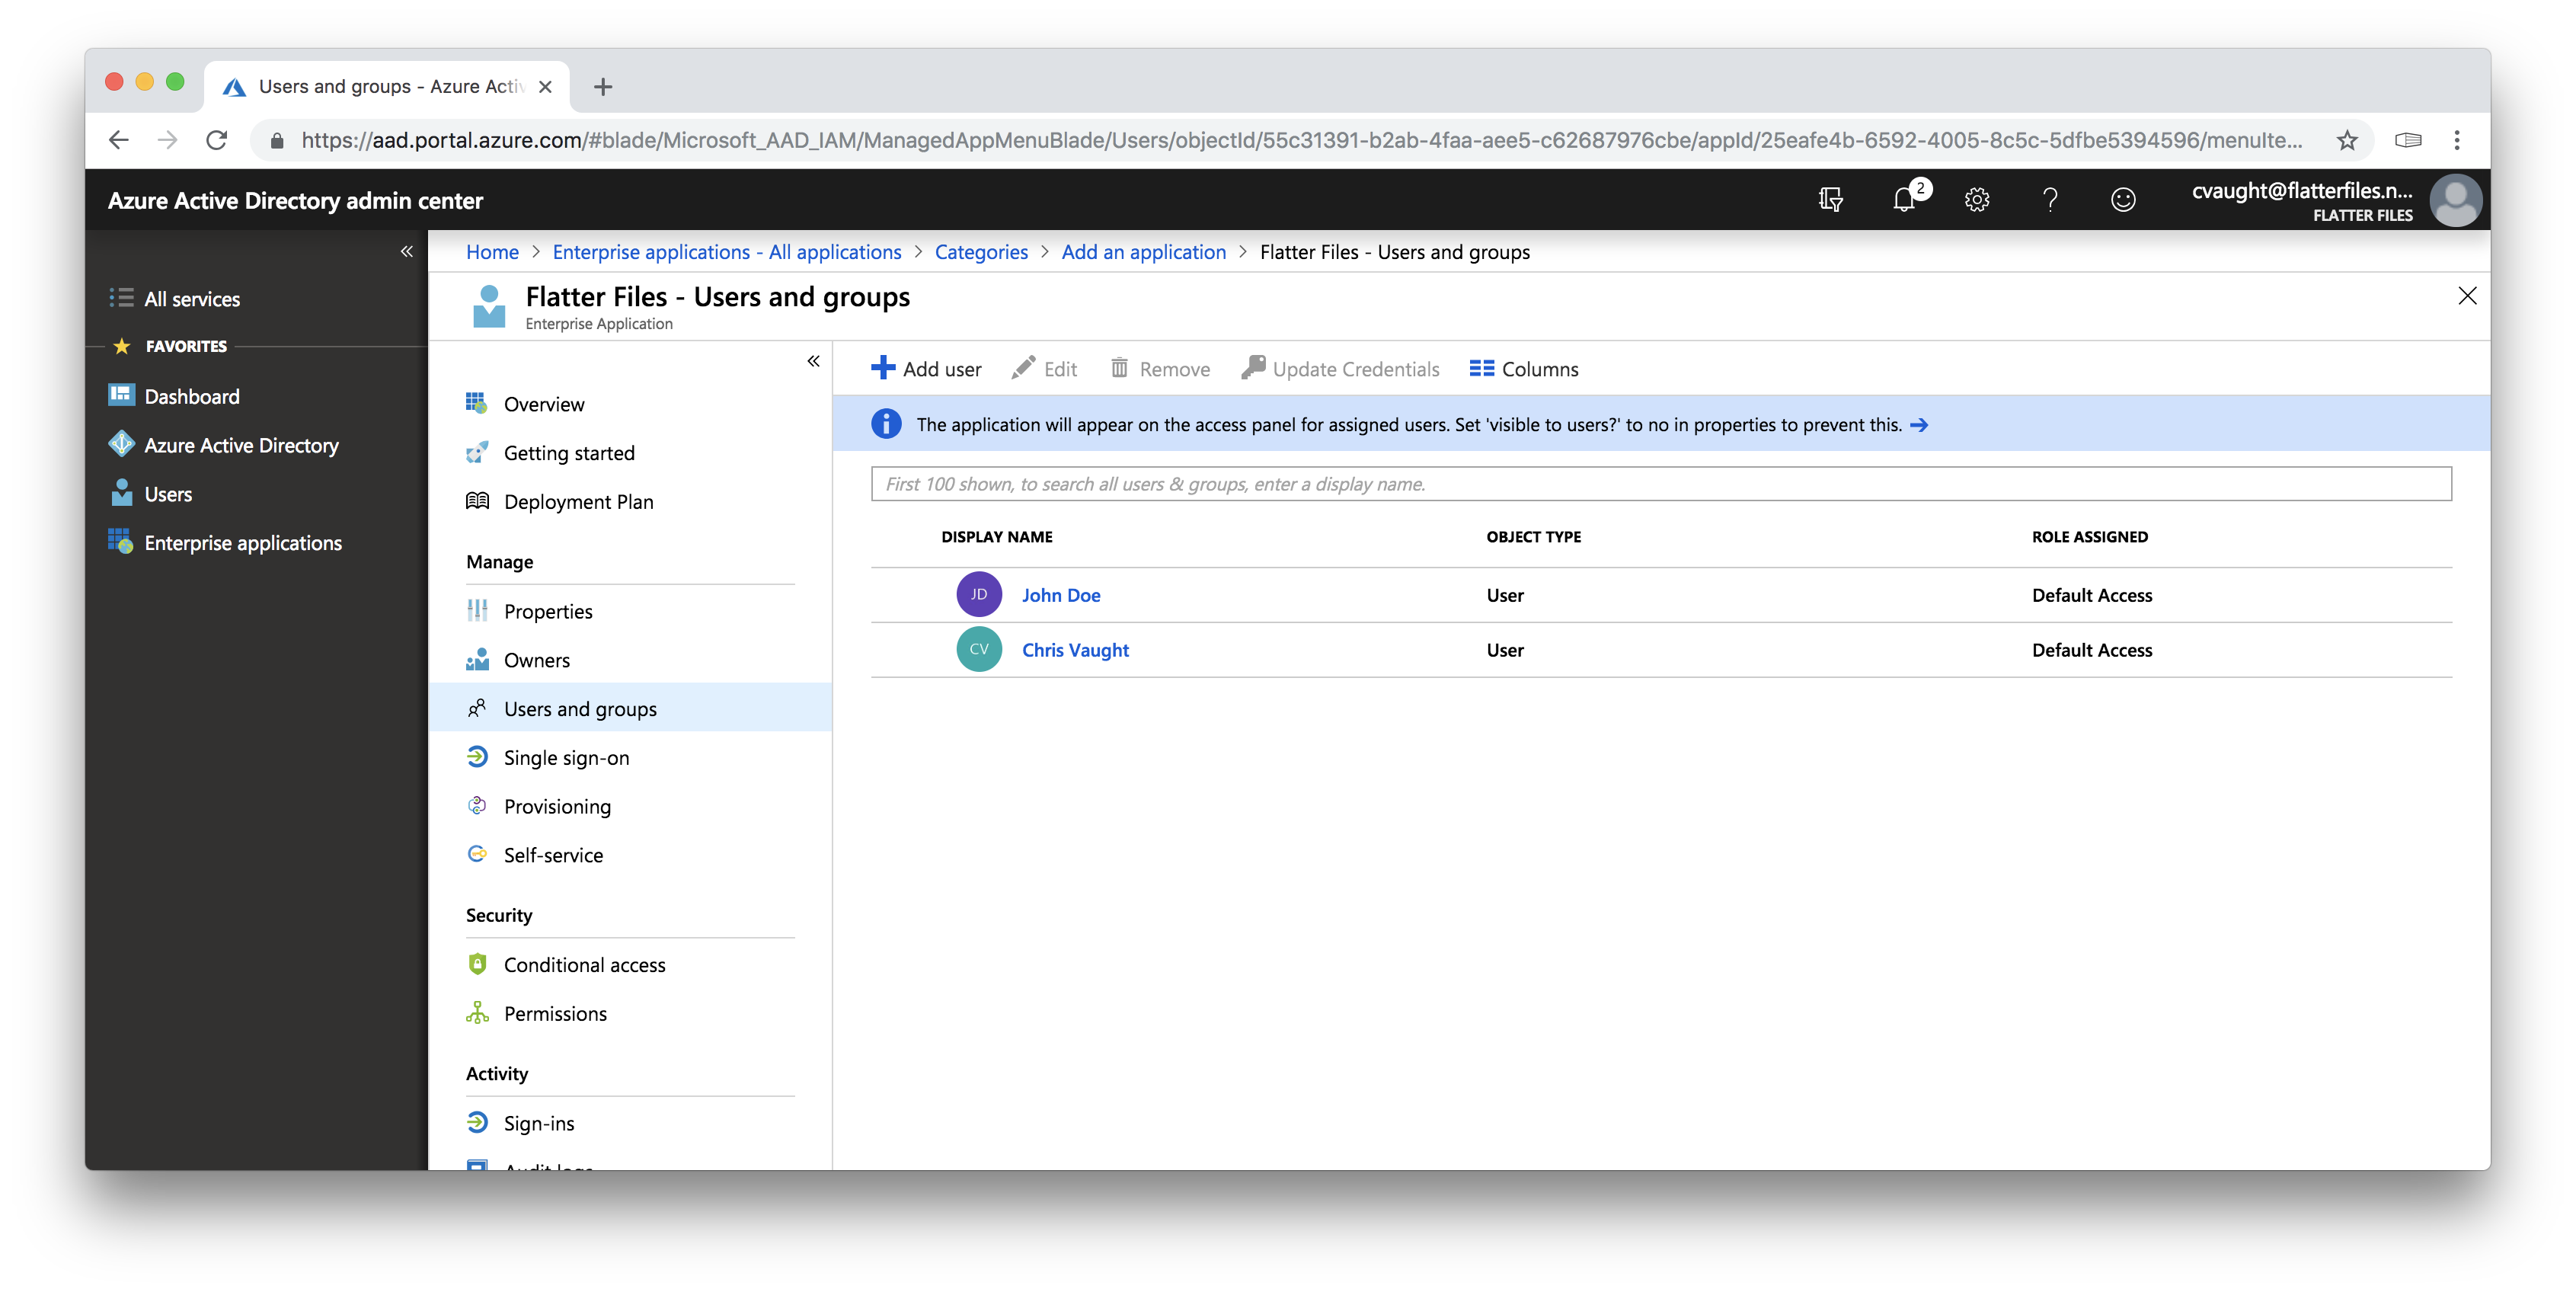
- The users that have been assigned to the application will be listed as shown in the image below.
- The users assigned should now be able to access Flatter Files using Single Sign On using their Office 365 credentials.
- If your account allows user group assignment then instead of selecting users in the steps above you would be much better off to select user groups such that if new users are added to the group the user will automatically be assigned.
- In addition, you can remove the requirement to assign users and simply make everyone in your directory have access to Flatter Files as shown in Step 7.
7. Remove User Assignment Requirement
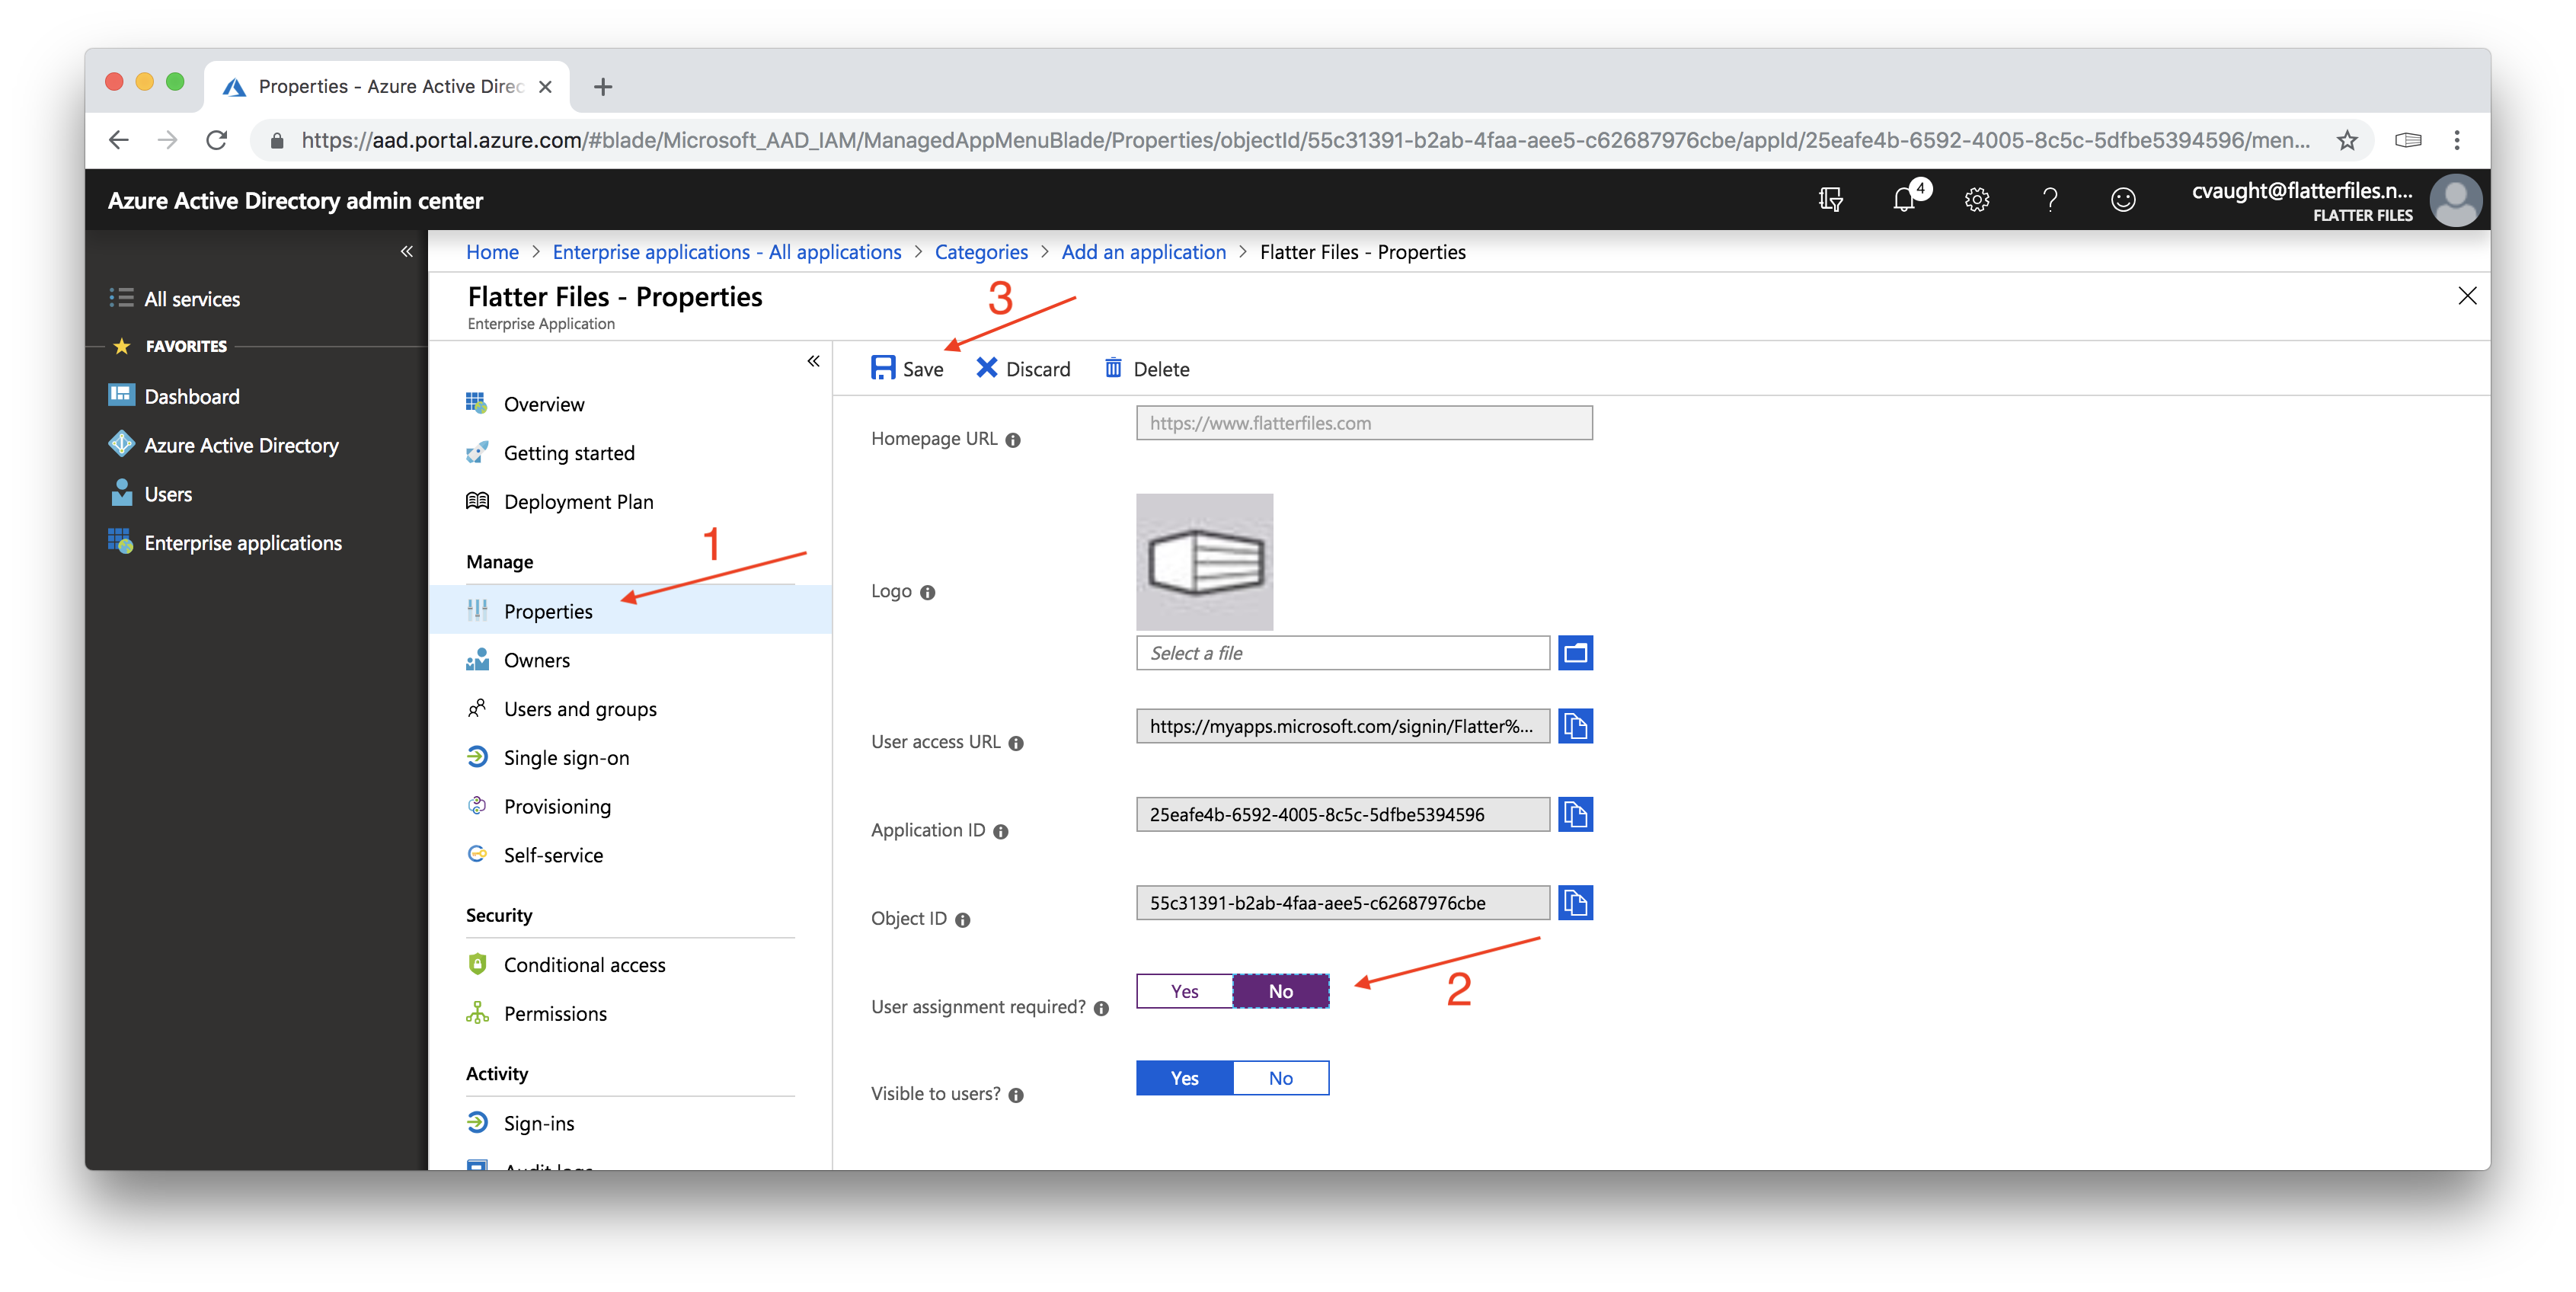
Instead of having to individually assign users from your directory to Flatter Files, you can simply make your entire directory have access to Flatter Files. You do this by simply following the three steps outlined in the image below.
- Click “Properties” as shown below (1)
- Toggle the option “User assignment required” to “No” (2)
- Click “Save” (3)
- User no longer have to be assigned. Instead anytime a user is added to your Office 365 directory they will automatically be able to access Flatter Files.
8. Login to Flatter Files from flatterfiles.com
There are two ways to login to Flatter Files once SSO is enabled, from the Flatter Files website and directly from your Office 365 home page. The steps below show how to login to Flatter Files from the website. To login directly from the Office.com portal please see Step 9 for details.
- To login from the Flatter Files website, simply navigate to flatterfiles.com and then click Login at the top right.
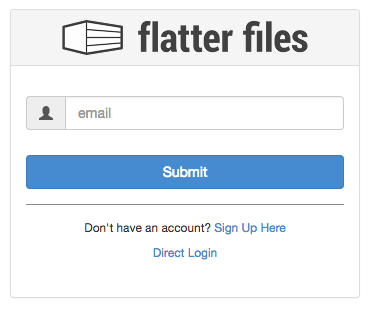
- Assuming you are not already logged into Flatter Files a login prompt should be displayed. Click the blue button “Login w/SSO” which will display the page below.
- Enter your email address and then click Submit.
- This will send a request to Office 365 to verify your identity. If necessary, Office 365 will prompt you to login. Once completed you will be redirected to the Flatter Files web application.
- Flatter Files mobile applications and Uploader also support this SSO login via Office 365 and works very similarly.
It is possible to simplify this SSO login process by creating a company specific link to Flatter Files. Details on how to do this can be found by following this link. The linked tutorial will describe how to create a link that will bypass the process described above and instead will simply redirect you to Office 365 for login.
9. Login to Flatter Files from Office.com
The steps below will first show you how to add a shortcut to Flatter Files to your Office.com products. Once the shortcut is added, you will just click the resulting Flatter Files shortcut to automatically login to Flatter Files without any additional login prompt. This option is only available to users that have been assigned to Flatter Files as shown in Step 6. If you didn’t assign any users and instead simply used Step 7 above to disable user assignment then adding a shortcut to the Office.com products won’t be available for your users.
- To login to Flatter Files from the Office 365 portal, navigate to office.com and sign in if necessary.
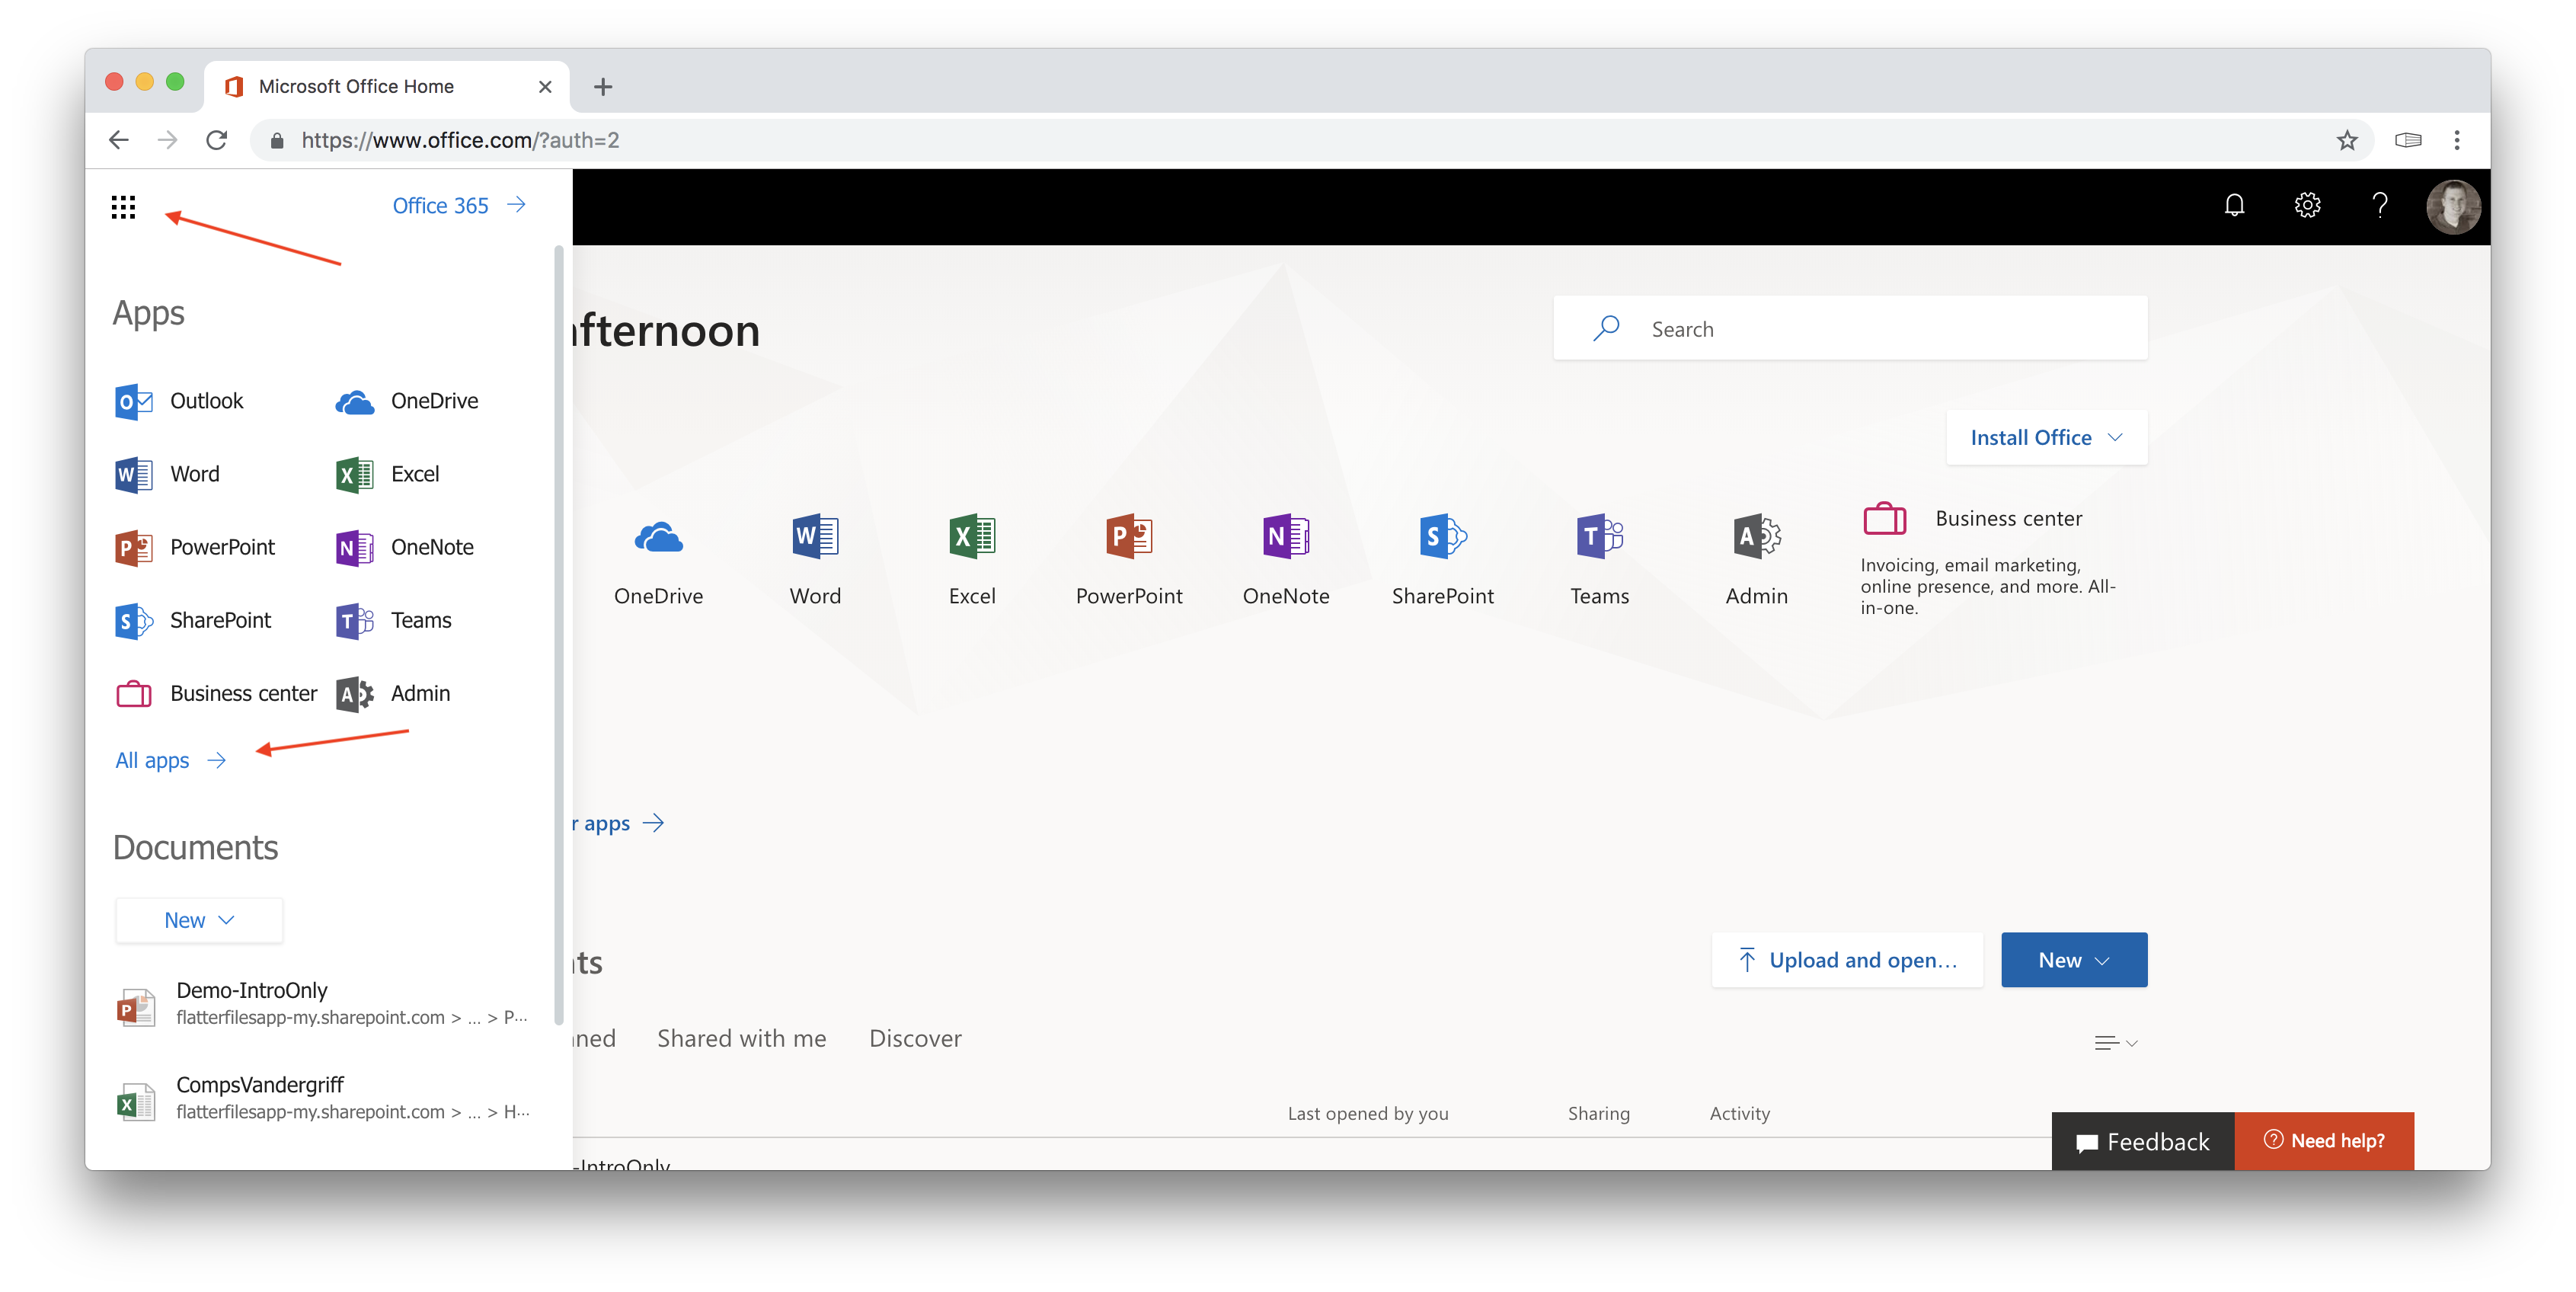
- Click the application menu button at the top left of the page to display your Office 365 applications.
- Click the “All Apps” option.
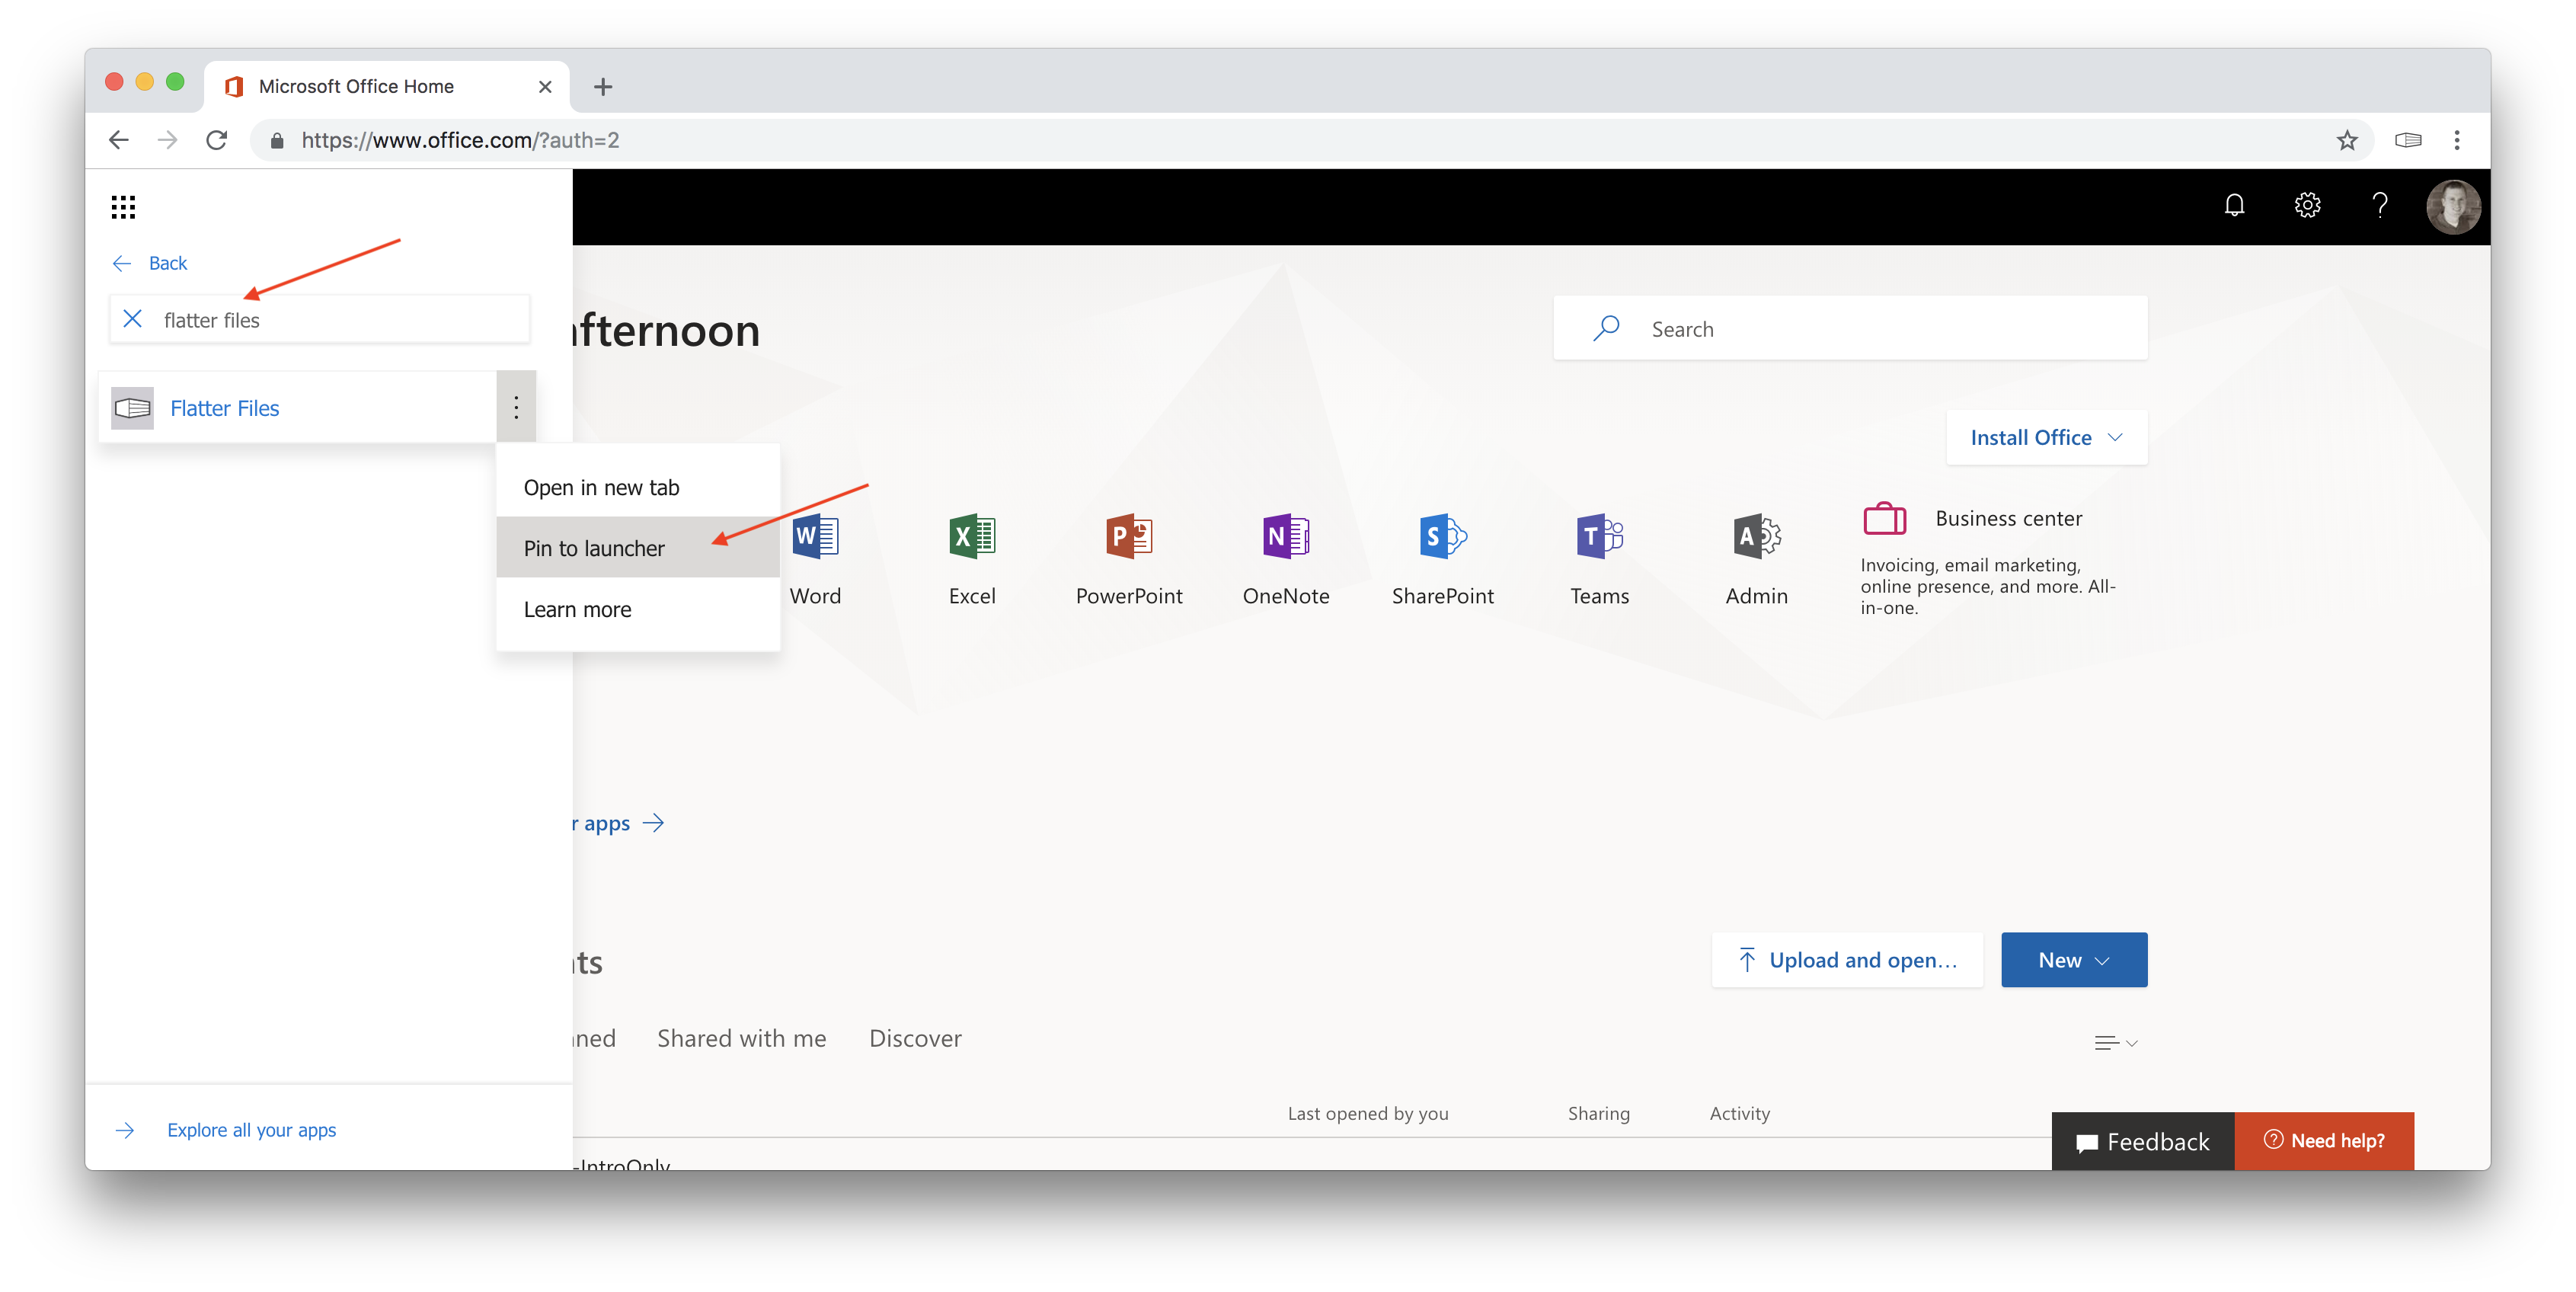
- In the search box that is now displayed start typing “Flatter Files.”
- Once the Flatter Files entry is displayed hover over the entry and click the 3 dots on the right hand side of the entry.
- This will display the menu shown below.
- Click the option “Pin to launcher.”
- Click the back button in the menu and you should now see Flatter Files listed in the primary menu.
- To access Flatter Files, simply click the Flatter Files icon and you will be automatically logged into Flatter Files and the web application will be loaded.
10. Complete
This tutorial is now complete. Your account should now be integrated with your Office 365 account such that users will login to Flatter Files using their Office 365 credentials.
If you have any questions or need additional help please email [email protected].