Customizing External Shared Links
Flatter Files can be used to shared content with external viewers such as vendors and customers. External sharing is facilitated by a user creating a link to a list of items that is then sent to an external email address or email addresses. As a company administrator there are many settings that can customize how the sharing works including the look, content, and settings of the emails sent for the external sharing.
Prerequisite:
- Access to your Flatter Files account as an Administrator.
1. Navigate to Shared Link Settings in Flatter Files
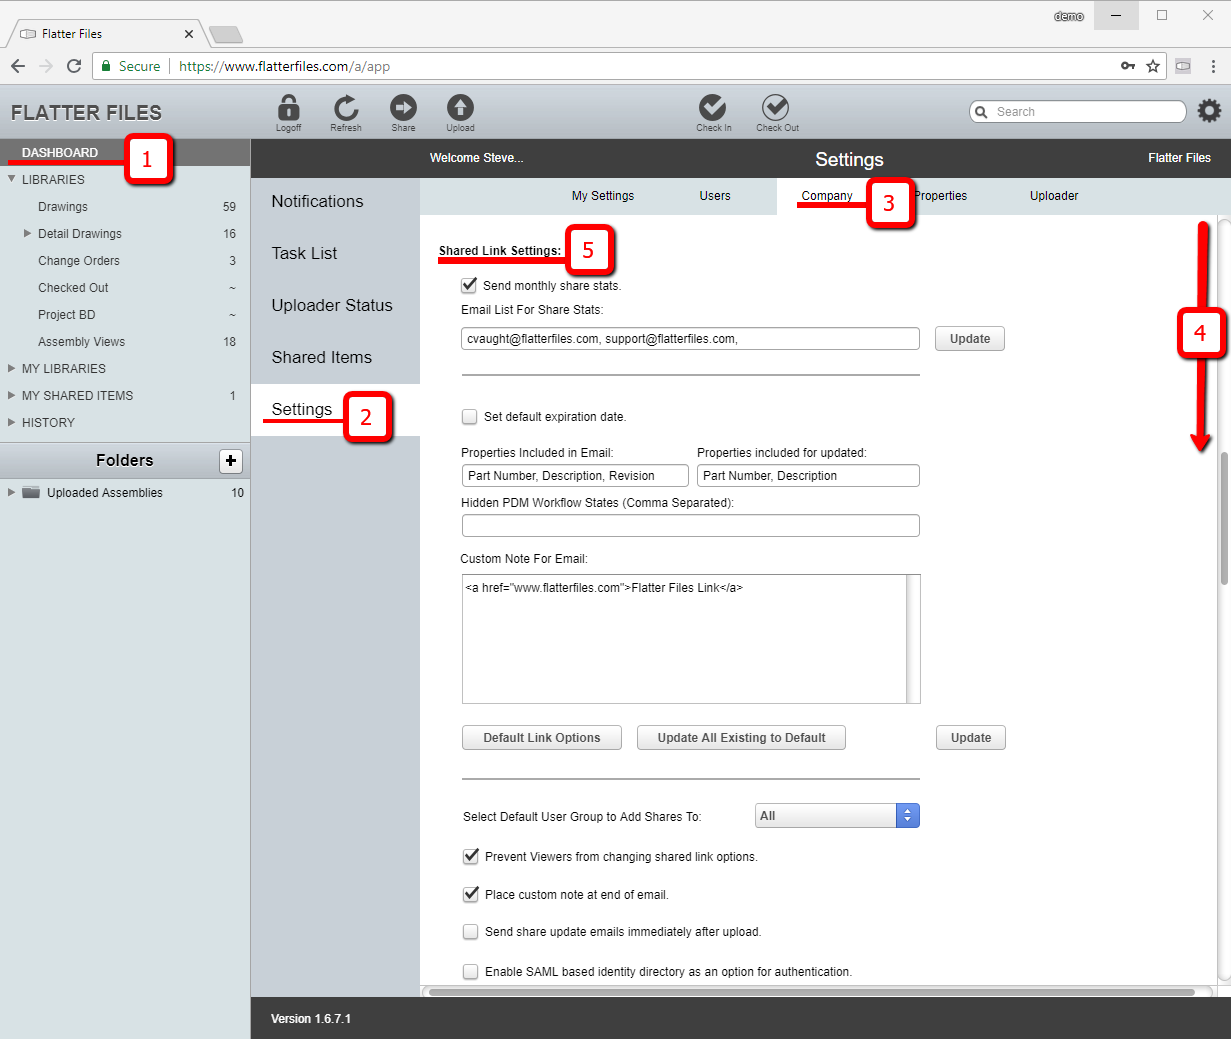
The Shared Link Settings are located in the general Company settings. The steps below will outline how to navigate directly to this section of settings.
- Login to your Flatter Files account using an account that is an administrator.
- Click Dashboard at the top left (1).
- Click on Settings (2).
- Click on Company (3).
- Scroll down (4) to “Shared Link Settings” (5)
2. Monthly Share Stats Reports
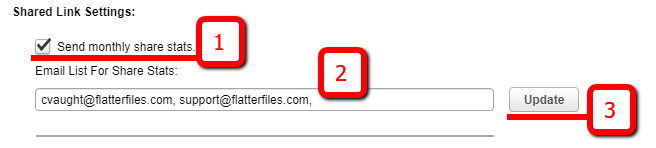
If desired you can have Flatter files email a list of email accounts the stats (who did what & when) of each share link.
- Enable Send monthly share stats (1).
- Type in the emails addresses of the people who want to receive the stats (2).
- Click the Update button to save the list of email addresses (3).
3. Set Default Expiration Date for New Shares
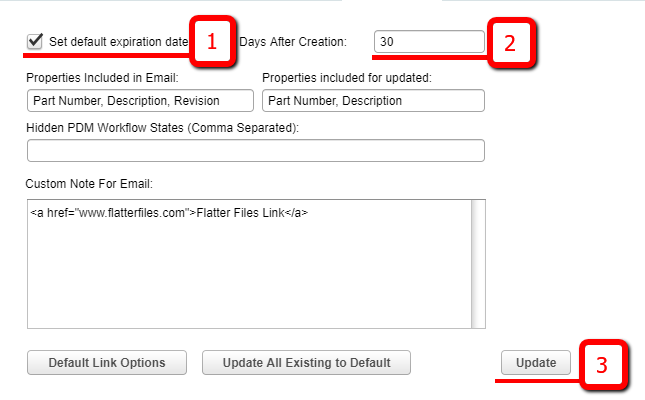
Flatter Files can set any newly created shares to automatically expire after X number of days. This saves users from having to calculate the expiration date when creating temporary shares. If a vendor needs continuous access to an item, then perpetual shares can still be created by just simply un-checking the expiration box when creating the new share.
- Enable “Set default expiration date” (1).
- Type in the number of days after the new share should expire (2).
- Click Update button to save the changes (3).
4. Customize Default Email Contents
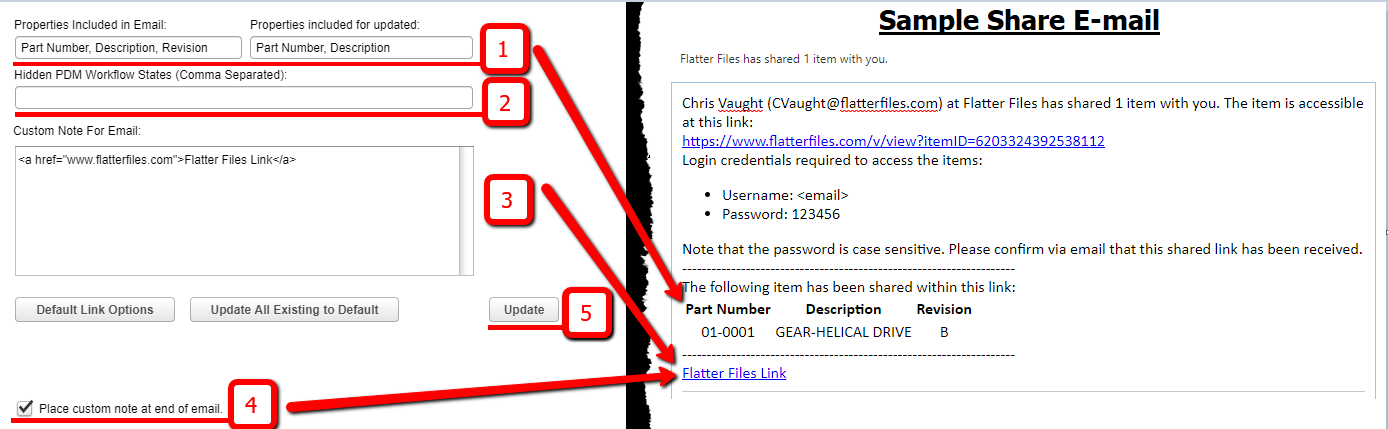
When a share is created, an email will be sent to the recipient. The user creating the share will have the option to customize the email but as an Administrator there is also an ability to customize what is included in the email. This can include default disclaimer text, instructional text, and/or a list of items being included in the share.
- Type in the property names, comma separated, that you have setup and wish to be listed in the initial share email or update email (1).
- Note: The order the properties are listed determines the order they show up in the new email or update email.
- Hidden PDM workflow States: Typing your PDM workflow states in this field, comma seperated, will exclude any revised items from the share emails or update emails (2).
- Custom Note for Email: Type any custom text here you wish for every share email to contain (3).
- Note: Users can further customize this custom note text, and the body of the share email, at the time the share is created when the “edit email” dialog displayed.
- Enable “Place Custom note at end of email” to make the custom text display at the bottom of the email. Uncheck to make custom text at the begining of the email (4).
- Click Update button to save changes (5).
Note:
When Office 365 Email integration is enabled, the share emails will be sent from your company email domain. This results in the sent emails showing up in your sent items folder in Outlook. Click here to learn more about Office 365 integration.
5. Set Default Share Options
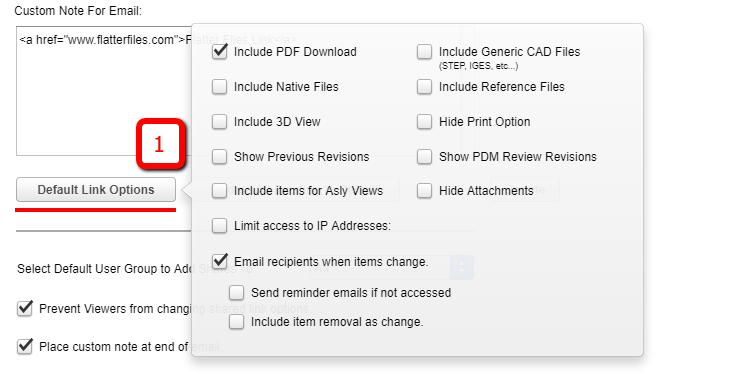
Flatter Files allows you to control what the share recipient can do with the items contained within the share. For example, you can disable printing, disable 3D downloads, or even prevent the download of the PDF. The Default Share Options allows you to set what the default options are for newly created shares. This will save the users creating the shares time from having to specify these options on every share created.
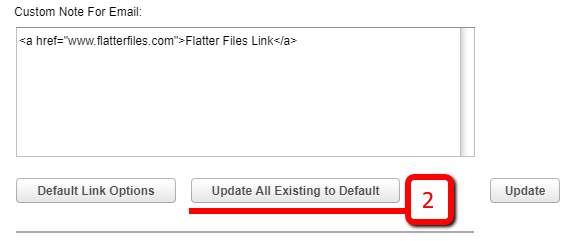
- Click “Default Link Options” button, and check mark any settings you wish to be default on new shares (1).
- Optional: Click “Update All Existing to Default” button, if you wish to update your existing shares to any newly created defaults (2).
6. Default User Groups that can Edit Shares
When a user creates an external share, the shared link is listed under their “My Shared Items.” Often times other colleagues might need to manage the share created by a specific user. To do this you add the share to a user group. If a user is in a user group that the share has been added to then the share will also show up in their “My Shared Items” even though they didn’t create the link themselves. This allows these additional users to also manage the link.
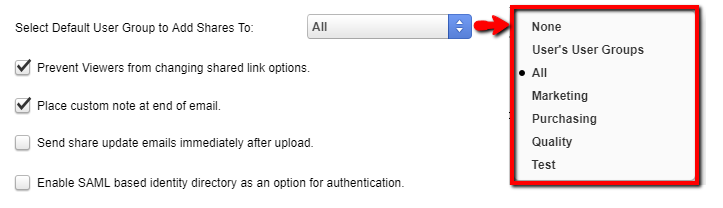
This process can be completed manually by right clicking a share and adding it to the user group. But it can also be done automatically be specifying the user group it should be added to for each new share. The options for automatically adding it to a user group is shown below:
- “None” - Any share created is only managed by the creator.
- “ALL” - Any share created will allow all colleagues with the ability to share items externally to see and edit each others shares.
- “User’s Users Group” - allows colleagues within the same user group to see and edit the creators shares.
- This is ideal if you have your user groups set up per your company’s department and each department manages their own shares. For example the purchasing department can manage each other shares but cannot manage the shares created by the sales department.
- “Specific User Group Name” - specifies a single user group to see any share created by anyone. Users who are not in this user group can only see and manage the shares they create.
7. Additional Share Settings
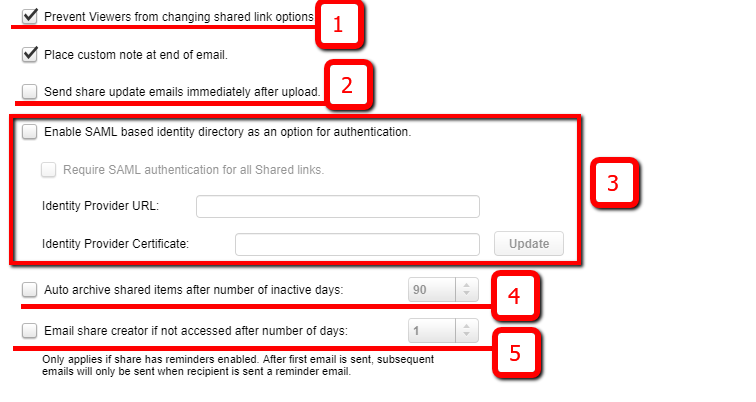
- “Prevent Viewers from changing shared link options” - Any viewer account cannot manage or change shares, even if they are in the user group specified in the previous step (1).
- “Send share update emails immediately after upload” - Enable if you wish for shares to get sent immediately once a file has been changed. Disable if you wish for all emails for the entire day to go out at the same time (2).
- The time that the update emails are sent out is specified under the “Email Settings” category of Company Settings.
- “Enable SAML based identity directory as an option for Authentication” - allows share recipients to create their own login & password that can be authenticated through any SAML compliant identity directory.
- For additional details and to obtain the sign-in and audience URL, please contact us at [email protected].
- “Auto archive shared items after number of inactive days” - will automatically move shares that have not been updated after X number of days to the Inactive folder under your “My shared items” folder (4).
- “Email Share Creator if not accessed after number of days” - when the share is set to send reminders to the recipient and the recipient continues to not login to the share the share creator will be emailed after X number of days. This email lets the share creator know that they likely should contact the recipient to find out if why they haven’t accessed the shared link.
8. Complete
This tutorial is now complete. Your shares should now be configured & customized to your company needs. For need additional help please email [email protected].